Sunday, October 31, 2010

Batty Batty Batty Bat!

Halloween Time again! Happy Halloween all!

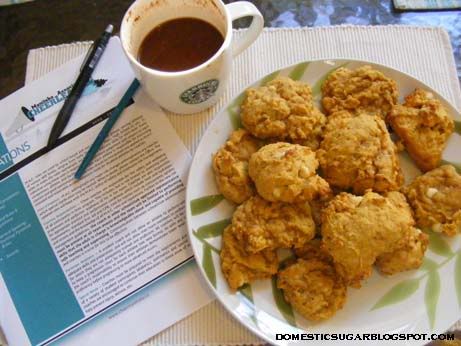
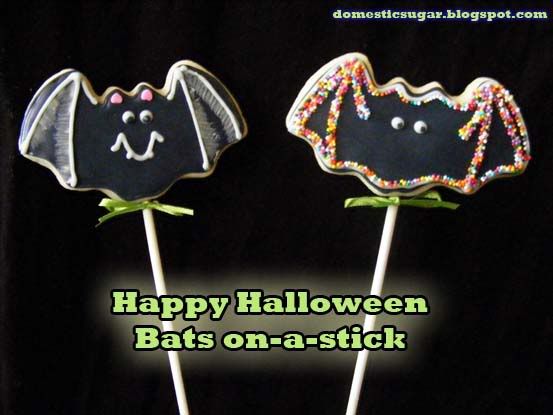
As a kid, I remember going to my neighbor's house to get a special treat on Halloween night. Henry would pack us a few goodies, a spooky plastic ring, and a small token he made. We (my siblings and I) would look forward to our little treat, tearing open the bag as soon as we got home. I think I pass that tradition on even now, as I make small treats for my neighbors' children. This year, I made special cookies: Bats on-a-stick.


Now, I remember a time when Home-made gifts and treats given at Halloween was a-okay! I used to get candy apples and cookies from the people on my block... then came the apple with the razor blade... then the stories of poisonings, and soon enough, treats were packaged, and rules about not eating anything open were standard fare. Sad though - cookies were better than a bag of chips or a candy bar (or even a BB Bat! - do they even make those anymore?).

With a simple bat cutter, I decided to play with some designs, looking for the cookie decoration that I liked best. Here's what I came up with:


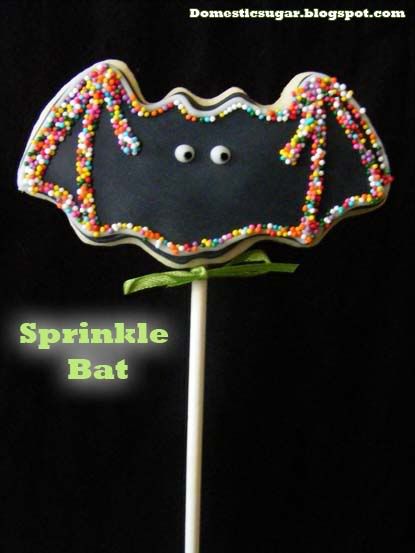
This one is my favorite of all - Sprinkle, the Bat!


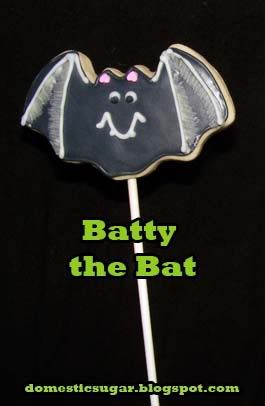
Batty, the bat has a big smile for all!


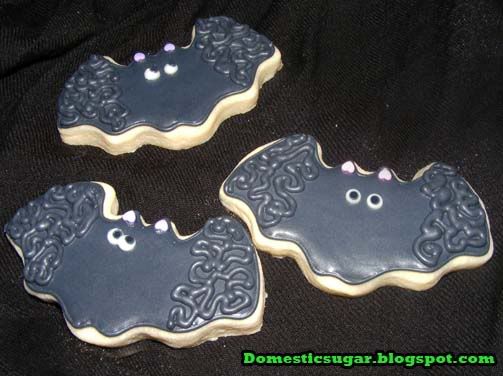
While my hubbie is happy to have cookies, he didn't feel the need to have sticks - these Swirly bats are for his consumption - He really liked their wings. This design was his favorite!

Now, the How-To part... People have a lot of questions about making cookies on a stick, and it's fairly easy, all you need is dough, cutters, and some sticks (I get Wilton long sucker sticks).

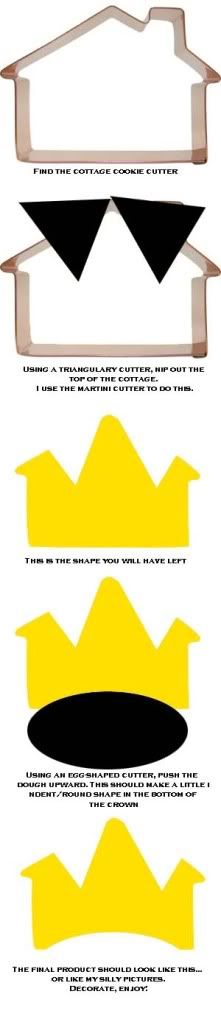
Steps to make Cookies on-a-Stick

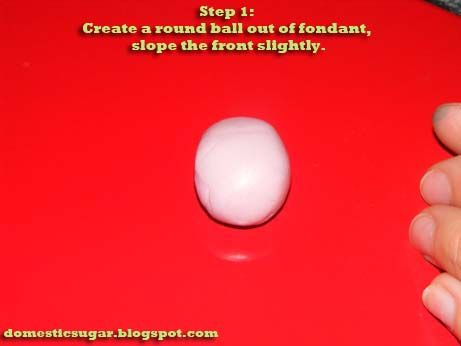
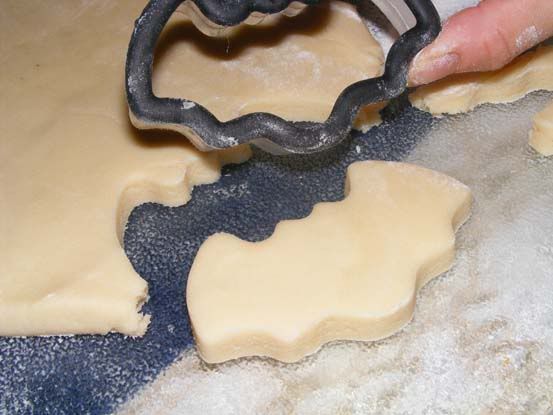
Step 1 is to roll out he dough thick, then to cut out a shape. I cut each piece about 1 inch thick. You will need enough room to bury the stick in the center.

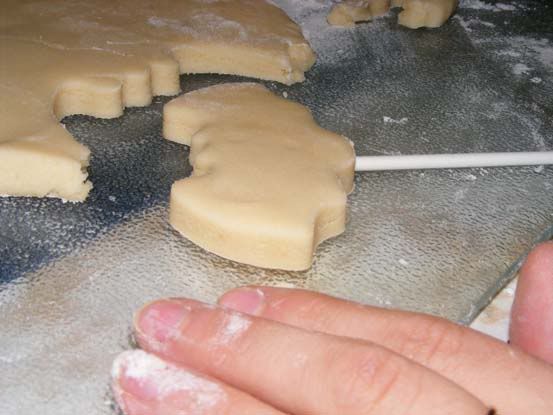
Step 2: Taking the stick between your fingers, poke the stick into the middle of the dough and twist/roll the stick between the fingers are you slowly push it in. Make sure you don't go all the way though. I find it helpful to put my hand on top of the cookie as I do this to feel where the stick is and to make sure the cookie does not bulge.

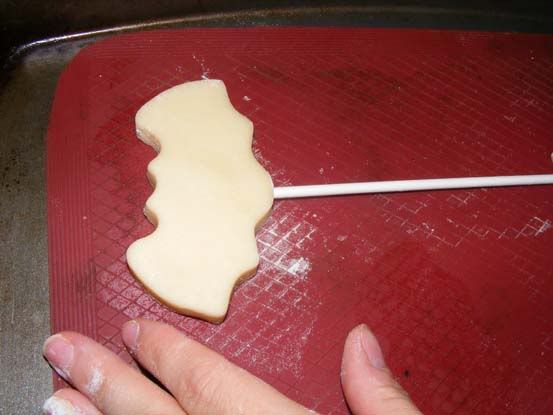
Step 3: Slowly and carefully place the cookie on the baking sheet. Make sure there is enough room for the stick to lay flat. The way it bends is the way it will set. As always, Thicker cookies will take longer to bake, so make sure it is cooked all the way though.

Decorate and enjoy. Icing that dries hard (like Royal Icing), are best because they add extra stability to the cookie thus supporting it.

NOW MY FAVORITE PART!
COSTUMES!

My question to you is what were/are you dressing up as this year?

Me?

Well, I'm stupidly fond of zombies. Maybe it is because I'm actually afraid of them. That's right, Zombie movies freak me out! Hubbie and I like to joke around this time of the year about the houses that would be zombie proof should there actually be a zombie apocalypse. I think we take the zombie thing too far sometimes (or at least my mother-in-law thinks so ♥)

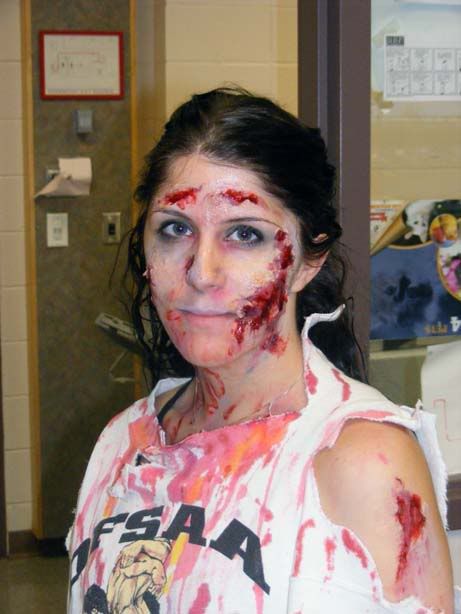
My costume this year: Zombie made out of an $8 dollar kit from K-Mart, some ripped cloths and a lot of shuffle.

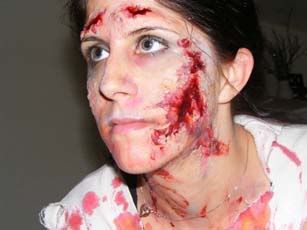
I actually shuffled around the school all day (not walking - it hurt my back but it was worth it). I moaned, grunted, and actually made some of the kids scream (HIGH SCHOOL - not grade school). It was amazing! I totally had a blast. By the end of the day my hair was jammed into the makeup, I had skin bits in my necklace, and my leg was sore from draggingg it behind all day. The makeup took forever to get off, but I got a lot of compliments. Very Spooky!

Hope you all have a scary, happy and safe Halloween!

post signature

Texas Monkey

Friday, October 29, 2010

Marshmallow Fondant Recipe

People are always unsure about fondant. They see it, think it looks nice, but are usually scared away by the difficulties of keeping it smooth, working it, or heck, even making it. Truth is, it's very easy. Fondant can be used for more than covering cakes; I use fondant to make sugar flowers, decorations, and even little people for cake toppers. It's flexible and fun to play with - like Play-dough that is sweet, rather than salty.

(Chocolate cake covered with pink MMF)

I've already posted two little tutorials on how to make Sugar Cherry Blossoms, and Bloody Brains out of fondant, but in neither did I post my favorite fondant recipe, MMF (A.K.A Marshmallow Fondant). Why do I use MMF rather than plane ol' Fondant, and what is the difference? Well, it's all in the taste, and the work!

Regular Fondant is made of sugar, glucose/corn syrup, gelatin and some other stuff. The bottom line, is that it's a little more difficult to work with. It tends to split, crack, and dry out. It's taste is bland, and strange. Most people will peal off the fondant because it's not a very delicious addition, even though it's pretty.

Marshmallow Fondant, on the other hand, tastes like marshmallows (as it's a main ingredient). It is simple to make (melt marshmallows add sugar), and rolls out nice without drying out. Some common complaints with it are that it can have pits (not as smooth all the time), and can be very sticky to work with. I find that it's yummier though and well worth the trade.

(Blue MMF rolled over a cake decorated with Sugar Flowers)


(MMF Brains on Red Velvet cupcakes)

So, the Recipe?

Marshmallow Fondant:

  • 4 c (9 oz pkg) miniature marshmallows
  • 4 c (1 lb) powdered sugar + plus extra for dusting
  • 2 tbsp water
  • Food coloring or flavored extracts, optional
  • 1-2 tbsp shortening (for hands)

Directions:

1. Place marshmallows and the water in a large glass (safe) bowl. Microwave for 30 sec, stir marshmallows, microwave for 20 more sec. Do this until the marshmallows are puffy (melted).
2. Stir the marshmallows with a rubber spatula until they are melted and smooth. Make sure there are no lumps at all. At this stage, add colour or flavor (if desired) and stir.
3. Slowly add the powdered sugar and begin to stir with the spatula. Stir until the sugar begins to incorporate and it becomes impossible to stir anymore.
4. Scrape the fondant mixture out onto a sugar-dusted, smooth surface. It will be sticky and lumpy, with lots of sugar that has not been incorporated yet--this is normal. Place some shortening on your hands to keep the fondant from sticking, and begin to knead the fondant mixture like bread dough, working the sugar into the marshmallow with your hands.
5. Knead until smooth and not sticky (you may need to coat your hands every now and again to prevent sticking). You want to make a stiff dough, but not too stiff. Let fondant sit for 1h or use right way. Fondant can be stored in an air-tight bag until ready to use. I coat mine in a little shortening, then wrap it in plastic wrap, THEN stick it in a ziplock baggie. But that's me :)


Make some just to play with, it's well worth it, and a lot of fun. Kids enjoy it too because they can eat their creations! You can also keep the fondant white until made, and colour it later - this is messy - kneed the colour in the center of a fondant ball, then work though with a little shortening on your hands. As always, it's all about preference. MMF seems to work for me. Try it out, and tell me what you think.

Have fun!
post signature

Wednesday, October 27, 2010

Fondant Brain Tutorial

As promised, the Fondant Bloody Brain Tutorial!


For the fake blood, a simple mix of 4 tbsp of Cornsyrup to a drop of red (liquid) foodcolor drizzled down the brain will create the perfect bloody look!


post signature
Join us Saturdays at tatertotsandjello.com for the weekend wrap up party!

Sunday, October 24, 2010

Bloody Brain Cupcakes!

I am super excited about this new cupcake I've made, especially because I'm such a zombie fan! Introducing, the Bloody Brain CUPCAKE! A Marshmallow Fondant Brain on top of a Red-Velvet Cupcake.


This cupcake not only looks spooky, but bleeds deliciousness! Who needs an excuse to make Red Velvet cupcakes anyway? Don't have a recipe, use MINE!


Sooo bloody Cute!


I had designed a tutorial for the brains, but it appears too small here on blogger. I'll have to redesign it, and post it up in a couple of days.

Tutorial Image for the Brain Forthcoming.. Really!

TUTORIAL HERE!

Happy Hauntings!

post signature

Link Party @ The DIY SHOW OFF @ The Gypsy's Corner

The Girl Creative Photobucket Party ButtonMake it Yours @ My Backyard EdenThe Trendy Treehousegiveaways

Saturday, October 23, 2010

Pumpkin White Chocolate Chip Cookies

Pumpkin is a comfort food to me. I've always loved it. My favorite way to eat it is in cookie form. The Pumpkin Cookie is, and will always be, my favorite cookie. Why you ask? Well, it is soft, chewy, and can be paired with coffee? You can put cranberries, chocolate chips, white chocolate chips, nuts, or any other kind of addition into the recipe, and they still taste amazing! So, I'll share my recipe with you! If you've not already tried making pumpkin cookies, you should try it now!


Pumpkin White Chocolate / Anything Cookies

(you can sub white chocolate chips for anything really)

Ingredients:
1/2 c butter 1 c sugar
1 tsp vanilla 1 egg (large)
1/2 tsp salt 1 tbsp orange zest (yeah, that's right!)
1 c pumpkin 2 14 c flour
2 tsp baking powder 1 tsp baking soda
1 tsp cinnamon 1 c white chocolate chips (or anything really)

Directions:

Preheat oven to 350 degrees.
1. Cream butter and sugar together. Add and stir in salt, egg, vanilla and orange zest.
2. Mix try ingredients: flour, baking powder and soda, cinnamon and the 1 cup of chips or whatever.
3. Add dry ingredients into wet, alternating the dry with the pumpkin. Stir until incorporated.
4. Spoon 1 tbsp of mix onto a baking sheet. Bake for 10-12 min, or until cooked through.


Yes, if you are wondering, I ate the entire plate of cookies with my coffee. It was delicious, and I promptly went to bed... letting the fat settle in. Pumpkin is a vegetable right? it's healthy? Ah well.

post signature


Wednesday, October 20, 2010

Who is the Queen Now - Crown Cookies

I'm sure it's poor form to play with your food, but honestly, there are times when it is necessary! Enter: THE CROWN COOKIE!

Now, I didn't actually have a crown cookie cutter when I was asked to make this cookie; I was a little panicked as to what I would do. I found that a collection of cutters can replace a single one. You'll see what I mean.

(I ate this cookie... don't worry!)

The cookies themselves were quite simple. Blue crowns for boys, pink crowns for girls. The pink are more tiara, whereas the boys have a more jester-king sort of look.

Each of the crowns was individually tagged with the intended child's name. While Jack was common, I thought the name Timea was different. What a unique name!

All in all, the crowns turned out quite nice, and I was proud with them - considering they were made from scratch and I had no cutter! So, here's how I did it, I h


Here's hubbie! He's a little camera shy!

post signature

Join the LINK PARTY @ Someday Crafts & Seven Thirty Three & The Shabby Nest

giveaways