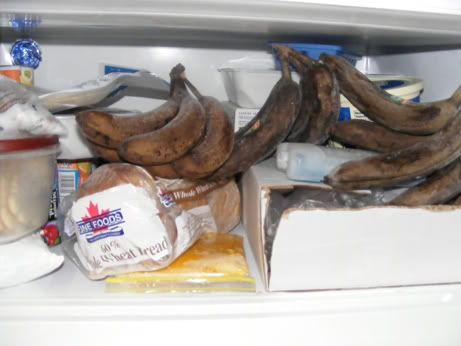
I opened my freezer today to grab stuff for supper, when I was attacked by several frozen bananas! In my house, you use everything, and never throw anything away. So, when we get a plethora of bananas from the "Good Food Box" (a monthly box of fruits and veggies to promote healthy eating), we don't always use the bananas right away. So, into the freezer they go until I can make something with them. This time, however, I realized that I had not been using them as quickly as I should, the result being this:
Yeah, a lot going on in there (cookies, chicken, frozen pumpkin puree, bread, juice...). So, I pulled out some of my baking goodies, and decided to make a banana loaf.
Here's what you need:
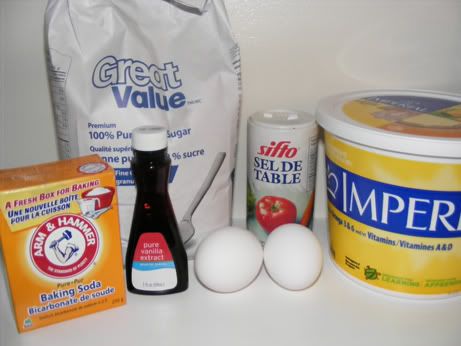
BANANA BREAD:
- 1/2 c butter (or margerine)
- 3/4 c sugar
- 2 eggs
- 1 tsp vanilla
- 1 c banana (about 3) mashed/thawed from frozen.
- 1/2 tsp salt
- 1 tsp baking soda
- 2 c flour
Instructions:
- preheat oven to 350 degrees.
1. Cream butter and sugar (well). Add eggs and bananas.
2. Add salt, baking soda and vanilla. Mix well.
3. Add flour slowly, stirring until just incorporated. Don't over mix.
4. Bake at 350 for 20-25 minutes (depending on your oven) or until a toothpick comes out clean.
ENJOY!
Add-ins:
Now, you can add Chocolate chips, but since I've given up chocolate (since Christmas... cry!) I' had to avoid baking with them. If you do add chocolate chips, add 1/2 cup of mini chocolate chips or 3/4 large.
Another thing you can add is coconut. I think that the banana goes well with it. Just add 3/4 c of dried coconut.
Nuts: I hate nuts in Banana loaf, but not everyone shares my distastes. Funny story, when I was young, I would pick the nuts out of brownies and breads at school and throw them at my friends. Yes, mature, I know, but I would enjoy picking them out and throwing them while calling "♪ NUTS !♪" At least I gave warning. But I digress... For nuts, 3/4 cup for a batch is plenty. Unless you really like them, in which case, go nuts! Get it? Nuts?
Dork.
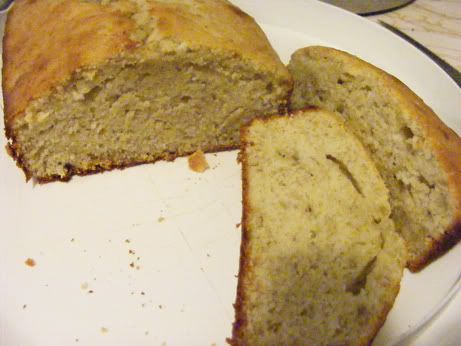
This is my plain bread, but it was so moist and good!
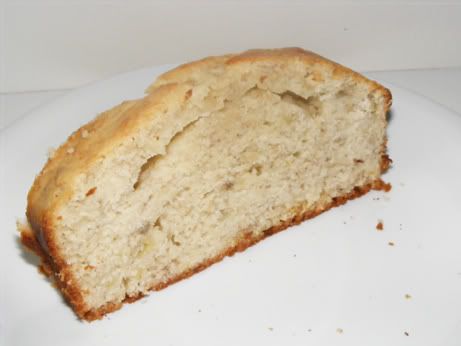
Enjoy with coffee or friends, or coffee and friends, and cribbage... always cribbage.
Now, that leaves some 7 bananas in my freezer. Maybe I should make extra, who knows. All I know is that it is lightly sweet, banana good...
Until next time!
Saturday, February 27, 2010
Wednesday, February 24, 2010
Fort Frances High School Math Olympics
Happy Olympics Everyone!
Hopefully you're enjoying the spirit as much as I am. I'm stuck on the hockey game right now, Canada is winning 7-3 in the 2nd. GO CANADA!
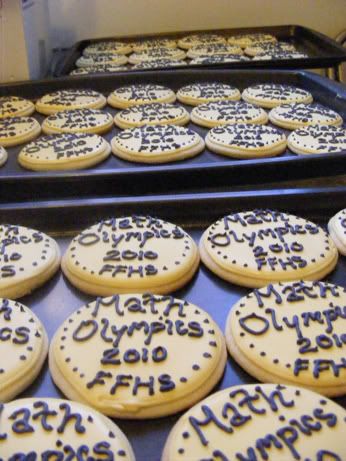
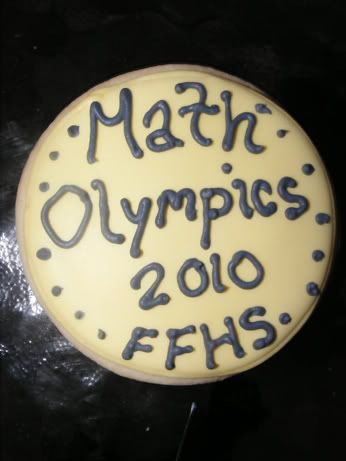
This week past, the Fort Frances High School Math Department decided to hold their first Math Olympics. As a way of congratulating students on a job well done, they ordered some Gold Medal cookies. Here's the pattern that ended up being the final product:
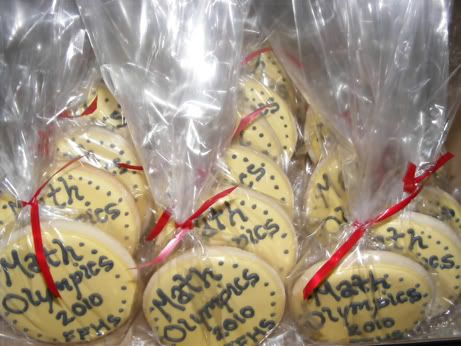
As you can imagine, this was a big order, but it was worth it. The kids were generally quite excited about the cookie. I'm just glad to have my kitchen counters back! This is only a section of the 7doz cookies ordered.
It was really great working with the math teacher, and I was super pleased, as well as she, with the final product. Red Ribbons celebrate success!
Now that the order is out of the way, I will be able to get back to the game! Hopefully everyone gets to enjoy the spirit of the Olympics, even if it is while doing math!
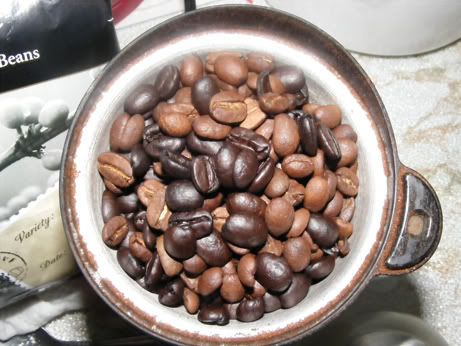
Just one last thing before I go. I woke up early to do a morning practice with the cheer squad today, and decided it was time for some gourmet flavored coffee (Raspberry Chocolate♥). I know, I know, it is certainly not Starbucks, but there is something amazing to be said about the flavor! Anyway, when I poured out the beans today, I smiled a little. They came out all pretty :
Now, after working at Starbucks, I realize two things:1. The beans must have been mixed old/new because the darker beans still contain their oils, while the lighter beans have dried a little (which is bad). 2. Flavored coffee is not at all natural, and is chemically treated. But, still, they were just so pretty! So I will go against all my coffee training, and will simply look at the happy, tasty beans which made an amazing cup of coffee this morning! ♥ I always thought that coffee beans were pretty!
Saturday, February 20, 2010
On the Move
The Fort Frances High School Cheerleading team took a nice trip to NorWossa yesterday, and that meant that we were on the move. I realize that it is only a 2 hour trip to Dryden, but that is two hours on a bus filled with sleepy-excited cheerleaders and volleyball players, leaving at 6:30 in the morning. It was a long day, but everyone did super!
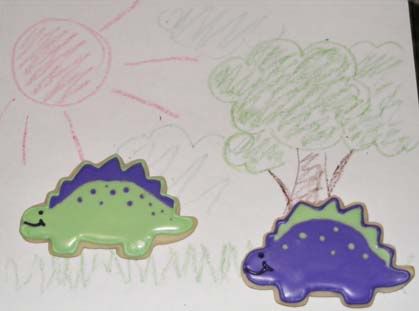
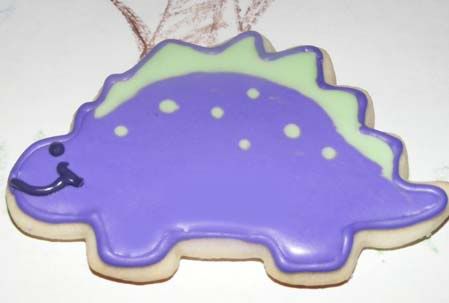
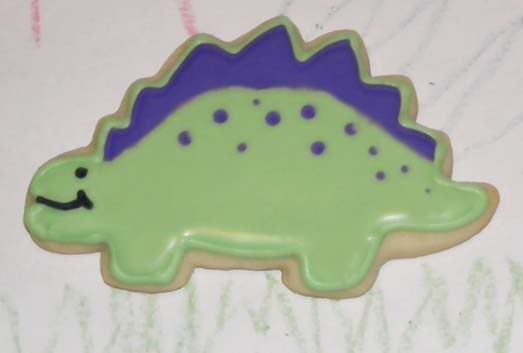
To celebrate the cheer exhibition, and a lot of hard work, I made this Stego-cookies. The girls have been working very hard on their routine. With Regionals only a few weeks away, I figured it would be best to give them something to show how much we appreciate their hard work.
It was not until I had chosen and made the icing that I realized that I had chosen "Barney" colours, but it was not as though I could do anything about that! Surprisingly, none of the girls made the link. They simply loved the tasty cookies, which is fine by me! I didn't want them to think that the colours were chosen for any "Barney-like" reason. Still, despite the silly colour choice, I think they are so cute! Look at them, on the move, ready to take a long trip!
I just wanted to thank the girls for their hard work. You guys were so amazing! I can't wait to see the whole routine at Regionals. Let's continue to work hard! You should be very proud of your success!
Until the next cookie! ♥
To celebrate the cheer exhibition, and a lot of hard work, I made this Stego-cookies. The girls have been working very hard on their routine. With Regionals only a few weeks away, I figured it would be best to give them something to show how much we appreciate their hard work.
It was not until I had chosen and made the icing that I realized that I had chosen "Barney" colours, but it was not as though I could do anything about that! Surprisingly, none of the girls made the link. They simply loved the tasty cookies, which is fine by me! I didn't want them to think that the colours were chosen for any "Barney-like" reason. Still, despite the silly colour choice, I think they are so cute! Look at them, on the move, ready to take a long trip!
Look! All smiles, and after a long day too!
I just wanted to thank the girls for their hard work. You guys were so amazing! I can't wait to see the whole routine at Regionals. Let's continue to work hard! You should be very proud of your success!
Until the next cookie! ♥
Wednesday, February 17, 2010
Hey Baby, Cute-Cupcakes!
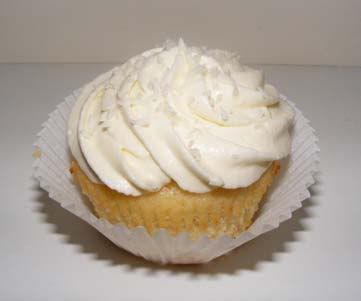
One of my co-workers was celebrating their birthday today, so I figured that, rather than transport a whole cake, I could make a batch of cute cupcakes!
This inspired me to share one of my favorite cupcake and icing recipes!
Enter: The Vanilla-Butter Cupcake!
This is a simple cupcake to make because it does not take a lot of effort to get a perfect rounded top! Many of the recipes I have for cakes etc. don't like to rise like this one does. Truth be told, I got this recipe years ago from Canadian Living (the magazine). While the recipe does not seem to have made it to the website ( I figure because it has been so long), I have a nicely recorded copy to share!
Vanilla Butter Cake:
- 2 1/4 c Cake Flour
- 1 1/2 c sugar
- 4 tsp Baking Powder
- 1 tsp salt
- 3 eggs
- 1/2 c unsalted butter (room temperature)
- 1 c milk
- 1 tsp real vanilla (artificial extract is okay too)
- 1/2 tsp Almond extract
Directions:
(Preheat oven @ 350)
1. Fork together flour, sugar, baking powder, and salt
2. Cut butter into flour and add milk, vanilla and almond. (should be mostly crumbly)
3. Beat on low, add eggs and slowly add milk.
4. Mix for 2 minutes on medium speed.
5. Bake for 15-20 minutes, or until toothpick comes out clean.
Once you have the cupcake all cooled and happy, it's time for the icing. I use a Swiss Meringue for the top -- it's not as simple as a butter-cream, but I find it is less sweet.
Swiss Meringue Buttercream:
- 3 egg whites
- 2/3 c sugar
-200 g (3/4 c) unsalted butter
1 tbsp vanilla
(color if desired)
Directions:
1. Place sugar and egg whites in a heat-proof bowl over double-boiler. Beat mix constantly until sugar is dissolved and mix is warm to the touch.
2. Remove from heat -- whisk with mixer until mix forms firm peaks (not dry). Mix will be cooled.
3. Add vanilla. Add butter piece- by piece and blend until incorporated. You can add a little extra powdered sugar if you find this not sweet enough. It is a light, fluffy type of icing... YUMMY!
Chill before use, about 15 minutes.
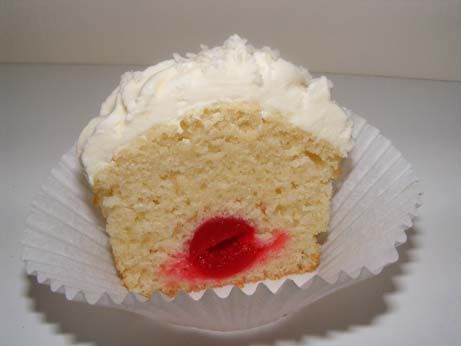
Now, I LOVE to do little touches. These cupcakes are snow-white. I like them that way, but there should always be a heart to baking. So, when I spoon in the batter, I added a cherry to the center, the scooped more batter on top. The effect, a sweet heart center!
How cute is that? You can really see here how the cupcake rose. So yummie. Hopefully you'll like them as much as I do!
Sunday, February 14, 2010
Valentine's Day Dinner Fit for a King! (of Hearts)
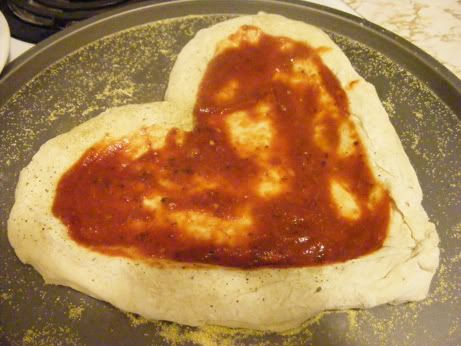
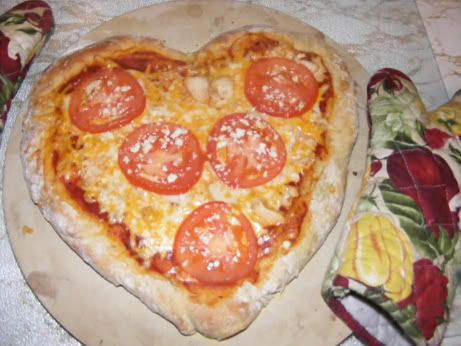
As a little Valentine's cliché, I decided to make a Heart-Shaped, Focaccia Pizza. ♥
Interested in making a healthy pizza? See the recipe below!
Step 1: Saucy! The nice little red-silhouette.
I had to make two pizzas because I wanted left-overs ☺
This little pizza was for lunch tomorrow:
The Main Course! My husband and I worked together to make this one. Toppings: Mozza, Cheddar, and FETA cheeses, spiced chicken, and tomatoes! Too bad there were no mushrooms.
Look at that crust! YUMMIE! The rosemary is really the key in this pizza. The dough is great on it's own, but something about that rosemary taste makes all the flavors come together! It's just the right analogy for our little evening: Pizza and a movie on the couch!
Making pizza from scratch is so much better than the box or, GASP, a pre-made crust. It is simpler than you might think. You can pick up the ingredients from the store, and make a crust for under 3 dollars! At least this way, you know what is in the pizza (no additives). Not only that, but you can make it healthier by using whole-wheat flour!
Recipe: Crusty Focaccia Pizza:
1 pkg (2 tbsp) active dry yeast
1 cup warm water
1/2 tsp salt
1 tbsp honey
1 tsp sugar
2 tsp olive oil
2 1/4 c flour (depending on humidity and altitude) - I like to use bread-flour, but all-purpose is good too.
1 tbsp ground Rosemary
1 tbsp Italian Spice
1 tbsp cornmeal
Directions:
1. Dissolve yeast, salt, honey, and sugar in warm water. Let stand until yeast is frothy.
2. Add olive oil. On medium setting (mixer) add flour in slowly. Continue mixing until incorporated. Grease the top of the dough with a little olive oil/cooking spray. Let dough stand in warm, dry, draft-free place for 15-20 minutes, or until doubled.
3. Sprinkle pan with cornmeal. Press dough into a pizza pan, leaving a ridge for a crust. At this point, I simply shaped the dough into a heart. Sprinkle with Rosemary and Italian Spices
4. Add sauce and toppings. Bake at 450 degrees for 15-20 minutes, or until crust is browned on the bottom. Let cool 2 minutes before cutting. ENJOY!
Friday, February 12, 2010
Little Lemon Tarts!
I was super excited this week when I walked into our small kitchen store and found some cute little tart tins! I think I literally jumped for joy. This is something I could order off of the internet, but choose to hold off, and well, it paid off! So, the first thing I thought to make were little lemon tarts with my favorite Lemon Meringue Pie Recipe!
How cute are those! With the little swirly meringue! You can tell the shape of the tins, it made such a cute little impression in the pie-crust...
Tuesday, February 9, 2010
Cupcake Cookie Party!
♥♥ This cutter is SO ADORABLE! ♥♥
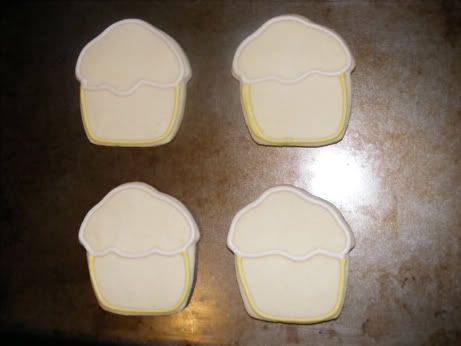
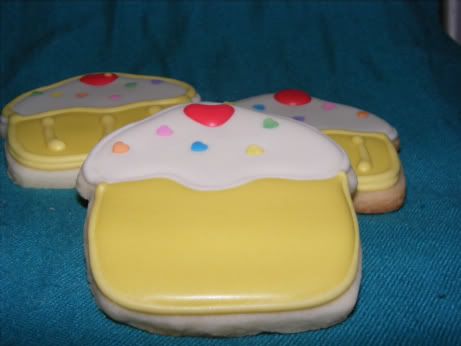
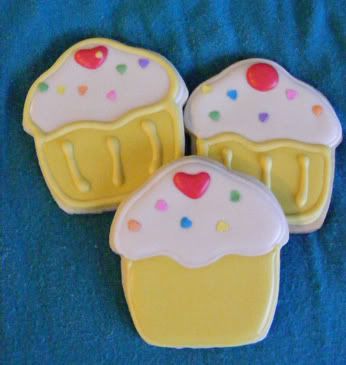
When I saw the cupcake cookie cutter on Off the Beaten Path (cookiecutter.com), I just knew it would inspire the most precious cookies! The simple shape (below), is either a muffin or a cupcake, whichever you dream it to be. To make cupcakes, simply envision the wrapper, choose a cute colour, then pipe away! For these cupcakes, I mean, Cookies, I choose a yellow wrapper and white icing!
To make them extra cute, I put heart-shaped sprinkles right into the icing. Then, topped the cookie with a heart-shaped cherry! ♥♥ They were simply adorable! ♥♥
Here's the finished product:
I made three types, not being satisfied to not play with my design. Personally, I like the simple one the best, but the outlined and wrapper-lined cuppies are also amazing! I think I'm just in love the with concept of Cupcake Cookies!
I need to actually make the real thing now... cupcakes that is ☺ . Maybe this weekend. I have a new set of tart-shells to play with. So much to bake, so little time! ♥
Sunday, February 7, 2010
Party like it's 1980 (Part 2)
HEY~ It's time to Party like it's 1980!
Maybe not the most flattering photo, but it certainly gets the idea across about the party which inspired the cookies! This party was a blast. Shout-out to Wendy and Natasha, Happy 30th!
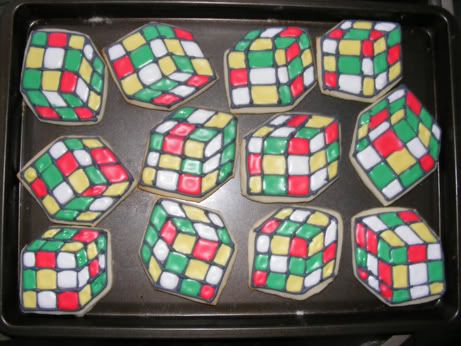
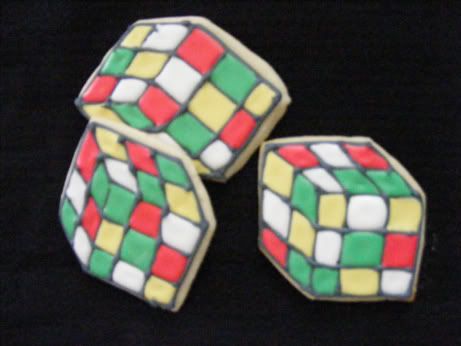
As a special request for the party, the Rubik's Cube was an inspiration for a new cookie design. I was thrilled to get this request, and the cookies, while a royal pain in the bum to make, were really quite nice. Despite all the problems I had photographing them! See for yourself!
And for a close-up which did not photograph well:
The party was great; Old-School Nintendo, Super Mario Bros. (which later turned into the WII version because the Nintendo Entertainment System kept shutting off on people :: tear ::), silly dancing, great open-faced Spam-Salad Sandwiches, and BBQ chips. I loved the hairstyles people came up with. It was truly a flash from the past. And the NEON! I can't wait to see all the photos. But for now, the Rubik's Cube Cookie remains a blissful hit of the past. Onwards we roll. I just can't believe that it has been 30 years since the 80s :: Shock ::
Saturday, February 6, 2010
Order Information
Thinking about Ordering?
Please give at least 2 weeks notice for projects. If less, please contact Meghan Spooner to see if a space is available.
Information:
Domestic Sugar specializes in Cakes, Cookies, Pastries and Party-Tables. Please feel free to contact me for parties, retirements, weddings, or special occasions.
Pricing:
Please contact for information - Prices dependent on materials and complexity.
Decorated Cookies - Start at 15$/Dozen + depending on complexity.
Cakes - Decorated Cakes are based on complexity and detail (including sugar-flowers, fondant, decorations). Please contact me for further pricing guides. Cake prices can range from 25$ and UP.
Dainties/Pastries - Dainties are based unit quantities. Prices start at 12$/Dozen +
Delivery:
Delivery can be arranged (for a fee) or can be picked up.
Contact:
If you wish to contact me, my e-mail address is domesticsugar (at) gmail (dot) com.
I am always available to answer questions!
Please give at least 2 weeks notice for projects. If less, please contact Meghan Spooner to see if a space is available.
Contact domesticsugar (at) gmail (dot) com
Information:
Domestic Sugar specializes in Cakes, Cookies, Pastries and Party-Tables. Please feel free to contact me for parties, retirements, weddings, or special occasions.
Pricing:
Please contact for information - Prices dependent on materials and complexity.
Decorated Cookies - Start at 15$/Dozen + depending on complexity.
Cakes - Decorated Cakes are based on complexity and detail (including sugar-flowers, fondant, decorations). Please contact me for further pricing guides. Cake prices can range from 25$ and UP.
Dainties/Pastries - Dainties are based unit quantities. Prices start at 12$/Dozen +
Delivery:
Delivery can be arranged (for a fee) or can be picked up.
Contact:
If you wish to contact me, my e-mail address is domesticsugar (at) gmail (dot) com.
I am always available to answer questions!
Party like it's 1980
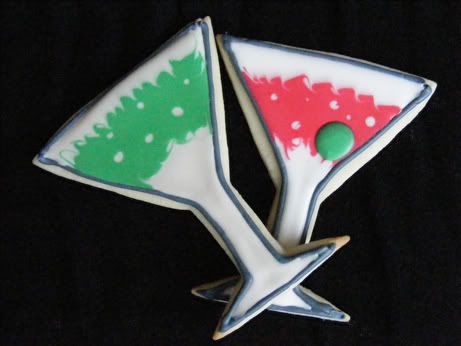
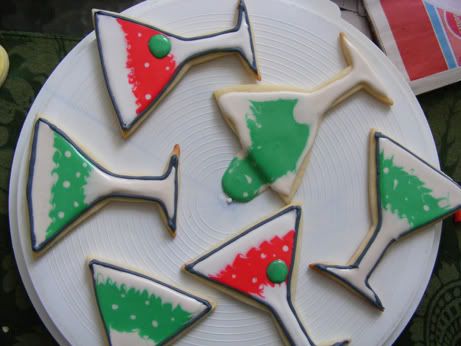
This weekend, two of my friends are celebrating their birthdays. In celebration, we are going back to the 1980s, time to, like, tease the hair and grab the bangles! Totally! I've made two types of cookies for this event. First, the Martini cookie!
This cookie, with or without olive, is a fabulous little addition. The sharp colors scream taste!
Be careful, however. The Martini Cookie is, like, totally spillable!
Tomorrow! Party with the Rubics Cube Cookie!
This cookie, with or without olive, is a fabulous little addition. The sharp colors scream taste!
Be careful, however. The Martini Cookie is, like, totally spillable!
Tomorrow! Party with the Rubics Cube Cookie!
Monday, February 1, 2010
Weekend Coffee Cake
This weekend was a nice, relaxing one. I had very little time on my hands due to a friend moving to the area, but that didn't mean that I didn't take some time for the sweeter things in life. As a welcome-to-Fort bonding experience, her and I made this lovely, moist coffee cake. She is used to the fabulously rich taste of Starbucks (dies), so what better than to enjoy a cup of Anniversary Blend with some perfect-pair, cinnamon-y coffee cake! :)
Now, I have someone to play Crib with! Latte and Crib, with a little cake. It's a regular tea-party!