Showing posts with label Christmas. Show all posts

Saturday, December 29, 2012

Winter Wedding

This cake was near and dear to my heart, and in truth, had to be baked twice before I was happy with the results! But, with all my heart, I wanted it to be perfect.

So, with much fussing and playing, I managed to create a winter-themed cake with a rather large Poinsettia on top.


With a little bit of a twist, this is an egg-nog cake with vanilla-bean buttercream. The cake is covered in MMF, and decorated with sugar flowers/snowflakes (a combo if you will). I had no time to order a snowflake plunger set this year. Rats! Maybe next...


 Because the Poinsettia is so large, it actually dented to the top of the cake! I have never done a single flower on top, and was rather pleased with the off-set aesthetic of it.


 And of course, this was a drop-in wedding, so Cupcakes make things a little more munchable! I was rather pleased all around.


So, now I have some extra cake in the house... I wonder what I will use it to make next :)
Happy New Year!


post signature

Wednesday, December 26, 2012

Gingerbread Home - looks like a bird house!

Asa child, my family would make gingerbread houses. We would buy one of those per-packaged kits which would come replete with icing, jujubes, and smarties. We would take a box, cut it, then line the base with tin-foil snow. After opening the candies, we (my siblings and I) were given specific instructions NOT TO EAT ANY OF THE CANDY.... Very stern!

And thus it was that our gingerbread house was made, somewhat bi-yearly, and would sit on the end-tables, uneaten (under threat for any who dared eat it before Christmas - thanks Dad). And as the days would pass, the house would become harder, and harder, and it's candy decorations (specifically the smarties) would begin to disappear piece by piece, until the day, CHRISTMAS, when the house was deemed free to eat, and was so hard it had to be tossed... a waste of food, and time. Alas, this was not in vain; the memories lasted!

And so it was that my gingerbread home tradition starts, in the dust of crumbled cookies past.


This year, as some of you may have read, I moved into my new home. This newly-built paradise, on the shores of Rainy Lake, Ontario, has become my pride and joy. In a previous post, I showed off my
kitchen and some other small quips about new-home ownership. Today, I wish to share with you all my Christmas Gingerbread Home (not a house, but a home).


Sadly, in my artistic vision, I did forget to post a door, and was stuck making a rather sad looking gingerbread bird house, but who is judging?


The roof was inspired by a card design that I received.


And of course, I could not simply make one Gingerbread house, I made several - I believe some 10 small ones or so....


And the house? Well, It met with a somewhat orthodox ending on Christmas Eve.... my mother-in-law had some troubles smashing the little structure, but with some coaxing and a butterknife, she succeeded in felling the home.


 But, as always, Photos will live on. Here is a photo of the house on my sweets tower, prior to our House-Warming/ Yuletide /End-of-the-World party. Did anyone notice how the world DID NOT end? Did anyone thing otherwise? I was certainly glad it did not end!


And, just to finish off... here is a close-up of the small Gingerbread houses... they were teeny-sized houses which fit on the end of cups. The idea was actually from NotMartha.com. If you ever find you have more time than you know what to do with, and you feel like being a Holly-Homemaker (Suzy?), check out the site. She has great ideas!


So, to close, here is a picture of my father-in-law sipping his morning coffee, eating gingerbread on Christmas.


Merry Christmas everyone! I hope your Holidays were as relaxing as mine were!

post signature

Monday, December 10, 2012

What keeps you going? Peaking into my kitchen

 For all of my adult life, I have been dreaming of my kitchen. I pictured myself in my cute apron, whipping up batches of cookies and sweets for my husband, who comes in with the paper and sits down at the table just as I place the roast ham down next to the yams.

That will never happen.

First, my husband does not read the paper, as he is technologically inclined to download it instead, or check the online headlines.
Next, he hates ham. I love it. He hates it... a dilemma if ever there was one.
Finally, my husband loves to eat on the couch. True story.... no joke. Go figure!

So, now that I have moved into my dream mansion on the lake, and my kitchen is oodles bigger than before, I get to live only parts of my dreams. At least I can share them with hubby.


December always marks baking season for me. Every year I whip up hundreds (no literally, hundreds) of goodies to give away in tins and boxes to family and friends. The way I see it, people spend lots of money and time making dainties for people who drop in for a visit, so wouldn't it be nice to give out some of those dainties and save them time?
No
They eat them,
They eat them as soon as they are given,
And they are happy,
Which is just as good.

This year I had the pleasure of baking goodies with friends and family in my new home. If you did not know, this was the reason I had sparse posts and uninteresting pictures. I recently moved into my newly-built home on the shores of Rainy Lake. It is a gorgeous paradise. And my kitchen is about 5X bigger, without exaggeration from what I had before.


It is so big, in fact, that I was able to have company over for a cookie decorating party (as seen above) which was super fun! I was also able to bake more than one batch of cookies for the dainty boxes, which is amazing! I have never had two batches baking in my double oven while the third batch chilled... HOW MUCH DID THAT BLOW MY MIND?!

Here's my new paradise:


 It is super hard to believe that it is perfect... except for a valance curtain (teal or yellow... I have yet to decide) the place is perfect. I even had a sign made for above the island.
Je suis la propriétaire d'une patisserie!
N'êtes-vous pas exciter? Non... mais, je suis laide.


So, from my home to yours, Merry Christmas, and Happy Holidays.

post signature

Friday, December 23, 2011

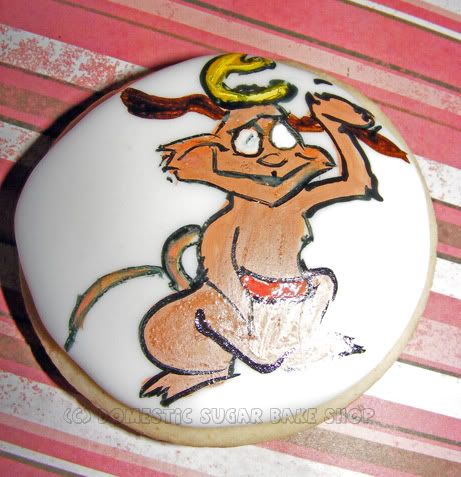
Max, the Grinch's Dog - is that his name?

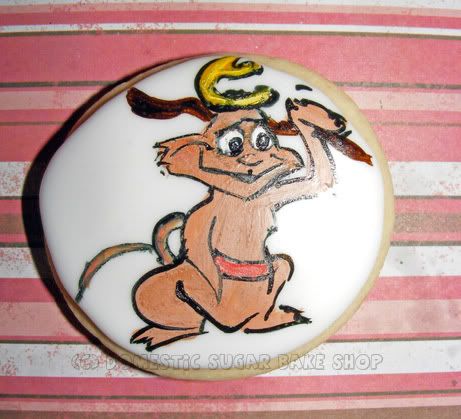
No really, most people forget that the dog's name in the Grinch is Max. May be it is because I am a little silly, but I can't forget that kind of important information.

Anyway, ::
DOES A HAPPY DANCE ::
♪♪Tomorrow is Christmas Eve! ♪♪

For my Family, the eve is the most important day of the year. I am super excited! And now that our school's Christmas Concert is over, I can finally take a deep breath and enjoy it.

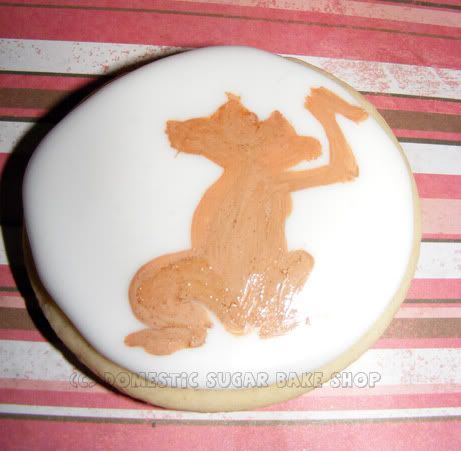
I was supposed to post these cookies up a few days ago, but found that I had NO time. I had a lot of those kinds of plans. So, here is the final cookie. Only two pictures of the process, but by now, you should be able to understand how I did it:


I may not have time to post over the Holiday season (But I have more cookies to post), so I am wishing you all a very Happy Christmas, Hanukkah or just the best for the season.

post signature

Tuesday, December 20, 2011

Sleigh Riding Max

Well, apparently SANTA exists here in Fort Fabulous! A little fairy dropped a gift at my door to reveal a brand new PlayBook! HURRAH! An E-reader Has I! Totally having a blast playing with it and almost forgot to update today. Sorry!


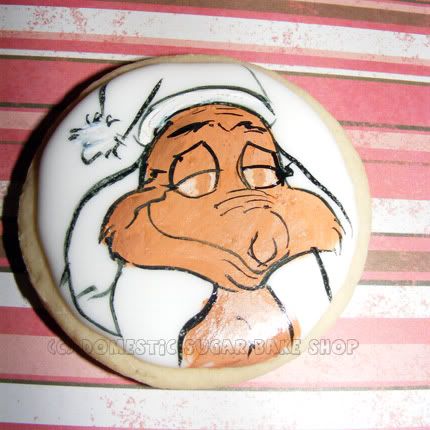
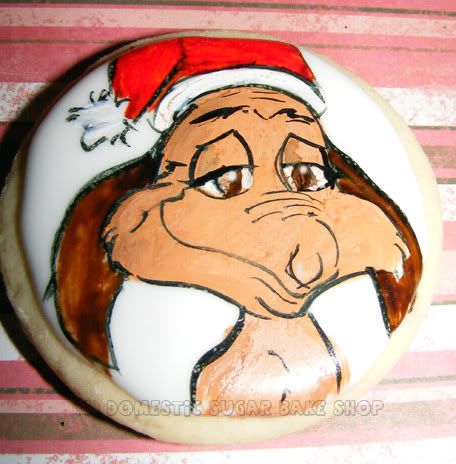
This scene comes from Max riding on the back of the Grinch's sleigh. I love this scene, poor Max, just wants to go for a ride, like all puppies do!

Anyway, fewer pictures on this one, sorry! Even less for the last post tomorrow.

For this one, I followed the same technique.

Again, outline using the foodcolour (mixed with white), then dark line (with foodcolour - I am not sure if the food doodlers are the best quality, but you could try them), then fill in the detail.


Okay, that's enough for today! I am going back to play with my new toy!
THANKS SANTA!

post signature

Monday, December 19, 2011

Cindy Loo Hoo w Wreath Painted Tutorial

Breaking down the cookies now! This is tutorial Number THREE!

For tutorials Number One and Two, just click on the numbers.

Let us continue, shall we?
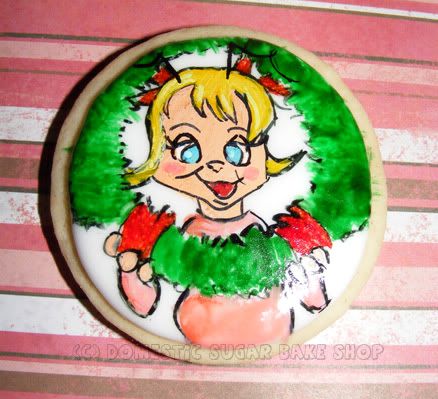
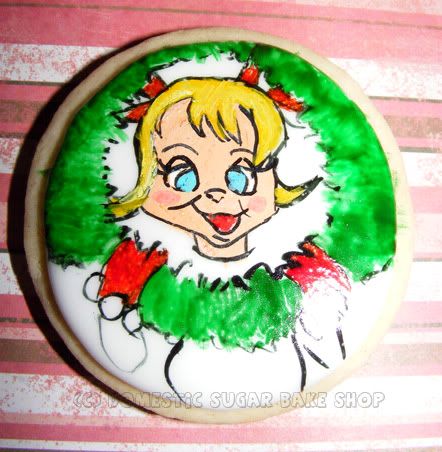
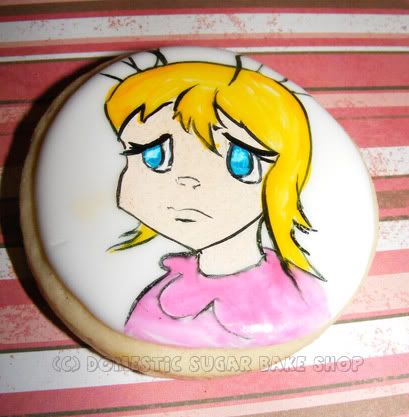
The last Cindy Loo Hoo cookie was sort of sad. I didn't want to leave her looking like that, so I had to make one of her happy after Christmas comes back. So, I decided to do a cookie with her holding the Christmas Wreath.

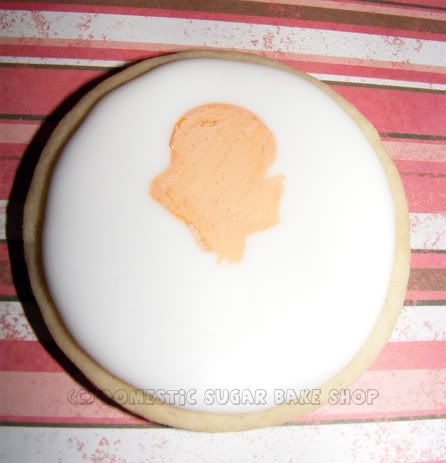
I start by using a 'pale peach' foodcolour (mix a small bit of pink, yellow brown, and quite a bit of white). I use this for her face shape, just to give me an idea of where everything will go in the end.


Next, I ink in the black lines. In the below picture, I forgot to stop, and I had actually drawn in her hair. You can choose to do that before or after the black. I caution you to make sure each colour is dry before continuing: it will take about 3 minutes for the 'paint' to dry.

It really helps to have a good reference picture!


Next, after the black is all dry, I start to add in the colours. I dabbed on the green to give the illusion of a fluffy wreath (thicker paints will help with shading.


Finally, I add in shines and small details.
FINITO!

I took these pictures while the cookies were still wet. As they dry, the food color gets more glossy and less shiny. Sorry about the bad photo conditions.


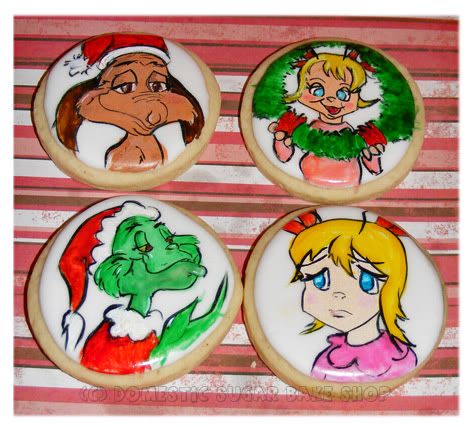
I had my students vote on which cookie they liked the most. They all liked MAX best. I'm going to save that one for last. I have two more days to cover.

Until Tomorrow!

post signature

Sunday, December 18, 2011

Cindy Loo Hoo Cookie, Painted Tutorial

Hey All!
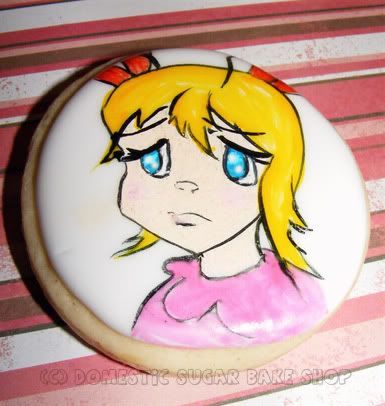
One week to go! For today's cookie tutorial, I planned to post up the Cindy step-by-step. The original picture has Cindy Loo holding a tree ornament and looking sadly at the Grinch. I love the look in her eye, it is so sad and she look so cute. I just want to HUG her.

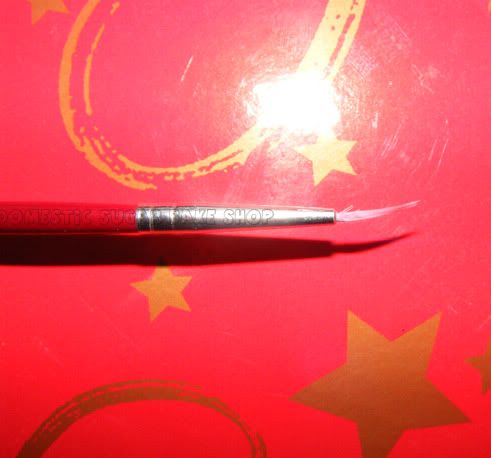
Before I start, Trish from Sweetology101 asked a good question about what I use to paint on cookies. Simply put, a very fine-tipped paintbrush. The one below is the one I use, and it is OLD! I got it from Walmart, but truthfully, I need to invest in one from a craft store, since it will probably hold together better than this one. Either way, this one is great, if not a little weather-beaten. Hope that helps.


Now, on to Cindy Loo.

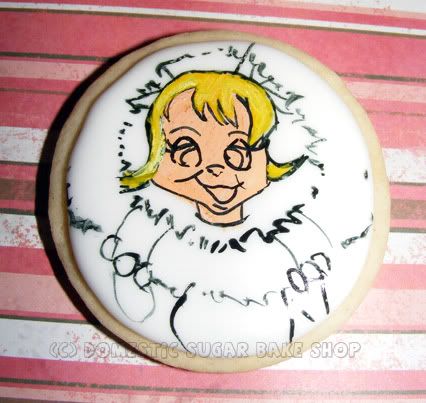
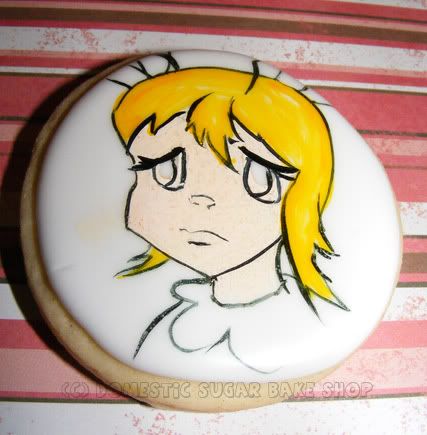
I started by combining some colours into a light peach: Lots of White, red, yellow and a touch of brown. I used that to paint the face in the background. Then, using a bright yellow, I painted in the hair. In this picture, you can see the between stages; I've put in the yellow hair, and the face colour, and I'm just beginning to line the black around the head. I had a picture taken before this, but it did not turn out well.


There, now I've got the face, hair and body all outlined.

Now I start adding in the details. Again, using a thicker colour, or a darker shade, you can shade around the edges to simulate shadows. For the Eyes, I used a blue mixed with white to thicken, this way, you can cover over any colours underneath.

Final Details, and DONE!

Below, you can see the difference in using the white to thicken the paint colour. In the Grinch's face, I used just green food colour; you can see that the colours are not as pronounced or cartoonish. After making that particular cookie, I realized that I needed the white, so I switched my tactic. White is important, but not essential.


Hope you all enjoy this last week. Hope it passes quickly. Until Tomorrow!

post signature

Saturday, December 17, 2011

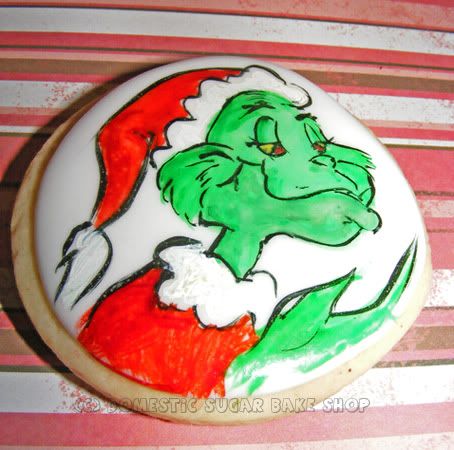
The Grinch - Painted Cookie Tutorial

Hey All! Coming down to the crunch! Christmas is here soon!

These are my latest creation. I figured I should try something a little different, since I have very little time. While making a batch of cookies for a friends, I made 5 round cookies and decided to paint them rather than pipe them. Here's what I did:

Painting cookies is super easy. Many people would have heard of "Food Doodle" food grade markers. I like them, but they are nowhere as nice as the colours you can get out of the gel food colours (Specifically Americolor). To Paint on cookies, all you need is a good work surface, a pre-flooded cookie (Royal Icing that has hardened to create a canvas surface on the cookie), water, food gels (best is Americolor because the bottles are easier than Wilton's pots), and a very fine-tipped paintbrush.

You can put a small amount of gel-colour on a plate or on a pallet, it is up to you. I use a little bit of water to dilute the 'paint' and make it easier to draw with, but be careful, too much water will be hard to work with. If you put too much water, you also run the risk of it eating through the sugar in the flood. That means that you'll get a small hole in the cookie where the sugar was. That is not something that you can fix easily.

For today, I'm going to show you the Grinch cookie. Each day I'll post a new cookie with a quick look at how it came together.

Start by painting the green background. This may require a picture or a very good eye for what you want to do. Be creative! I used darker shades on the edges (thicker, undiluted paint colours) to map out the parts I will black/outline.


Next, I clean off my brush, then paint in the details/outlines. This part, again, takes some creativity.
To get the best colour, I like to mix the colour of paint with a white base of foodcolour. Again, Ameicolour white is essential to get good colours. You don't need it, but you will find that it will give a clearer look to the painting.
Mistakes can be fixed by dipping the paintbrush in water (pure water) and dabbing at the area. You can paint over it again with the green if you wish. I used a picture as a reference, but, again, you don't have to. If you are doing a different picture or just playing around, that's great!

LET THE BLACK DRY!
(Otherwise you may smear it with a top colour)


Now, I add in the other colours. For this, again, using white is great. As you can see, I added SOME white into the hat, it gives a little contrast. If you paint out of the lines, whatever. You can use the water trick and dab it away, or leave it like I did!


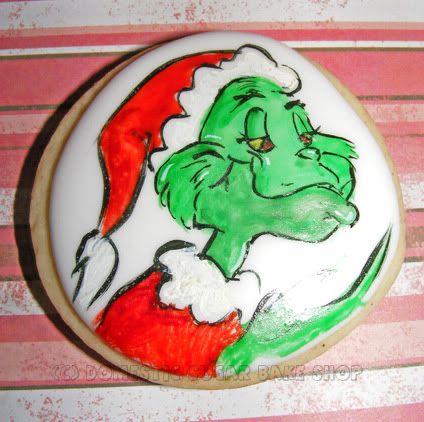
Finally, I touch up and adjust; using a little white, I add some shines in the lips and face. This gives a little more depth to the cookie and makes the painting pop.


And there you have it! Not too shabby. Painting on cookies is a nice way to make a simple cookie, and it takes less time to get a detailed product. Often, when I'm piping a cookie, I have to wait a day to see the project through to the end. This cookie took about 10 minutes to finish. Obviously you'll not want to make 100 of them, but for a quick dozen, or for a fun way to pass the time (maybe with kids) painting on cookies is great!

See you tomorrow with a Cindy-Loo Hoo cookie.

post signature

Wednesday, December 14, 2011

Spicy Orange Gingerbread Cookies (Recipe)

I love the colours of Christmas! They are the best! Rich greens, reds, and silvers are a wonderful addition to any home.
Along with all those rich colours are the rich smells: Cookies freshly baked, Turkey piping hot, delicious sweet yams or fresh soups. It is a wonderful season indeed.

As promised, I am sharing yet another recipe from my yearly Christmas Box. These cookies are a staple in any home in the festive season: Gingerbread. Be it in cookie or in house form, I love the smell they give, and how sweet they are!


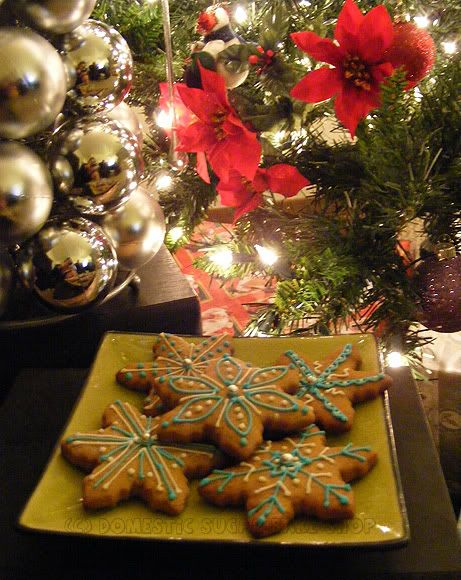
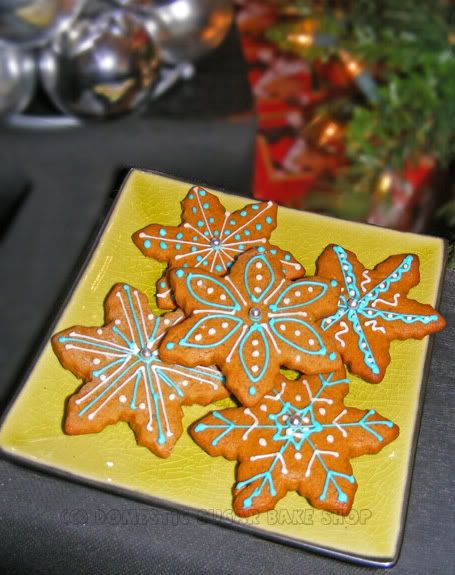
This recipe is one I've used forever. It is a rich, orange, spicy gingerbread that is quite unlike any other I've ever had. It also hold up to its shape. You can see above my snowflakes kept their shape, which is key for making houses etc.

Orange Spicy Gingerbread


1/2 c margerine
1/2 c sugar
1/2 c molasses (I use fancy type, but whatever works)
1 egg yolk (Save the white for the icing)
2 c flour
1/2 tsp salt
1/2 tsp baking powder
1/2 tsp baking soda
1 tsp cinnamon
1 tsp cloves
1 tsp ginger
1/2 tsp nutmeg
1 tbsp grated orange zest

Directions:

Preheat oven to 325 degrees. Put parchment on the cookie sheet.

1. Combine margerine and sugar, add in molasses, zest and egg yolk. Set aside.

2. Combine dry ingredients (Spices, flour, and salt).

3. Incorporate slowly the dry mix into the wet. Stir until all ingredients are well mixed.

4. Take mixture, and chill for at least one hour (or overnight). Remove from fridge and roll half the dough on a lightly flowered surface. Use cutters to cut shapes and bake for 8-10 minutes until firm. Remove from oven and cool. Do the same for the second half of the mix.

Yield: 30 cookies?

ENHANCE, ENHANCE, ZOOM, ENHANCE!

The above photo is super Photoshopped so that you can see the detail. The problem with my camera is that it is horrid in low light (a constant problem in my small apartment).

I hope you give the recipe a shot! If you do, tell me what you think.
Until then!

post signature