Showing posts with label Gift. Show all posts

Wednesday, June 6, 2012

Somber Cookies

What you say? Another blog post?
It seems that the world is trying to conspire to keep me baking. My week was pretty busy trying to get the Sauna situation in order, and then I baked to distract myself.... In a one week period I made a Pikachu Cake, Cheeky Tulip cookies, Thank you Flowers/Butterflies, and now, these Somber cookies.


Why are they called Somber Cookies? Well, they are for a friend who recently lost her father. The flowers are an attempt at chrysanthemums, a flower commonly associated with death, also known as the God Flower. The butterflies symbolize rebirth and freedom.

 
 I feel that they also symbolize light in darkness, which is why I chose the colors grey (for the loss, white for light or the divine, and yellow for hope). Hilariously, and quite honestly, I love the color scheme, even through I used them with a specific meaning above, I could easily see this as my kitchen/living room colours.


These particular cookies were a combined gift from myself and my coworkers. When they were delivered, I got a smile, which makes me hopeful that the healing process is well underway.


All our love!

post signature

Sunday, April 22, 2012

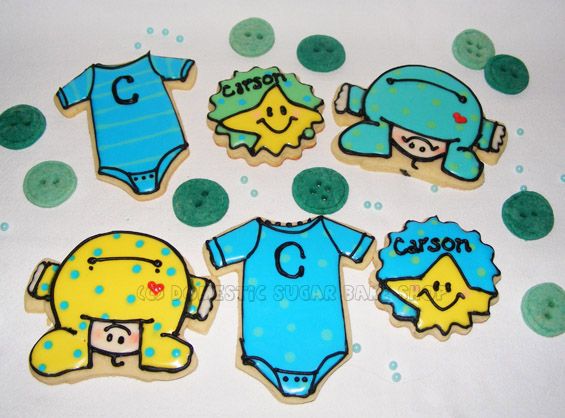
Baby Cookies for Baby Carson

Babies! I've got none yet, but I am a very proud Aunt of three wonderful little ones. Little ones always make me smile especially when they laugh! Melts my heart.

I am happy to announce that one of my coworkers has recently given birth to a little one of their own. Carson was born last week to two very proud parents. Since I figured they had all the 'things' they could possibly need, I decided to do what I do best and bake!


These cute little cookies are inspired by some rather cliché designs, but none the less, are adorable! Looking through my files, I noticed that I've not done any (I think) baby-shower/baby-themed cookies. HOW! For three years now I have been blogging up a storm, and I have yet to do baby cookies!


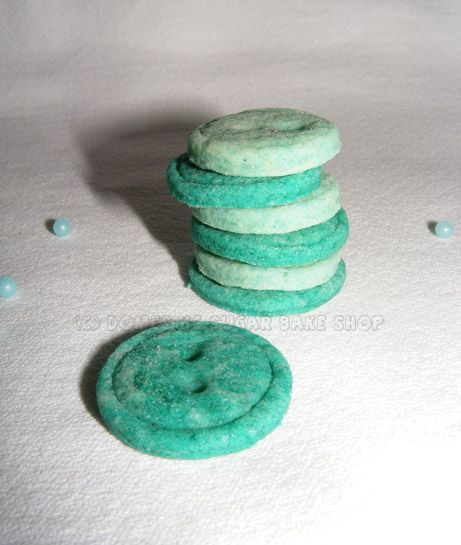
Not that all my cookies have to be complex. I wanted to show a cute little tip for those of you who have less time but still want to bake cookies for little kiddies. These Button cookies are the perfect solution. (see them all around the decorated cookies?) They are simply my sugar cookie recipe(or any sugar cookie) dyed to the proper color.


Now, take a look at the loose buttons around. Those are a great cookie to make for those who are busy! Let's give you a little tutorial on those!


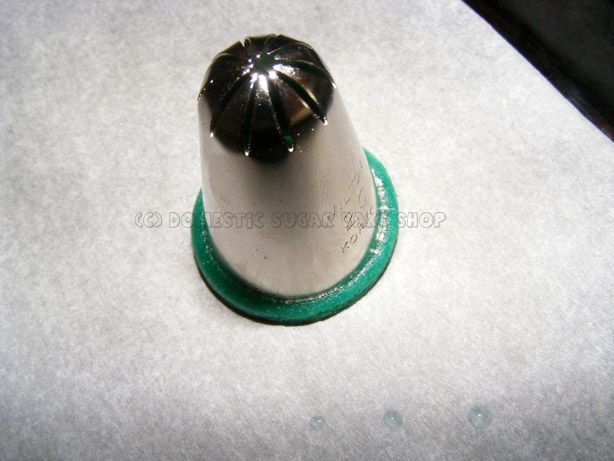
First Find three Round cutters. I used my piping tips, 1M ( large star tip), a smaller round large tip, and a regular 3 round tip. You could use any small round things to do these, and even make bigger buttons. Roll out your dough, and using the larger of the three circles, cut out a circle for the button.


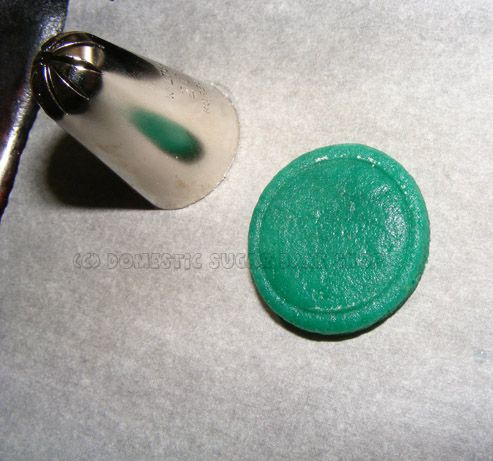
Next, take the medium round circle and, very carefully, place it in the center of the large circle and apply slight pressure (don't go all the way through). This will be the little indent of the button.


Finally, using the smaller circle (my 3 round tip) punch holes all the way through for the button holes. AND VoilĂ ! Bake as normal! (5 min @ 325 Degrees)


Now you know  a small, simple way to make cute baby cookies. These ones will be packed off and sent to the proud parents. Hope they like them!

post signature

Monday, December 12, 2011

A very Sweet Christmas (With Recipes)

Happy Christmas all!

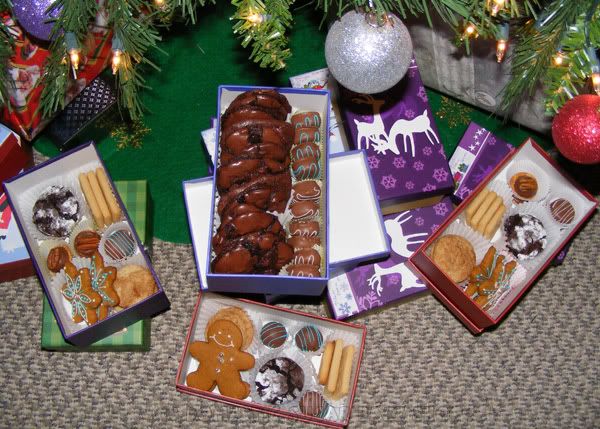
I can finally take a breather, all my Christmas baking is finally complete. Three days of solid baking made me so very sleepy, but the responses are always worth it.

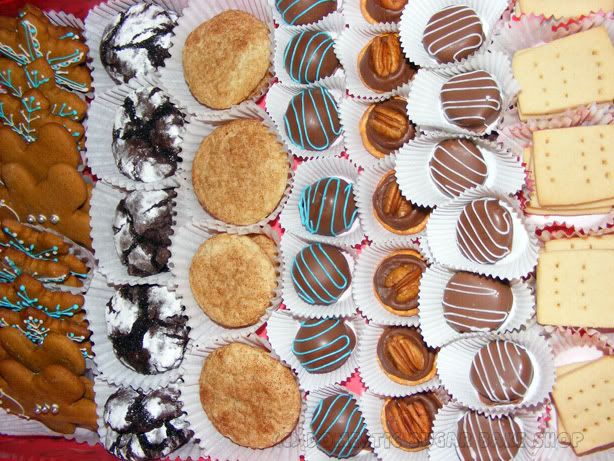
What did I bake? From Left to Right:

1. (Not pictured) Caramel Butter Bars
2. Spicy Gingerbread
3. Chocolate Crinkles
4. Snickerdoodles
5. Baileys Cake Balls
6. Turtles
7. Peppermint Patties
9. Scottish Shortbread
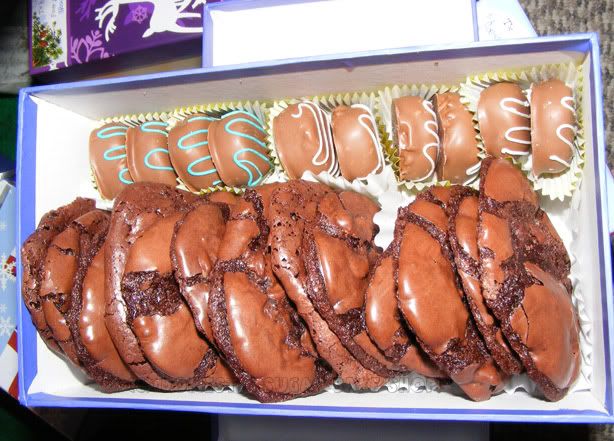
10. (Not Pictured - see below) Gluten Free fudge Cookies


Over the next couple of days I'd like to get my recipes up so you can enjoy them. Please be patient with me for the time being. I'll try to get one up every couple of days.

Some of the articles are missing because a lazy-bum decided to take a picture before they were boxed up. If you scroll down, you'll see the Gluten Free cookies.


Making gift-baking-boxes is the most wonderful thing, and the most stressful. I love baking delicious treats, but find that three days of baking straight is totally exhausting. Yesterday, I was practically a zombie (which those who know me will think is awesome) trying to get everything packaged and ready for delivery. Today, I played Santa with my wonderful Blue Recycle bag delivering boxes of treats to all my close friends. I believe that between the 25 small boxes and the two large, I baked somewhere between 20-30 dozen cookies. I kept telling myself that I was totally running low on baked goodies, and that I needed more. That was a joke! I have tones of leftovers.

The best part of baking this year was making something new. This recipe I found on Pinterest: Gluten-Free Chocolate Fudge Cookies (also pictured in the box are the Peppermint Patties, which are also gluten-free).


This is a recipe I just had to Share! Even though they are gluten free, they are more like Brownie Cookies, very chewy and sweet.

Flourless Chocolate Cookies

Originally posted from Chocolate and Carrots


3 c Powdered Sugar (Beware of additives in this! Cornstarch is okay)
2/3c dark cocoa powder (unsweetened)
1/8 tsp salt
2 to 4 large egg whites
1 tbsp vanilla
1c chocolate chips

Directions:

Preheat oven to 325 degrees

1. Line two baking sheets with parchment, and spray parchment with non-stick coating (this is necessary)

2. In a large bowl, mix powdered sugar and cocoa. Whisk in vanilla, salt and egg-whites, starting with just two, you can add more if necessary.
IMPORTANT: The batter should be just moist, and thick like brownie batter. It should not flow like water, but should be thick but a little runny. If it is not this way, add another egg white or two if necessary.

3. Add in chocolate Chips. Stir, and use a teaspoon to place batter on the cookie sheet. Space them well, as they spread.

Bake 9-12 minutes, remove and let cool completely. (Yield 30 cookies).

THESE ARE AMAZING. Seriously, you do not need to have a gluten problem to enjoy them.

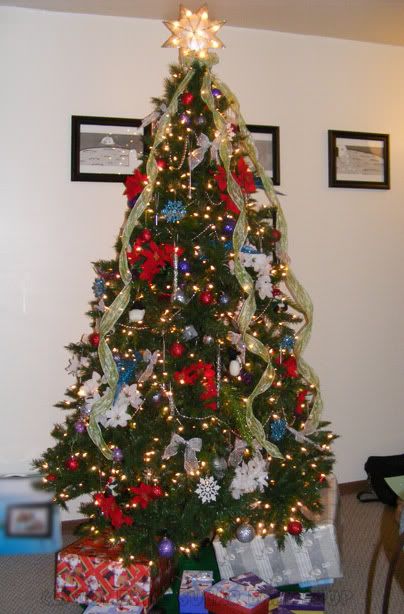
Now, here's my favorite part. I promised a while back that I would post up a picture of my tree. It is finally done. I had to pick up some new bulbs and a few extra flowers to fill it in, but I finally feel comfortable showing it off.


Here's wishing you all the very best of the season. It may seem trivial, but it gives me great joy to know that this blog has people who read it; to me, the greatest gift is your patronage. Thank you all so much for making Domestic Sugar what it is.

Cheers!

post signature

Saturday, November 5, 2011

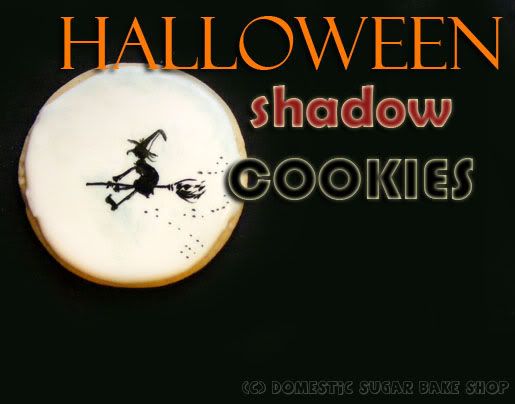
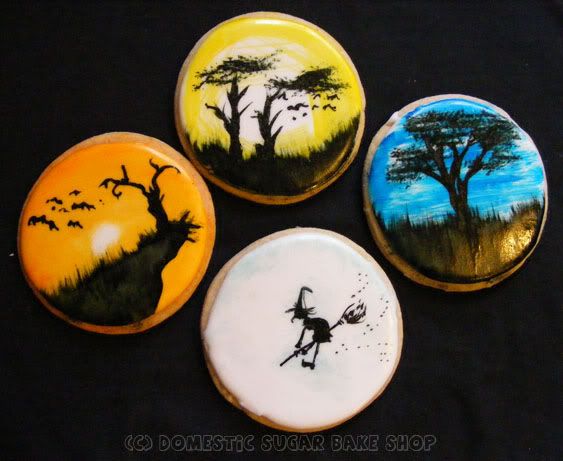
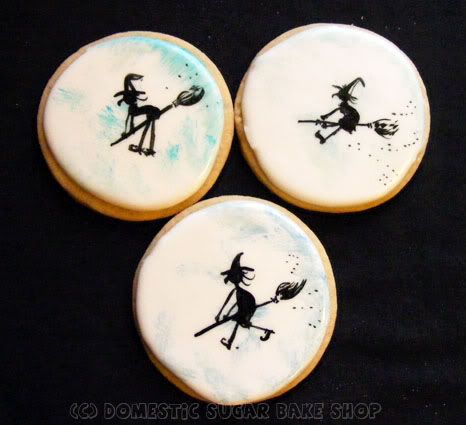
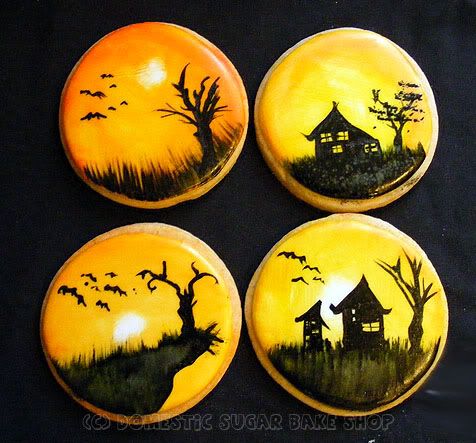
Halloween Shadow Cookies

Okay, I am well aware that Halloween is officially over, but I thought I'd give it one last post.

Last year I made Bat Cookies on a Stick, so this year, I decided to make something different:
Enter The Shadow Cookie!

You see, I live in a sad apartment in the middle of nowhere. The thing about Halloween is that the only children we see are those who live in the apartment; generally they come by to show their costumes before they go to the busier streets. Anyway, long story short, I don't buy candy. Instead, I make and give out cookies. I usually write my address on the bag anyway, but Linkpeople know who I am here. :)

Thanks Arty McGoo for the great inspiration!
These cookies are really easy! I simply used food a white flood for the back, then dry-brushed on some food colouring for the background colour. Finally, I used diluted black colour to paint on the front picture.


Honestly, I like the witchy-moons the best.

Hubbie found the scary yellow the best.


When I look at these, I always think of "Scary Stories to tell in the Dark", You know, those spooky books with the great art that everyone read when they were young?

Okay, Halloween is over. Now it's time to get into the Christmas spirit. Hubbie has a rule; no Christmas in the house until November is over... luckily, a friend of mine brought some Christmas in when she bought me some beautiful snowflakes for my window! LOVELY!

Until next time!

post signature

Saturday, October 15, 2011

Rainbows, Butterflies, and a girl's dream!

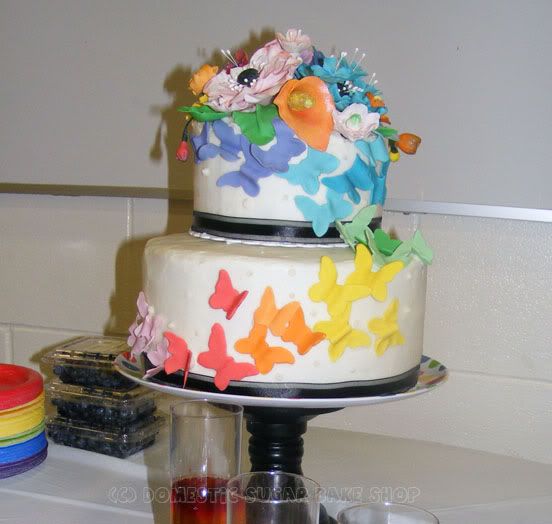
If you were asked to create a colourful cake that included the theme of rainbows for a 4 year-old girls' birthday, what would you say?

Could you say no?

No, really, Could you?

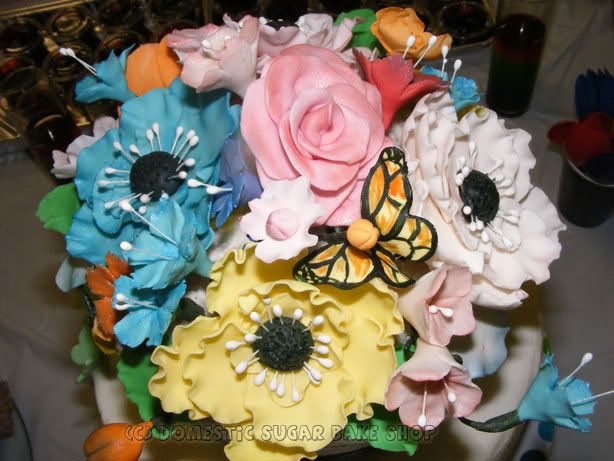
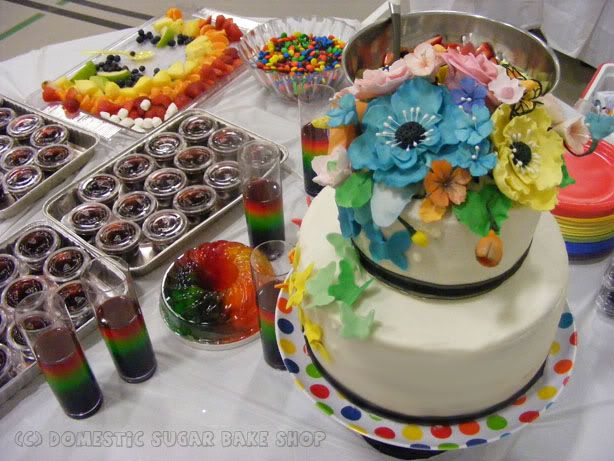
I could not! This project was just too fun to avoid!! All week I've been making sugar flowers and sugar butterflies for the perfect birthday cake.


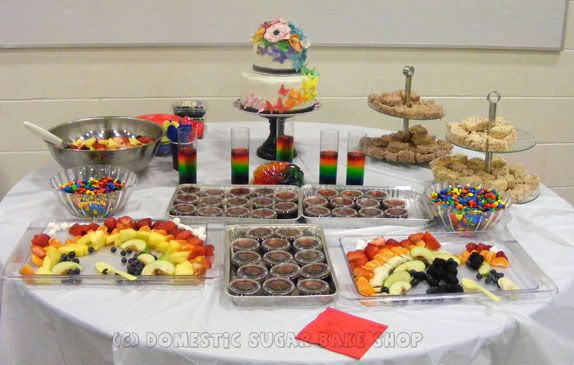
The party was an oasis of colour, big rainbow balloon archways, rainbow balloons everywhere, rainbow parachute, rainbow building blocks and streamers, rainbow tutus... :: dies :: The colours were spectacular. As a centerpiece on the dessert table was my cake.


No, this time I did not make the dessert table, nor did I eat all the fruit off of it (as some who know me might have suspected). I simply brought the cake... enjoyed the company, and took photos. Had I forethought, I would have removed the napkin from the center of the table before the photo was taken!

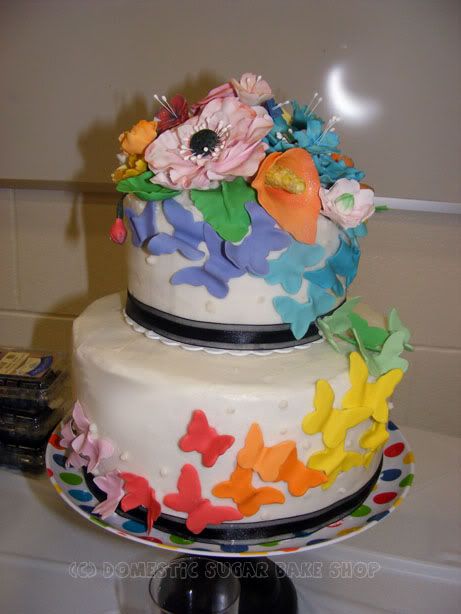
Now of course you can guess that the cake is a rainbow cake. Since the party is still going on, I have yet to acquire a photo of the cake being cut, something I am quite anxious for.


Again, for sugar flowers I choose anemone flowers (tutorial here), cherry-blossoms (tutorial here) blue bells (which use the same technique as the cherry-blossoms), leaves and of course, calla lilies. The display was mounted on an un-flattened cake top that I allowed to dome to give the whole set a little more volume. Over the edges of the cake I attempted to drape blue-bells and sugar blossoms (both open and not) to give some motion to the cake.

Flying up the sides, I used gumpaste-butterflies which I cut out in rainbow colours. I adhered them to the cake using crusted buttercream, which acts as a glue. Since the wings were worked to be nice and thin, they were very light on the side.


In total, a complete success!


For now, I am thinking Halloween. I've got my costume and some great cookie ideas. I cannot wait to show all of you! Hubbie has been chastising me for wearing my costume around the house (it is decent I swear). I just ABSOLUTLY freaked out when I got it. It's so fun! You'll see :)

Now, I have some work to do! Have a great weekend!

post signature

Thursday, October 6, 2011

Youth Leadership Conference cookies

HURRAY FOR YOUTH LEADERS! This post come a little late, as these cookies were made for Monday, but given the AWESOME weather we've had, I simply delayed posting them.

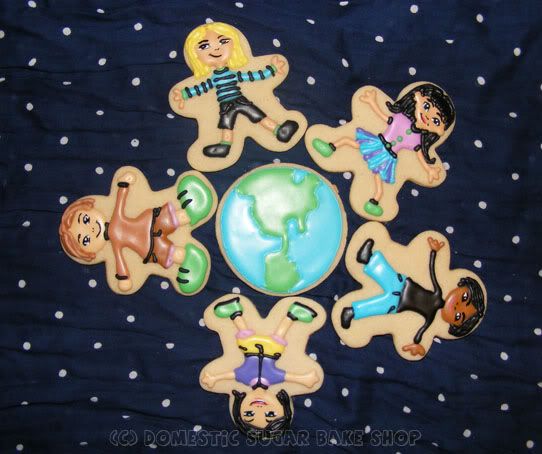
At our school, we have a group of students known as "Peer Mediators," whose job it is to help their fellow students resolve conflicts and provide a positive role-model to the younger students. As a reward for their efforts, our school requested some special cookies. Who could say no to that?

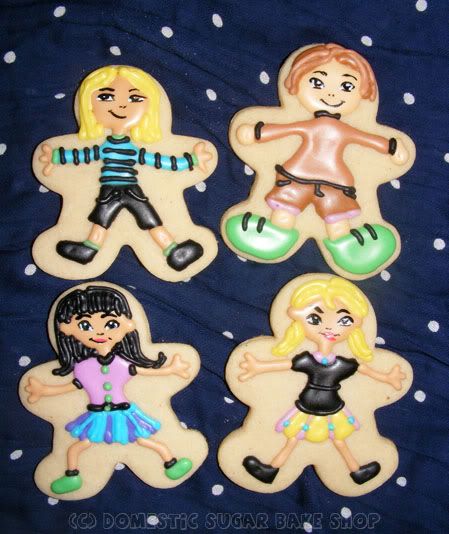
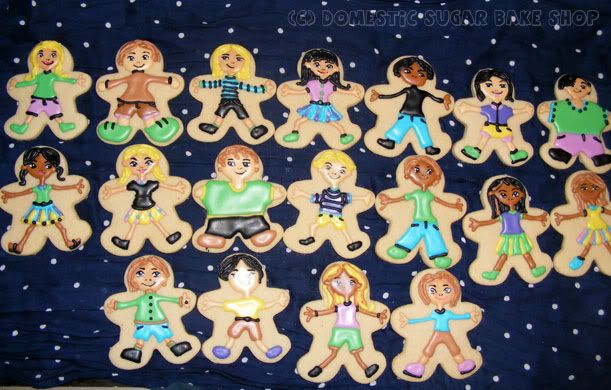
Each cookie was made as unique as the children; no cookie is the same. I made them in the same way I made my Cheerleader Cookies but I feel I've refined the process a little more.

But... there were quite a few kids. I was asked to do two dozen cookies (Some Earth cookies, some kids). Here are the kids; each one is unique (My apologies for the bad photography)!


Of all the cookies, this one was my favorite:


So, this weekend is Canadian Thanksgiving (Le Jour de Grace). My parents are driving down here to celebrate. So far, the cabbage rolls are done, I'm thawing my turkey. My soup is ready. Bruschetta is stewing... so much preparation! Happy celebrations to all!

post signature

Monday, July 11, 2011

Sugarbelle's Flower Pot Cookies

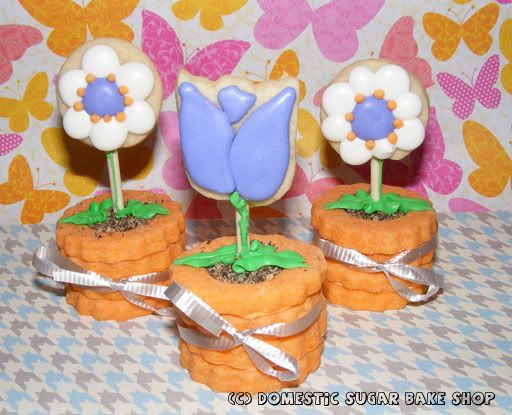
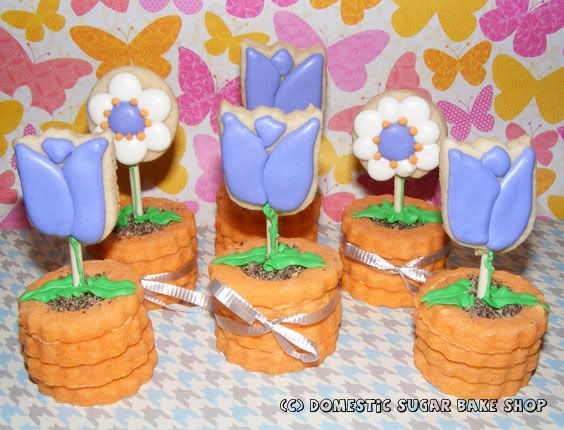
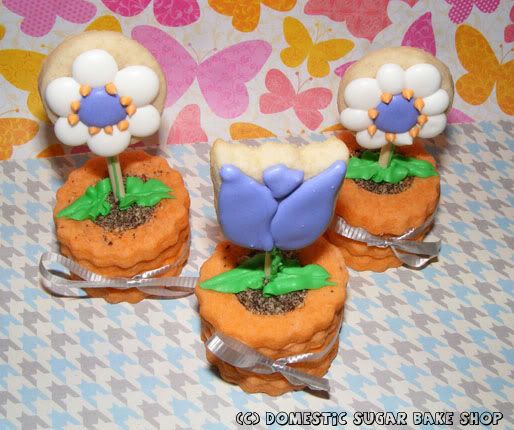
I absoolutely adore Sugarbelle. She has talent, enthusiasm, and is very creative! So, when I saw her flowerpot creation this past May, I just had to try it out.
The best thing about her creations, is that they are all very unique. I love that at any given time, going to visit her site, you'll find something quite inspiring, with great colour and beauty.

I realize my little flower pots are nothing like hers, but I think given my intention (to give away) and my love of decorating, I am quite happy with the result.

These "May" flowers are super easy to make. Actually, I didn't do a tutorial on them because Sugarbelle already did, but you simply stack round cookies and stick a cookie-on-a-stick in the middle. For my creation, I used cookie-crumbs for dirt.


(Mandatory Top View)

Well, my camping trip this year got cancelled. CRY! But that means I have more time to get cookies done. I have about 3 unposted things to go up... if only I weren't lazy. The truth is, getting the house done is a lot of work. I've not said much about it recently because there's been little to talk about. A lot of decisions, but no real work has gone up. I guess my contractor is a little behind already! That's okay... it gives us more time to pick out fixtures and colours.

Ah well... I'm off to go swimming again (gone every day this week)

Splish, Splosh!

post signature

Saturday, June 25, 2011

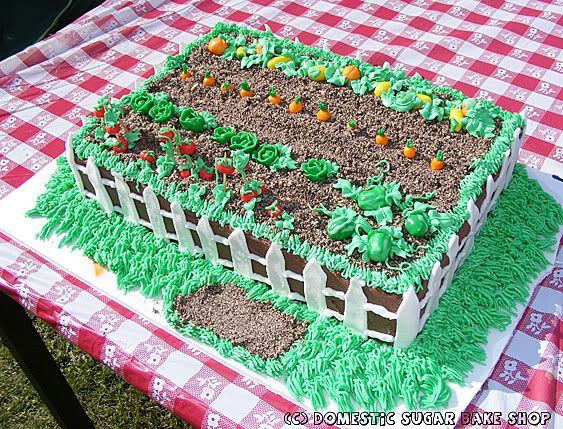
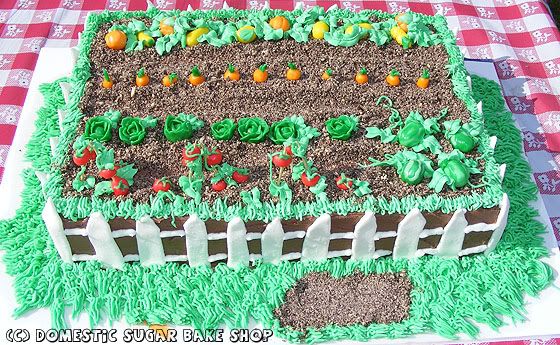
Veggie Garden Cake

HURRAY FOR SUMMER!

I am officially on summer break. Tests, reports, and all that other jazz are done for the season. Now, it is time to kick back and relax, and celebrate a great year. For some of us teachers, the end is nigh... one of our dear friends has retired (he did not die). Now, his big plans are to garden, and what better to do than to celebrate with a cake.

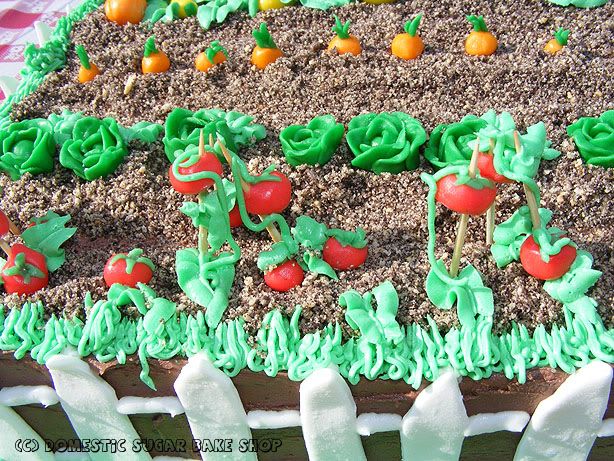
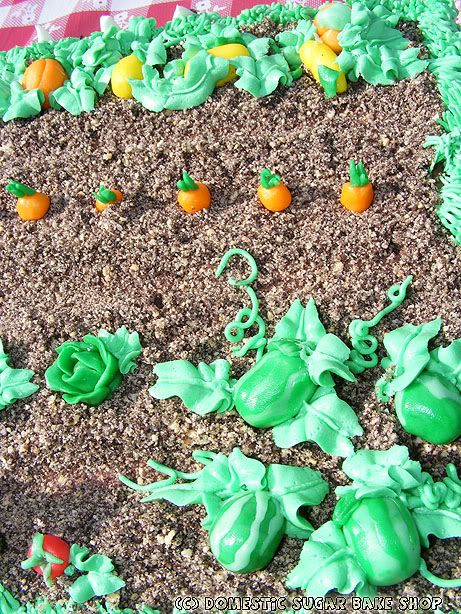
This is just a regular slab cake, decorated with chocolate buttercream (regular for the grass) and decorated with chocolate veggies and cookie crumble dirt. I think that smooshing cookies to make dirt was one of the many tricks my mom taught me that I use over and again! Totally great for cakes!Link
The posts are made of MMF cut to look like picket-fence posts. The lines in between are white piped buttercream.

I made modeling chocolate veggies, then added some flare with regular buttercream. For lettuce, I used the regular Rose technique, adding 'pettles' or 'leaves' on through overlapping layers. For the tomatoes, I stuck them into a toothpic tripod then piped some green leaves and vines for effect.

Add carrots (a favorite) and watermelons and we are good to go!


All in all, the effect was great. Said unnamed teacher requested no photos (he's shy), but that's all right! It was a great party, and a great cake, and he's a great teacher. We had a blast.

Well, I'm off for a few days vacation. I hope everyone stays safe. Play safe!

post signature

Thursday, January 27, 2011

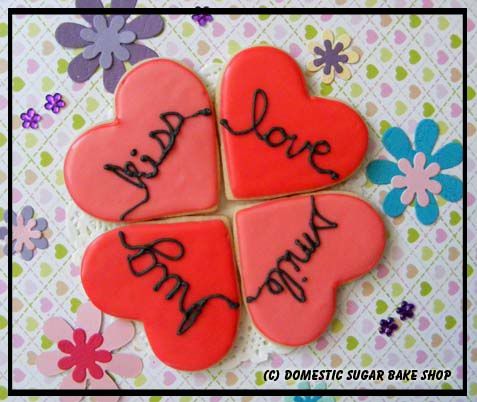
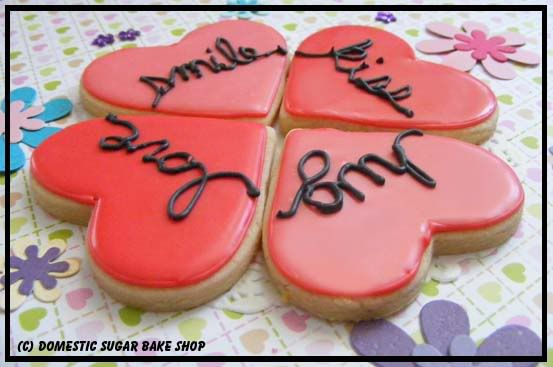
Messages of Love

Still playing with the hearts. This time, I decided to make little messages of love. I figured, why not, hubbie needs some reminding every now and then!

I think what I like most about these hearts is that they fit together nicely, and they flow together. Where one word ends, another beings. Okay, maybe I'm being the English teacher I knew I was, but it is a symbolic cookie.... Yeah, That's Right!


Now, to get ready for a new cookie design. Super excited about this design, I hope it works out!

Until then!

post signature

Monday, January 17, 2011

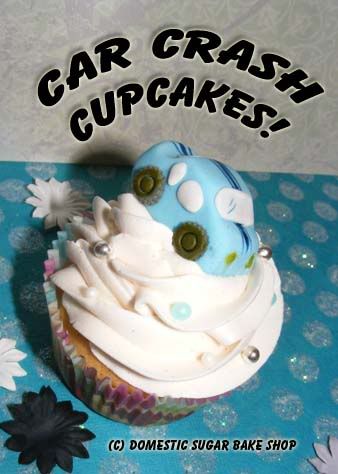
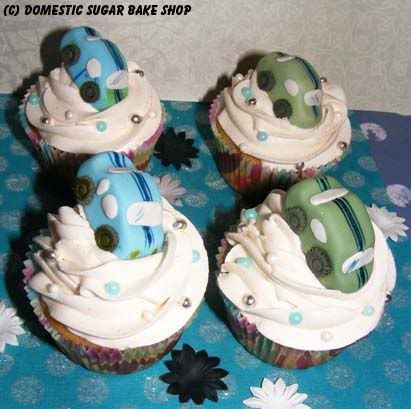
Car Crash Cupcakes + Car Tutorial

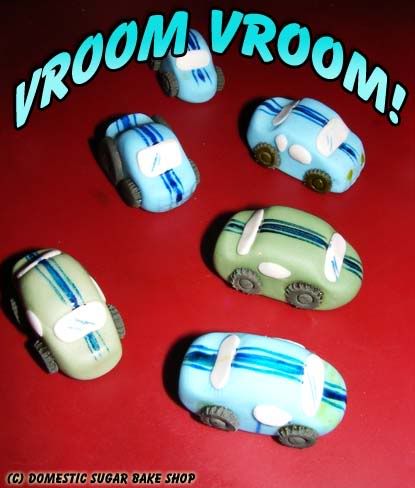
Today's post is a bit of a double-whammy. Not only am I going to share a great story, but this post also comes with a little tutorial on how to (or not) make banked Cars in the snow - Car Cupcake toppers. Totally simple, super fun, very yummy!

The Story!

These cupcakes were inspired by my hubbie, who always seems to get into trouble. For example, this weekend past, I drove us into the country to visit a lovely couple who had just built a home similar to the one we are going to build. There had just been a recent dumping of snow, but nothing uncommon for North-Western Ontario, so I chugged along the small back roads slowly and cautiously.

After the day was through, and we had visited enough (LOVELY HOME, MAY I JUST SAY!), I asked my hubbie to drive home; I was feeling a little under the weather and did not want to drive. So, with the keys in hand, he drives 30 feet when, WHAM, we hit the side of the road and banked in the snow. Now, remember, I drove us there from town down the same road (which is about 5 mi, and did not get us stuck. He drives 30 feet and we are done. :: sigh ::

Now, in the country, there is a lot of snow, and most is not packed, so the stuff we were stuck in was very soft, very deep, and we caught an angle that was impossible to get out of without help. Dig and dig we did, placed boards and revved engines, but to no avail! Our poor hostess was forced to come and help us, and I felt terrible~ Even she could not get us out after 2 hours of trying! (and us Northerners are quite good at getting unstuck from snow)!

Finally, we called in for help. A friend with a 4X4 came and pulled our car out of the bank. THANK YOU SOOO MUCH!


Now, here's where the cars come in. Notice they are not square on the cupcake as I would normally place them, but rather, they are tilted. Well, much like those cupcakes, our car was stuck at an odd angle. These cupcakes are 'thank you' gifts to the wonderful hostess and her friend who came and saved our Canadian Bacon!

To clarify, I ended up driving home anyway, and did NOT get us stuck!


So, Now you too can learn to make cars for your cupcakes (and place them nicely so as not to be stuck like mine!) Here are the steps:


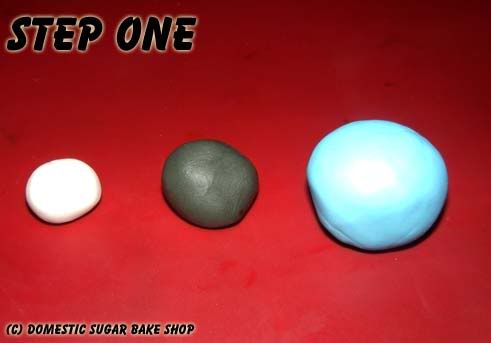
You will need three balls of fondant or gumpaste (I recommend gumpaste for these). You will need Black, White and another colour (any will do).

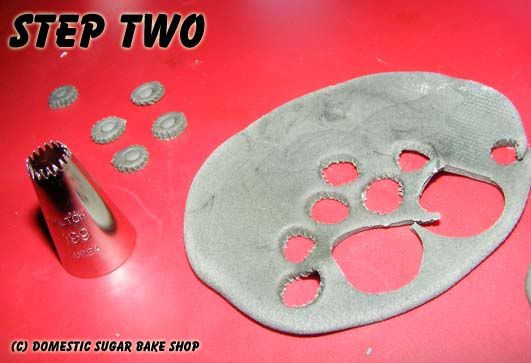
Step two: Roll our the dough and with a Wilton 199 tip (or any small round tip), cut out circles. You can use another tip to add in the center circle for the hub-cap too. Let these dry while you do the next parts.

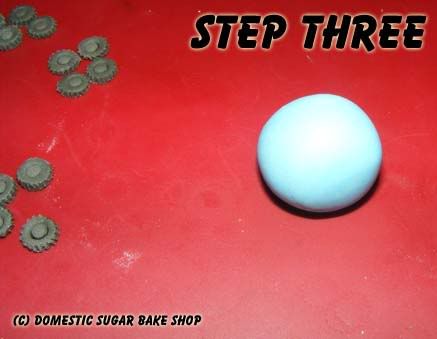
Step Three: While those wheels dry, take a small ball of your dough and roll it out into a circle.

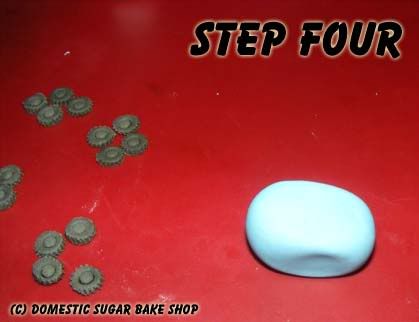
Step Four: Shape the circle into a nice rectangle. Do your best to get each side flat.

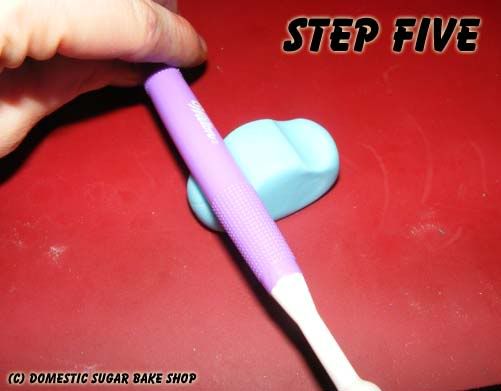
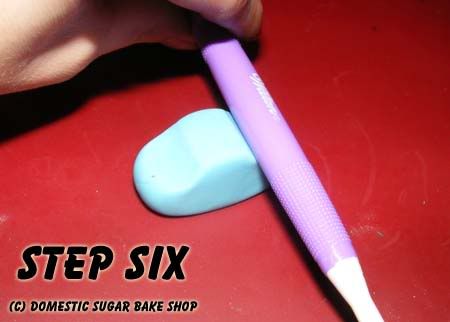
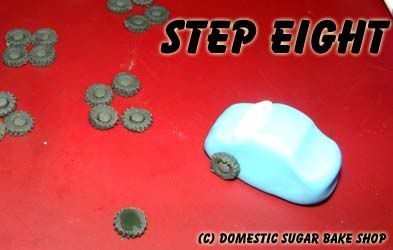
Step five: Using a pencil, pen or a fondant tool, shape the front end of the car by pressing down on the front of the rectangle.

Front and back! Remember: For the back, you do not want to push it as low as the front. It should be slightly higher than the front end.

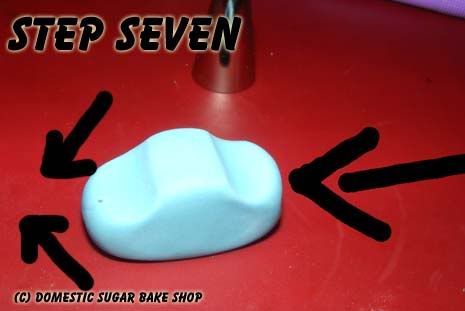
Now, to get a nice car shape, you will want to pull the front lowered part (engine part) in a little, not quite a triangle. And to get the back nice and shapely, push it flat with your finger. Even if this part is not perfect, the car will look great!

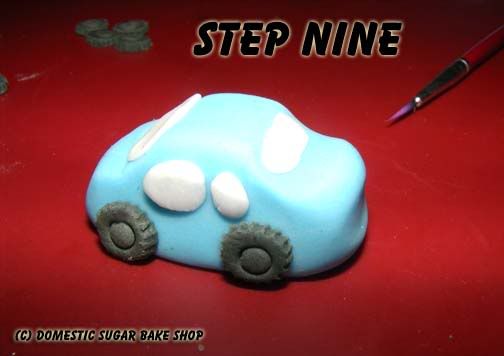
Now that you have the shape all done, add the wheels. They should be dry enough to handle. Simply dab on some gel or some water and press them lightly into the car.

Finally, add in the windows with the white dough. Simple shape long thin slices of the dough, then round slices. Apply with water again and let set.

To add in the car's detail, simply dilute a little gel-colour (like Americolor) and paint on with a thin-tipped brush. I like the racing stripes!


Hope this helps you! And maybe next time, I'll make sure I drive home and avoid the snowbanks!

post signature