Saturday, April 30, 2011

Wizard of Oz: Dorothy Cookie and my Cookie Recipe!

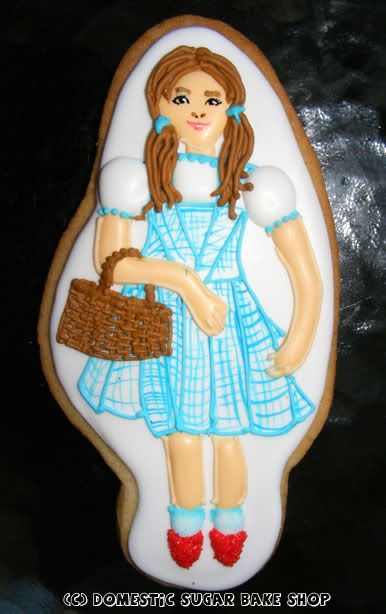
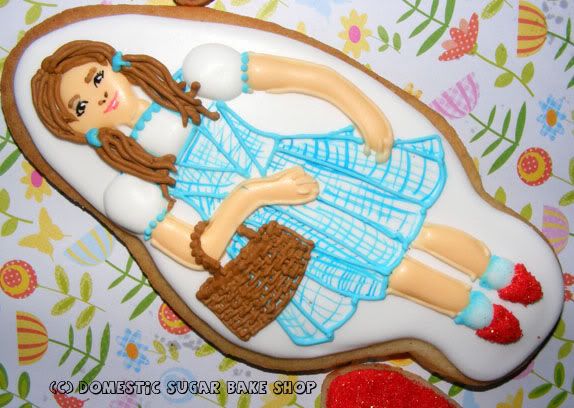
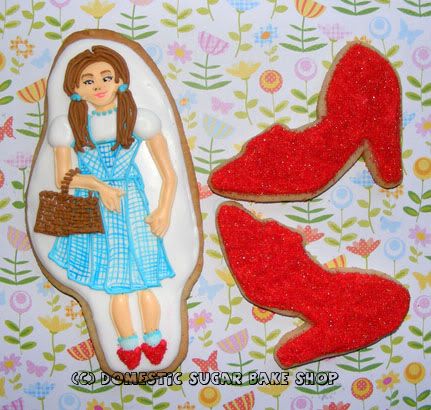
EXCITED! Fort Frances High School is doing a production of THE WIZARD OF OZ for this year's musical. To celebrate, I've made a Dorothy Cookie! This cookie not only highlights the event (for those in the Fort that read this), but it also goes to celebrate the birthday of the director! This cookies are my gift to her for all her hard work!


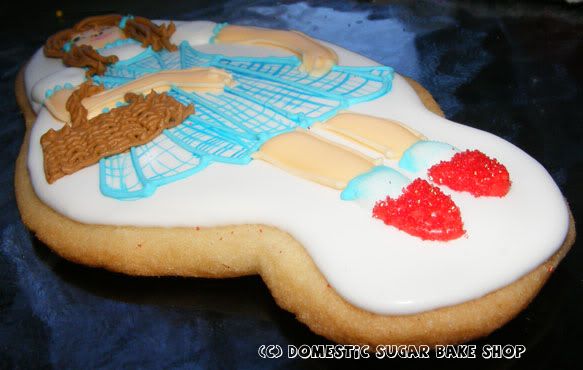
I was super excited to make these cookies, they literally took all day to do. Each part must dry before the next can be made. For this cookie, I had about 9 steps, each one coming together to make the final product. I love the basket, I think that was my favorite part. Either way, the end product of one day's decorating was TWO Dorothy cookies and THREE Ruby Slippers. How sad? So much work! Such a great product!

Now, many people have asked me about my own recipe. And, truth be told, I've intentionally never placed it up. Maybe I was being sentimental, but it was something that I wanted to keep to myself. How selfish am I?

Anyway, I've finally decided to share my recipe with all of you. I hope that you will enjoy it. Try it out for yourselves. It is a pretty traditional recipe, except the spices, which I believe really add a lot! Tell me what you think, okay?

Domestic Sugar Cookies:

1 c sugar
1 c butter/margarine
1 lg egg
1 tbsp vanilla extract (real is best!)... beans are even better!
1/2 tsp cardamom
1 tsp cinnamon
1 tsp baking powder
3 1/2-4 c flour (Depends on humidity) + 1/3 c for dusting

DIRECTIONS:

1. Cream butter and sugar (whip until fluffy). Add egg, vanilla, cardamom and cinnamon. Mix slightly.

2. Add in baking powder and flour, mix until the dough is just JUST not-tacky to the touch (should not stick to your fingers, but should be sticky.

3. Place dough in fridge for 1 hour. Take out a small ball (1/3 of the dough), and roll it out on a lightly dusted surface, roll to 1 inch thickness. You may need to lift dough and dust underneath. I use a pie-scraper for this, works great!

4. Cut out desired shape, place on a cookie sheet (I use parchment to prevent sticking). Place in the freezer to chill for 3 minutes. In the mean time, pre-heat oven to 325 degrees F. When the oven is good and ready, place cookies in the oven and cook for 7-12 minutes. This will depend on the cookie shape/size. Smaller cookies cook faster. Cook until the edges are JUST brown.

Remove and cool. DECORATE! OH-YEAH! :: does vector hip-thrust ::


Coming Up: How-to? Dorothy Tutorial!


post signature

Monday, April 25, 2011

Princess and Pirate Party

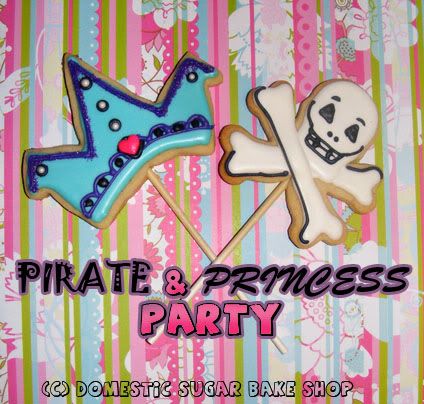
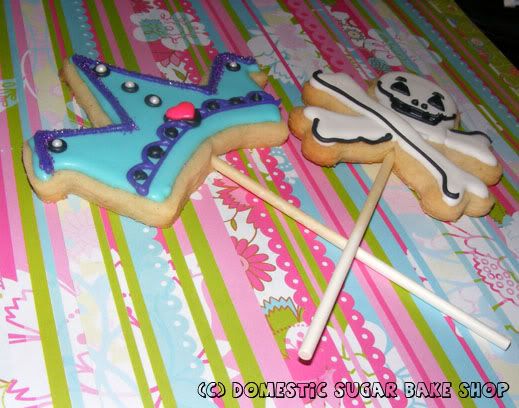
I hope everyone had a great little vacation. I know I did! I think it's been a week since I did any baking! I did do a lot of cooking, making Red-Pepper Squash soup, and Cinnamon Buns. Last week, I made cookies for a very special little girl named Piper. For her special birthday, she decided she wanted to be a princess, but the problem is that she is quite the tom-boy, and had a lot of boys (who are friends) attending. What to do? Well, as inspired by many Party Moms out there, her mom decided that the best way to approach the problem would be to amalgamate the boyish and girlish into one great party! Princess-Pirate Party ahoy!


On a whim, she had asked me if I would be willing to make some cookies-on-a-stick for the party bags. How could I say no, especially when she and her husband have been so kind as to invite me to watch UFC - Ultimate Fighter Championships - at their house on various occasions. (Yes, I actually got a taste of MMA - mixed martial arts - and have become a fan. It's like a dirty secret!)

The colours of the crowns are exactly similar to the party invites she had - safe for the heart being at the bottom rather than the middle. If you'll remember my last crown post, you'll remember that these cookies (the crowns at least) were made using a cottage cut out and I just sliced and diced to get the right shape. I like the unique shape, and owning one less cookie cutter is always a bonus in my home!


Now, wrap these babies up in a little cello and they are good as gold! A sweet and cheery way to enjoy a party's end.

Now, I have to go laugh my buns off while Tony Horton helps me to work out. For anyone who has ever done the P90X or the 10-Minute Solutions videos, you'll know what I mean. Lets just say, he was not that great of a comedian, but he's pretty.

Until Next Time!

post signature

Thursday, April 14, 2011

More Easter Cookies

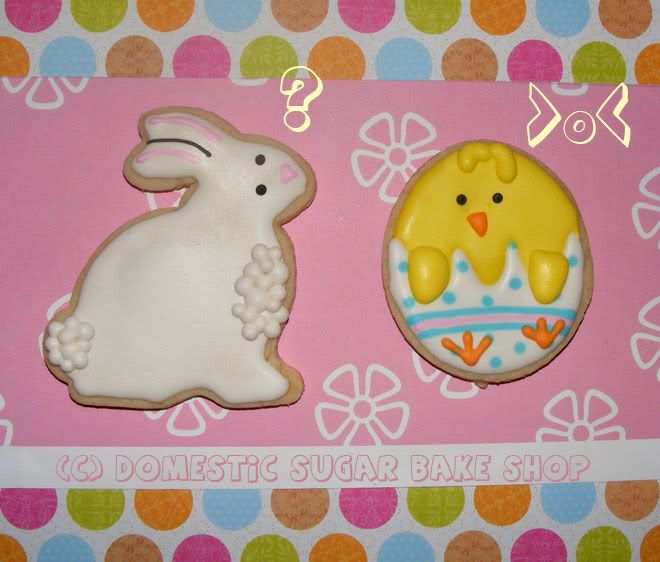
There used to be a silly cartoon called "Bumb Bunnies" that some kids I looked after used to watch. The premise was that the bunnies were socially inept, they did not read social cues or even understand how to dress themselves properly. When I made these bunny cookies, that show came to mind. The simple look of the bunny, in comparison to other types of cookies or animals, gave me the impression that these bunnies did not know social cues (if that were even possible for a cookie).

But, I suppose that is what makes these cookies so adorable. First, you get the impression they are clueless, maybe they don't quite understand their place on the food chain. Then, it slowly becomes evident, as I continued to pipe away, that these particular bunnies were truly, not too bright...

I guess it goes to show you that something that is delicious does not need to be particularly smart, or good for you... or :: insert moral here ::

Instead, I figured that my Easter cookies this year should keep with the cute design rather than the classic. More chickies please! But there is an issue, which came first?


Okay, that's my rant for now. Happy Easter Everyone! I can't wait to see what you've all whipped up!

post signature

Sunday, April 10, 2011

Check out what just hatched!

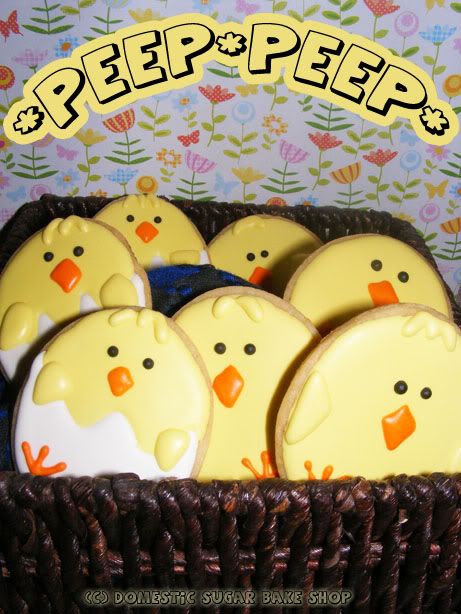
YAY for Spring! My little chicks just hatched! No really, here's what I found when I woke up this morning:

DIES! SO CUTE!

>_> ........ <_< ....... ^____^;

What, you don't believe me? Well, okay, so maybe it's not the case, but these cute little chicks are so amazingly adorable! And super easy to make. I am in such a spring kick this week, maybe it's the weather. This weekend, the temperatures in the Fort went as high as 16 degrees (Celsius). Which, for North Western Ontario, is actually quite amazing! I love the feel of the sun. It is almost time to crack out the heavy-duty sunscreen moisturizer (you should wear it daily!) Now, we've got lots of rain, which is washing away all the dirty snow. HURRAY! Perfect weather for baking!

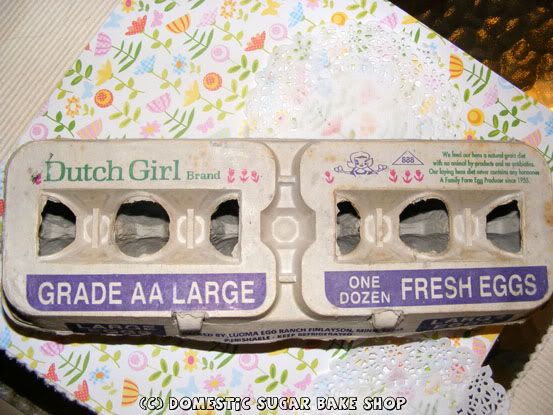
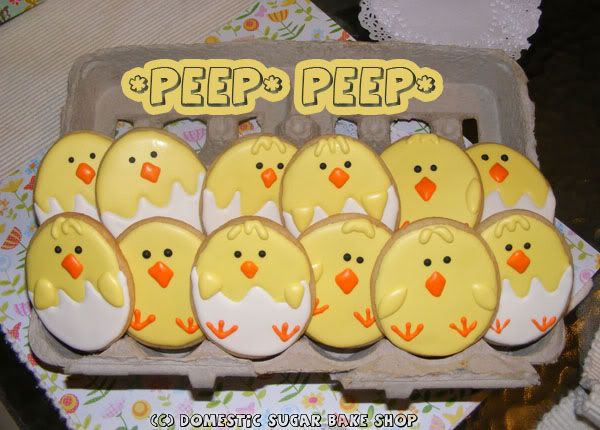
Anyway, on my run, I picked up a dozen eggs. Strange thing about the inside...


HAHAHA!
Okay, so at this point I'm not fooling anyone hun? But still, look at the cute little chickies!
While I may not be fooling anyone, I certainly am having fun. I love spring because of the renew of energy people get. I am certainly looking forward to the coming summer.

On the house note (and summer note) gone and seen quite a few houses that our contractor has built (many in the same general design of our home-to-be) and I must say, I am so very excited to get this party started. I love my property so! I am bursting with excitement at my new, large, fancy kitchen! Oh well, I'll make due with my picnic table dining table for now (yeah, we use outdoor furniture inside... to save... our..... *mumbles*).

HURRAY FOR COOKIES AND SPRING!


post signature

Sunday, April 3, 2011

How To? Barbie Catwalk-Cake Tutorial

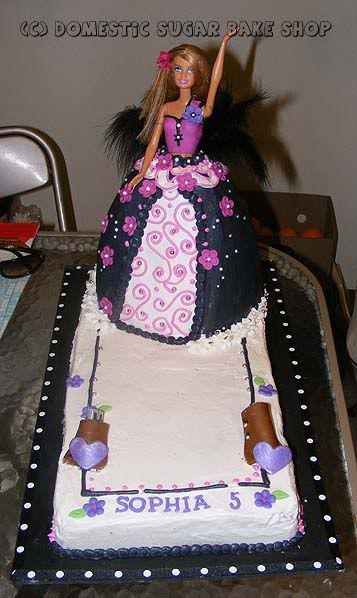
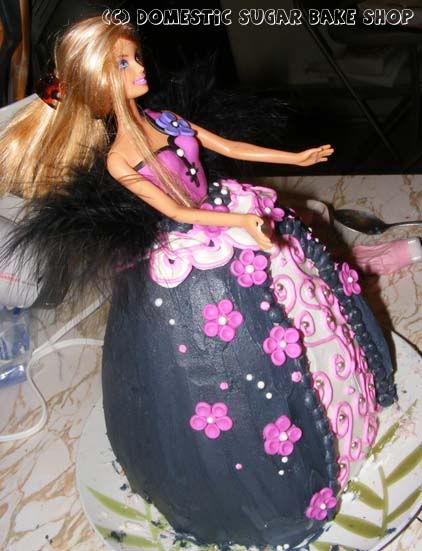
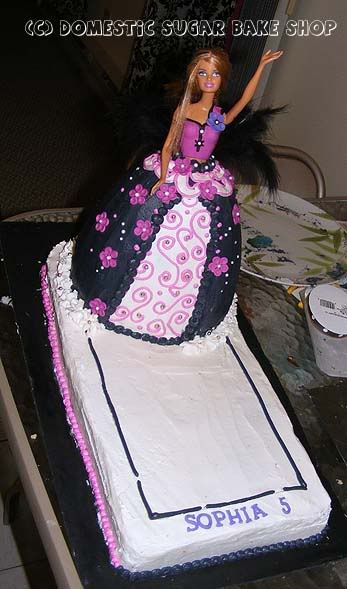
I trust everyone had a great weekend! Despite getting sick today, I've had a wonderful weekend! Allow me to show you my second cake this week. The Barbie Catwalk Cake!
This cake was super fun to make. Despite my reservations about making it, and despite the fact that it took oodles of cake to actually produce, I had a blast making it.

Wonder how it all came together, or want to know how to make a Barbie Cake yourself? Here's a sneak-peak on the making-of Barbie Cakes (Made in buttercream).

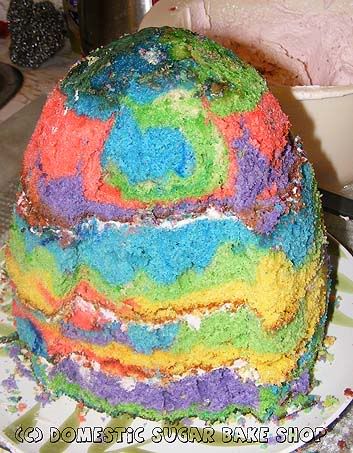
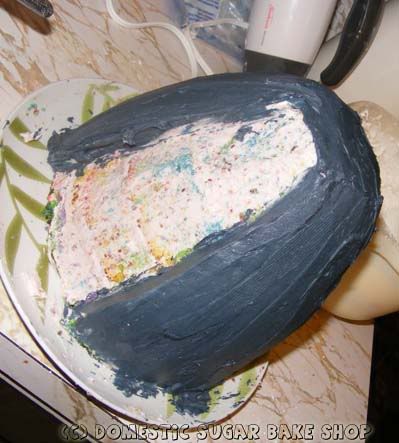
First thing to do is to stack your cakes. For the height of a regular Barbie-doll, I used three 9 inch cakes and one 6 inch cake for the top (which I let slightly dome in the center). Ice the in-betweens of each cake and stack. WARNING! MAKE SURE TO CUT OUT THE HOLES IN THE CAKE FOR BARBIE'S BODY. YOU CANNOT SIMPLY STICK HER IN AS IT WILL CRACK THE CAKE. To do this, simply use a round cookie cutter and cut out holes in the direct center of each cake progressing up to the top layer. (not shown)

Allow them time to settle a little, about 1 hour.Carve into the shape of the dress. For this particular cake, I decided to do a ball-gown style with a RECESSED center panel. To do that I cut into the cake and then slowly carved out each cake block until I had a nice little pocket in the dress. You can't see it well until the next picture...

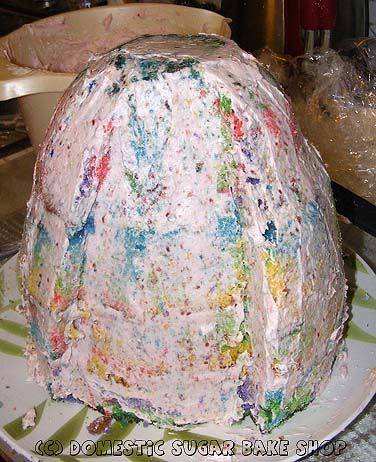
There we go! Now, Dirty ice the cake (making sure the icing is as smooth as possible and place in the fridge. The cake will continue to set and it will also harden the icing on the outside.

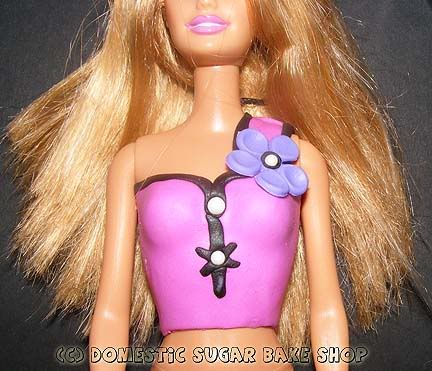
While waiting for the cake to chill and relax, you can go on to your Barbie doll. For this part, I used a little bit of Fondant. I just cut out the shape of a top (front and back) and designed a simple design. Since this cake was made to match Barbie's lipstick (Pink/Black/White), I colour matched the fondant to compliment her face. So pretty!

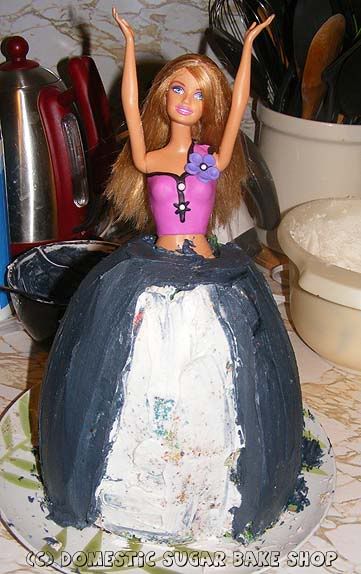
Once you've got her all prettied up, it's time to actually ice the cake. To do this, make sure you have very smooth butter cream (do this by using whole milk or cream that is whipped). Choose your colours and begin the apply the buttercream. For this part, I used black on the outside of the dress. As you can see, the initial application is a little bit rough. That's okay! We'll work on that!

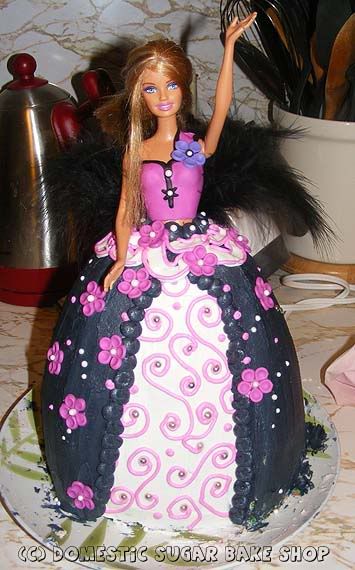
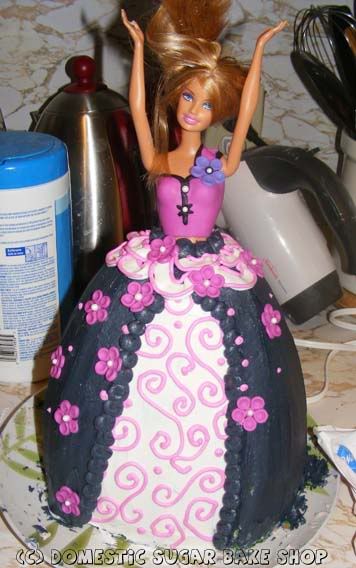
Now, Place Barbie into the center of the cake and smooth the black icing around her, then decorate.

TIP: To smooth buttercream on a cake. Apply a coat of buttercream as smoothly as you can, then allow time for the buttercream to crust (10-20 minutes). When you can touch the buttercream without it sticking to your finger is when it should be about right to smooth. The easiest way to smooth the icing is to take a piece of parchment (about 20 centimeters in length and width) and apply it lightly to crusted buttercream. Then, taking your hand, lightly rub it over the buttercream. Do this all over the cake. This will push down and bumps into the soft buttercream underneath and give a nice smooth coat. If you have a fondant-smoother, all the better!

Before....
AND AFTER!


Now, for this cake, I wanted Barbie to be walking down the catwalk, so I simply took 10 inch square pans and baked two cakes, cut them and filled them. Then, placing them side-by-side, I dirty iced, then iced them into a long rectangle. Next, I traced out the cat-walk on top, and placed the birthday girl's name and age on the end.

A catwalk is never complete until is has spotlights, and while they do not shine well in these photos, the two brown things sticking up from the cake are shining spot-lights on Barbie's walk down the walk. For this I used two key-chain lights and covered their casings with little fondant wrappers. You turn them on then cover them up! VOILÀ!

I hope that gives you some ideas on how to make the cake. Super fun! I hope you all had a great weekend like I did.

Until next time!

post signature

Friday, April 1, 2011

Spring Cakes

C'est le printemps! YOUPI! Je suis très contente!

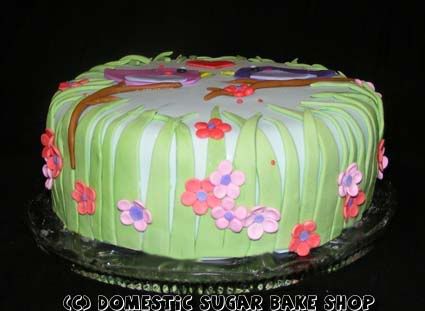
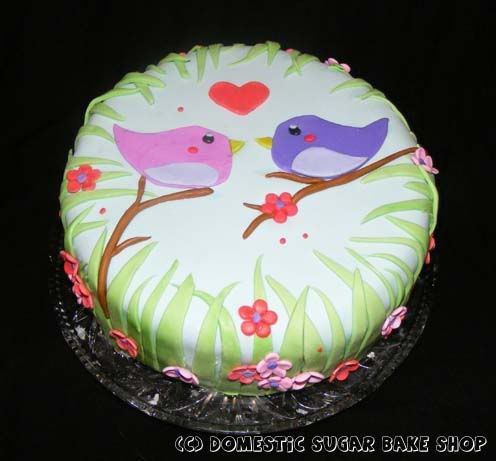
The closer summer gets, the more I dream about going swimming off the dock, or running in the cool summer air. There is so much about summer I love. But the best part (other than my soon-to-be-built-home!) is having friends over. My friends are so important to me. To celebrate a new-found-friend, I made this spring-themed cake.


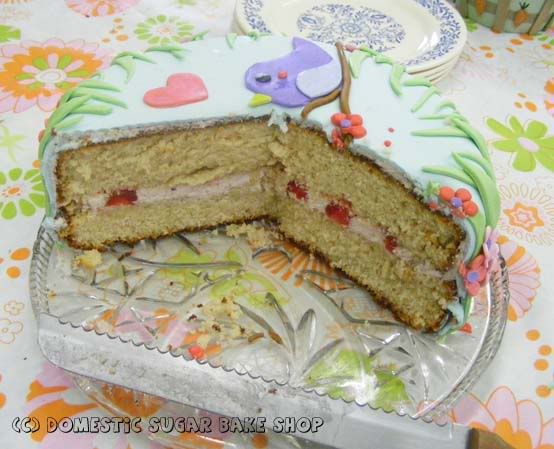
This is a borrowed design I suppose, coming from PetalSweet's blog. Check the original. But, mine, unlike hers, has a flat top. The birds represent the spring's arrival, and the love in the air. This is the time of renewal. I am super happy with the way this cake turned out, and so was the recipient.

If you were wondering, I actually got to post the inside of the cake FOR ONCE! There have been so many parties where I've been too busy or distracted to take pictures. It is also quite distasteful to take pictures of food when people are trying to eat. Anyway, the inside of this particular cake is a Vanilla-Spice cake with Raspberry icing filled with cherries and raspberries. It was an amazing combo! Super yummy.

Well, that's enough of the story-telling, I'm currently in the process of making one fabulous Barbie Cake. I have never made one, and it is especially difficult considering the request was NO FONDANT ON THE CAKE (DIES). Wish me luck. I'll chart my progress for next post.

post signature