Tuesday, August 23, 2011

Guest Post @ Snips and Spice


Posted on August 23rd 2011 at the

Hello Everyone
Meghan from Domestic Sugar here!


I love creating special treats that are both beautiful and edible. I am super excited to be able to participate in Cupcake Month with all these crazy good cuppy artists! Cupcakes (hereafter known as Cuppies) are the most adorable dessert. What privileged child does not have a great memory of eating a cuppy that was super crazy delicious. I remember going to a party once, to see these MONSTER cuppies with a ring of chocolate sprinkles and a crazy beautiful sugar flower in the center.

Anyway, this is my little addition to the party. I made these cuppies for my niece and nephew whom I love super lots!
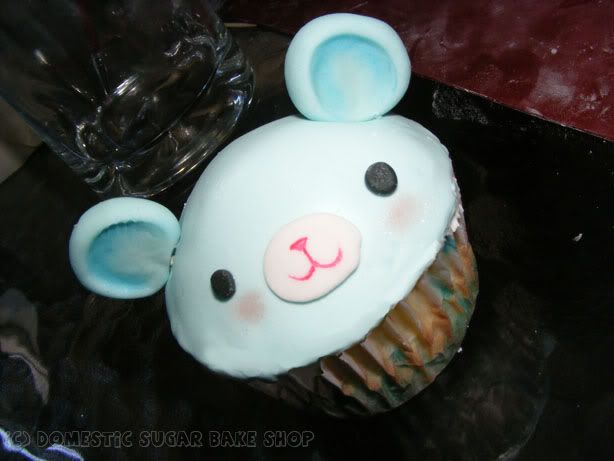
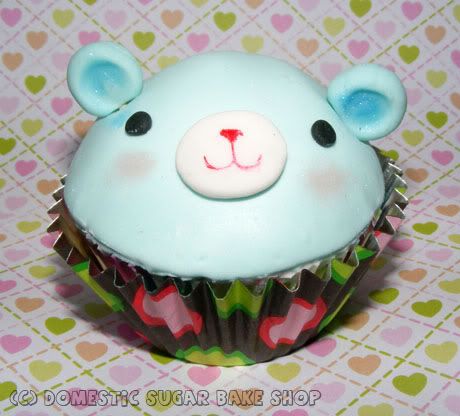
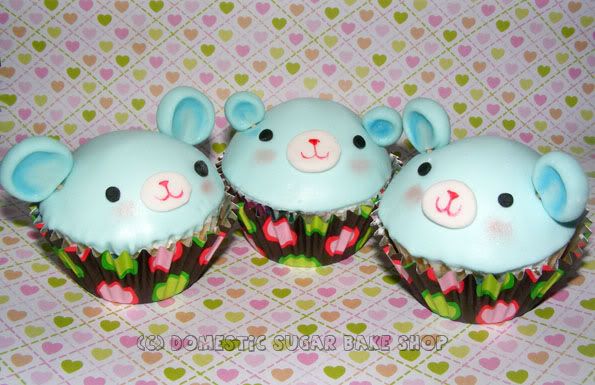
ENTER THE CUPPY-BEAR!


So, what will you need to make these cuties?
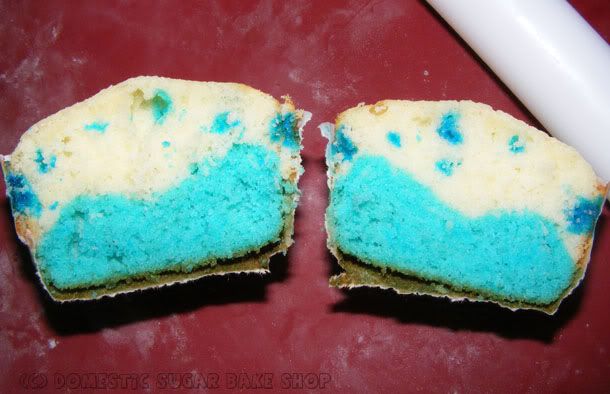
You will need to make some cuppies. Since these are cuppy-bears and they are blue, and it is raining (three reasons), I made some rainy insides:


To make the rain puddle insides, follow these directions, or just skip ahead to the Cuppy-bear part.

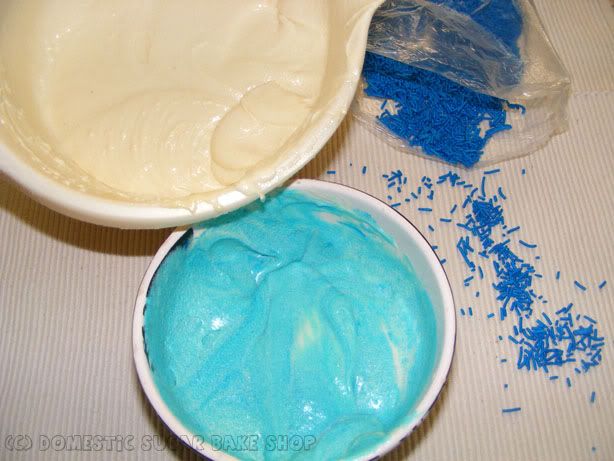
First, make a batch of your favorite Vanilla / White cake. It does not matter if it is from a box or from scratch. Take about One Cup of the mix out and dye it blue, leave the rest white. You will also need some Blue Jimmies (sprinkles) but I'll show you why in a bit.


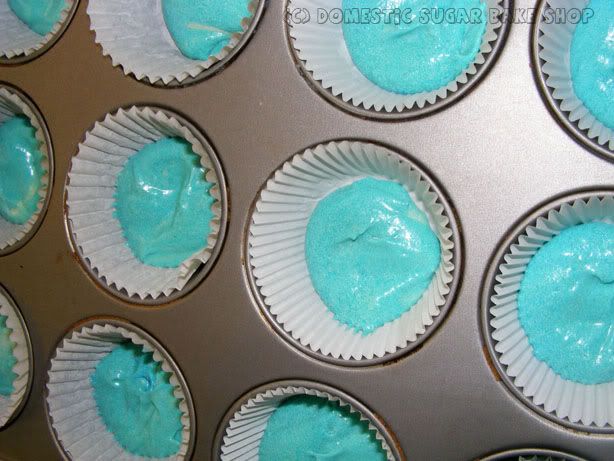
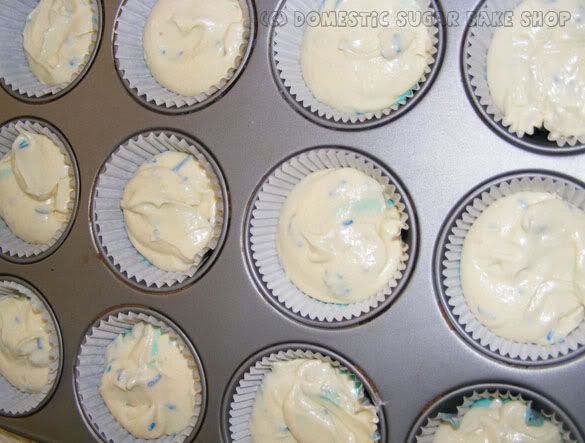
In your cuppy liners, fill the bottom 1/4 with the blue and spread it all about the bottom so as to cover it.


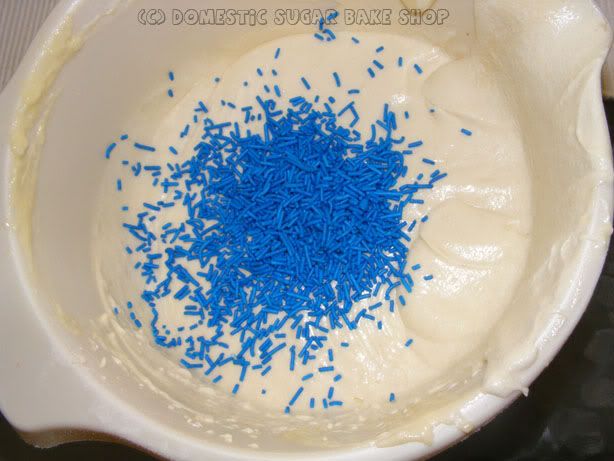
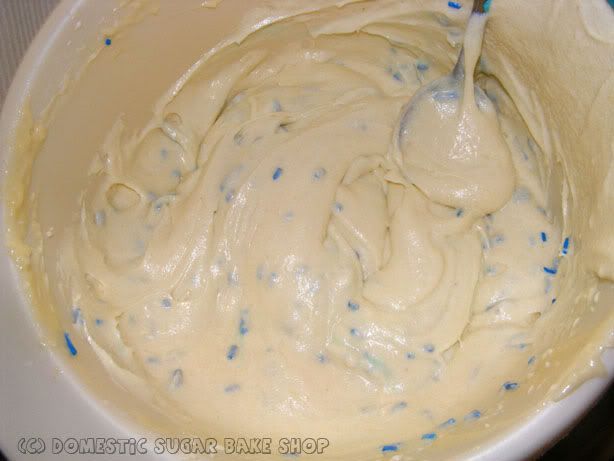
Now, go back to the white mix, and take about 1/3c of Jimmies and add it in. Stir lightly. Jimmies can bleed a little if over-mixed, so make sure you only stir enough to mix in.


Like so:


Now, fill the wrappers on top of the blue (3/4 to the top), and bake 'em as usual.


While those are baking, go to the decorating phase.
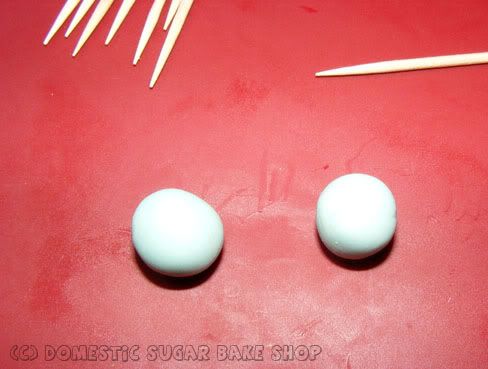
Take some gum-paste (any colour) and roll them into small balls. Try to keep them about the same size and not too big. These will make the ears of the bear.


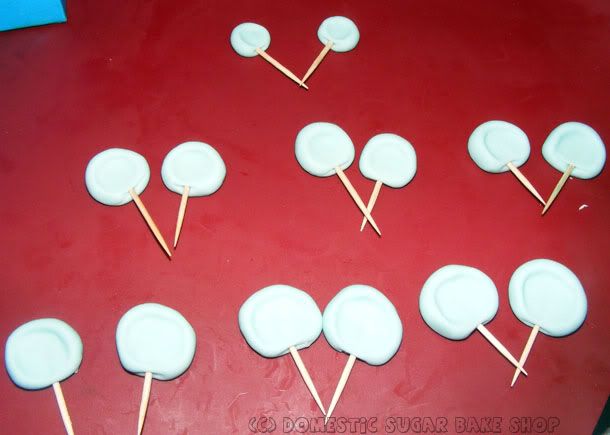
To make good ears, poke toothpicks into the bottom of the cuppy and then squash the center of the ear down with your finger. This will indent the ear, flatten it, and set the toothpick in.


Sets of Ears? CHECK!
Let those dry while the cuppies bake/while you get fondant and icing ready.

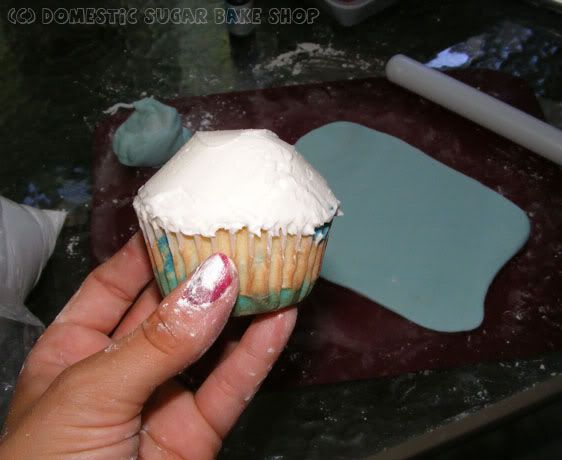
When the cuppies are done, and cool. Take your icing (whatever you choose), and using a butterknife, create a dome on the top! Make it as smooth as possible.


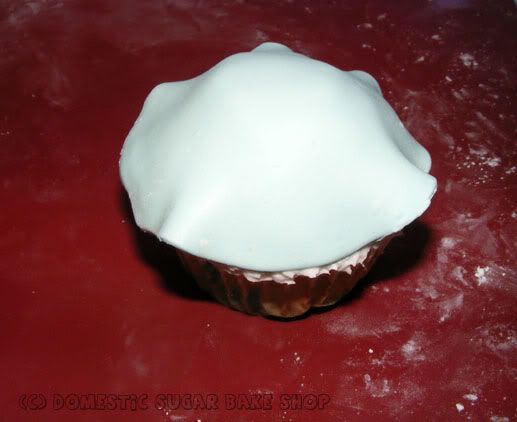
Now, roll out your fondant, and using a large circle-cookie-cutter, cut a circle of fondant. Lay the fondant on the the cuppy and begin to smooth it out.


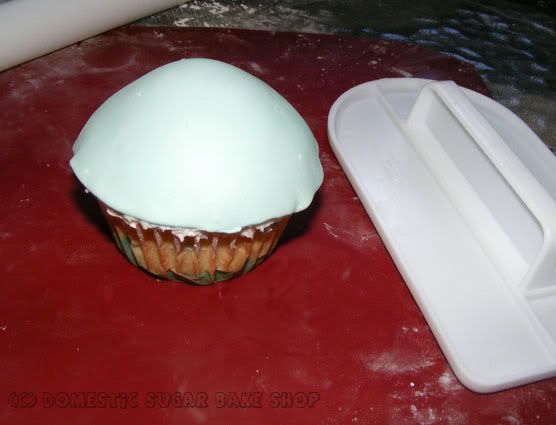
I like to use a fondant smoother. Get them as smooth as possible and then fold down the edges (not shown).


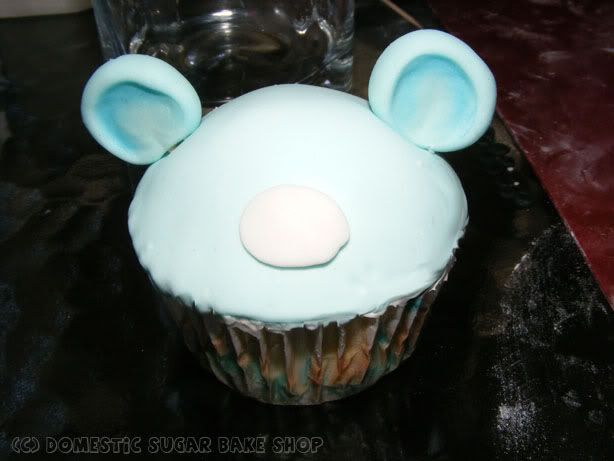
Now, pick in the ears:


Then using bits of gumpaste or fondant, roll out a middle oval for the nose. Secure it with a little water:


Next, with extra fondant or gumpaste, add on eyes. You could also just draw on the eyes.


Finally, add on the smile with a little foodcolor and water. I paint it on with a paint brush. If you have food-grade luster dust, you can even give the bear rosy cheeks and shade in the ears.

SHE'S ALL DONE. Man, that was easy right?


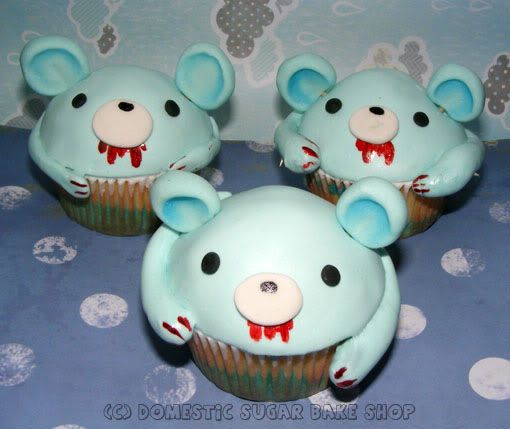
This idea could be used for other things, like a GLOOMY-BEAR FOR EXAMPLE:


I know, Gloomy Bear is supposed to be Pink.... Oh well! I just wanted to play.
If you wish to add in arms, just roll out some extra fondant or gumpaste and glue it down with dabs of water.


And now you know how to make an awesome Cuppy-Bear (or an even more rocking GLOOMY CUPPY-BEAR).

I hoped you all enjoyed the Tutorial. To see more, check out the blog:
Http://domesticsugar.blogspot.com
or
Google: DOMESTIC SUGAR BAKE SHOP


I hope you all enjoyed the LONG tutorial as much as I did making it.
Until then!
Wednesday, August 17, 2011

Orange Flower Cupcakes

Just a small peak at some playing in the kitchen.

I'm getting ready for a guest post another blogger, Malory @ Snips & Spice.It's going to rock, so stay tuned.
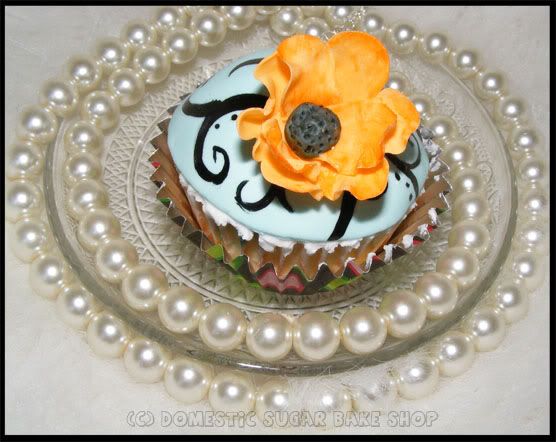
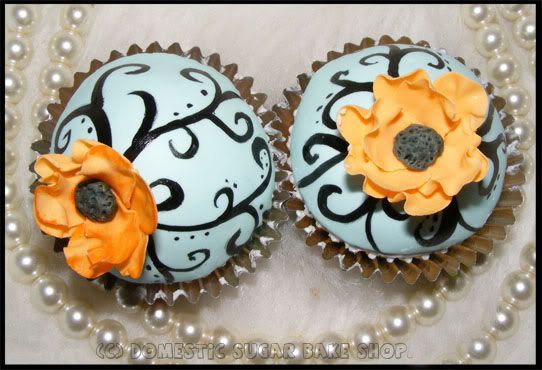
In the mean time, I used some of the scraps from the project to make a simple Orange-Flower cupcake.

This is an white-chocolate almond cake with orange-essence buttercream. I decided to use the orange flowers to contrast the cuppie's blue background. I like swirls, but need to work on them a little more. Still, it has been a long time since I've done a domed-fondant-covered cupcake. I like the look (you can't really see it in the photos). It's very classy.

Now, I've got some family issues to deal with that make me sad. I hope you all enjoy this little tidbit until I can actually show you my project. Big tutorial, coming up!


post signature

Sunday, August 14, 2011

Tutorial: Sugarpaste Anemone

Okay! TIME FOR TUTORIALS!

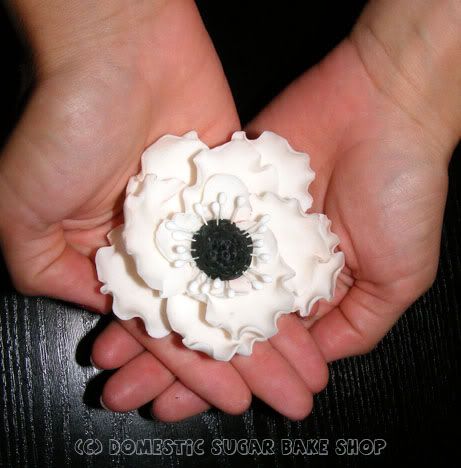
As promised, I am posting up a step-by-step for a Sugarpaste/Gumpaste Anemone. This is a very simple flower to make for cakes and goodies. I kept a couple if a vase for a while because they simply look that nice, but it's up to you what you do with them. Cakes is the more conventional sugarpaste use though.

As a little note, Sugarpaste is really Gum Paste (gumpaste). It's a mixture of glucose, sugar and gum-tex. I use the Wilton brand powder and mix generic glucose in. Your choice. Just note, this can only work with a type of dough that hardens, so Fondant will NOT WORK on these flowers.

On to the tutorial!!


To start you will need a few things. I try to re-use tools and items whenever possible so I don't have to buy a lot of tools, but some things are quite necessary:

1. You will need pre-made sugarpaste (has to be made 8 hours in advance and let rest). You can colour it whatever colour. You will need the flower colour and a black piece for the middle.

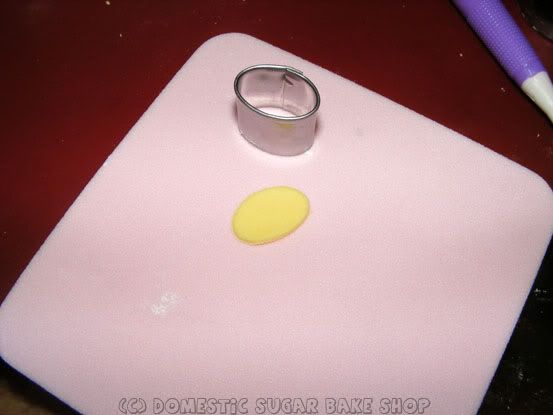
2. You will need two sized circle/oval cutters (small and medium) for petals.

3. You should have a foam square for shaping and ruffling flowers (and gumpaste). This is again, a 5 dollar Wilton purchase.

4. You will need a bowl or a flat surface. I have made them on a plate or a bowl; the bowl rounds the flower nicely, so I prefer it. Your choice. It should be pre-dusted with powdered sugar to prevent sticking.

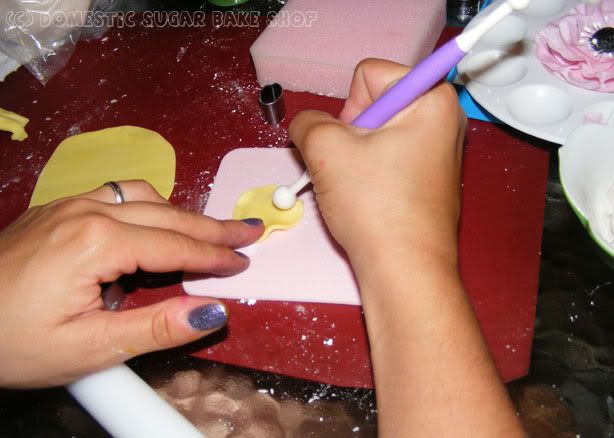
5. A ball-tool (seen two pictures down) to ruffle the flower.

6. (not pictured) something to roll out the sugarpaste... a cup, a rolling pin, whatever works.

7. (not pictured) a small bit of water in a bowl and a paintbrush to apply the flower petals together.

8. (not pictured, (-ι_- )<{sorry}) floral pistils (black is best, but I like the look of white).

READY?!

So, roll out the sugarpaste (quite thin) and cut out an oval/circle to make a 'petal'.
Place on the foam.


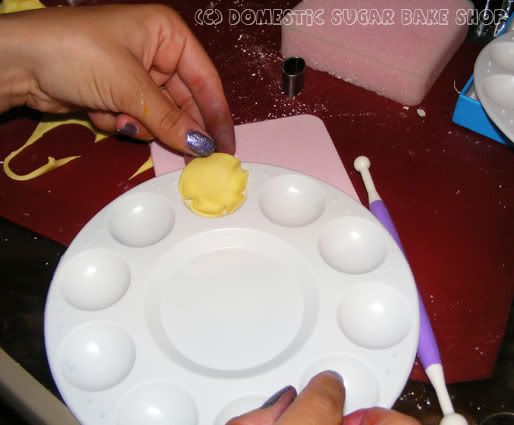
Using the ball-tool, drag the ball around the edges of the 'petal'. I like to have half the ball tool off the sugarpaste form. Apply pressure, but not too much. Dragging and applying pressure thins the paste and causes the ruffled bulges. Do this for all but one 'side' of the flower (like in a U shape).


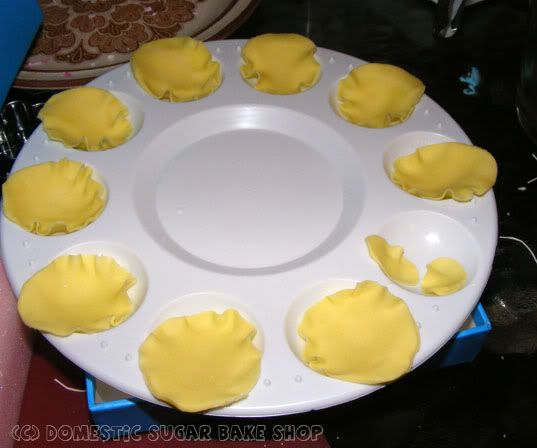
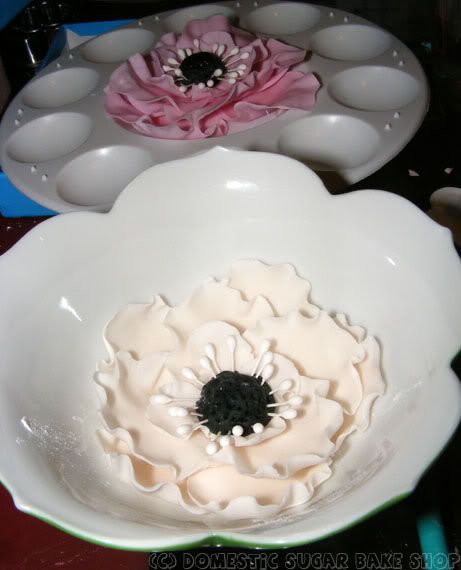
Now, if you don't have a paint pallet, that's okay, you can use large spoons, but place the petal in the spoon or pallet so that the petals are forced to curl a little more. I drape the back end of the flower petal over the edge of the pallet so that it remains flat.

For my Anemone flowers, I use 9 large petals and 3-4 small ones, so, repeat until you get the desired petal amount. You'll see why in a second...
LET DRY FOR 20-30 MINUTES!!!
... OR until the ruffles are hard but the opposite end is still a little soft.

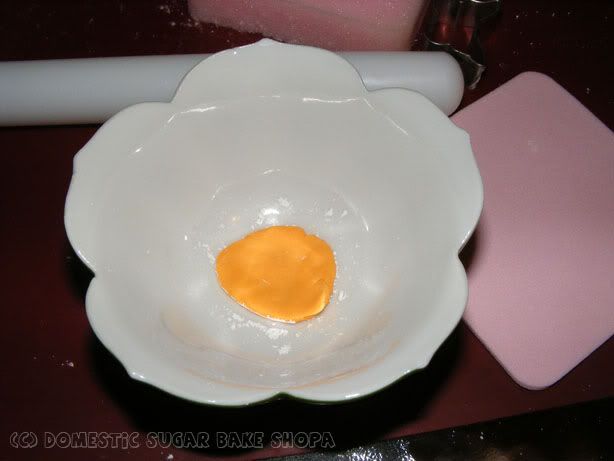
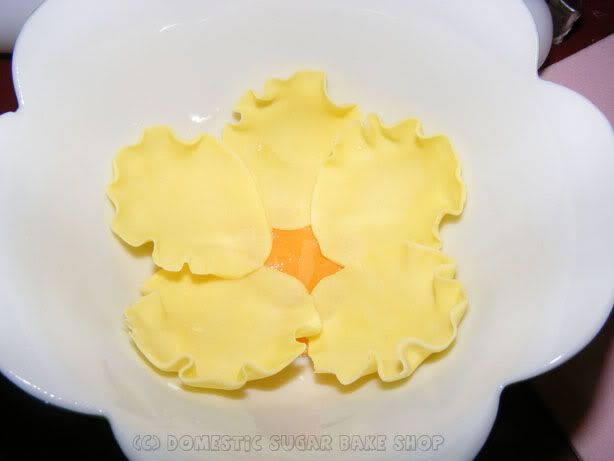
Now, going to your bowl/rounded/flat plate, place a piece of sugar paste on the bottom (flattened like the other pieces, but not ruffled). This is going to be the part that hold all the petals together. Make sure the bowl/rounded/flat plate is well dusted.
I used orange to show you, but normally I would use the same colour.

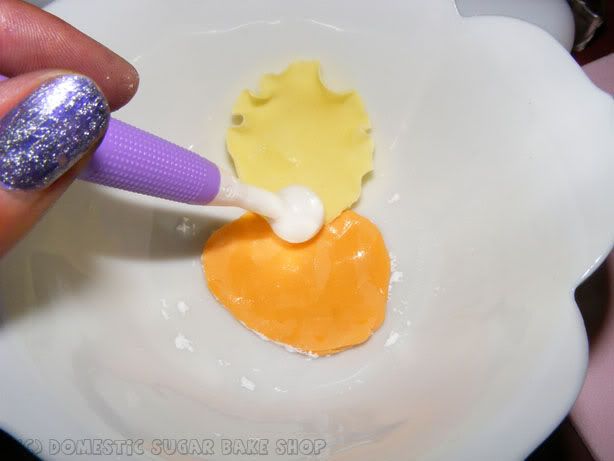
Now, with your hardened-ruffled petals, take 5 (one at a time), and apply them to the center using water to 'stick' them to the center piece. Do the same for the 4 other petals (or however many you want).

ONE LAYER DONE!!!

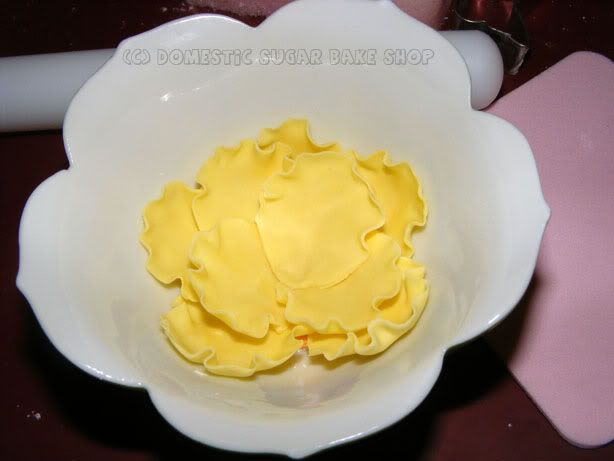
Now, do the same for the 2nd layer. Wet the bottom layer ever so much, (remember, more water = longer dry time) to stick the petals to the base. If you find the petals are drooping, wait 10 minutes more, then don't add more, and apply a little tissue under the already-placed petal to prevent further drooping. Once dry, you can continue to add the four center petals.


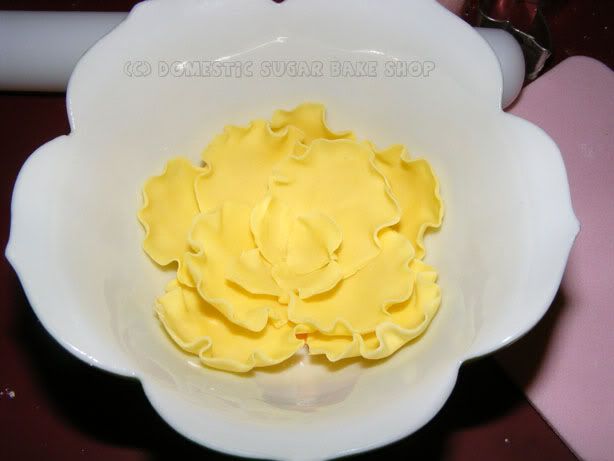
Finally, add the 3-4 smaller petals to the inner 3rd layer to complete the petal part! Almost there!


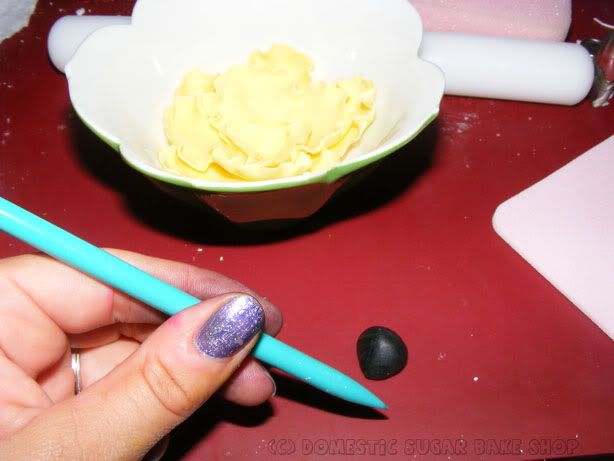
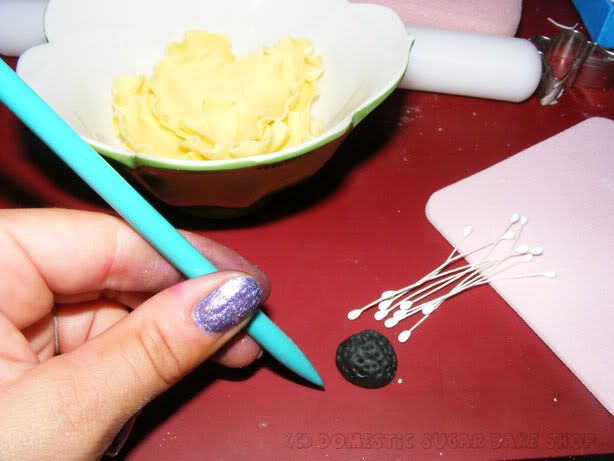
While you allow your flower to chill, grab that small piece of black sugarpaste I told you about earlier. Roll a small portion into a ball (big enough to fit into the flower) you can use a fork or a needle or anything to do this next part; here I have another sugar-tool... I call him 'Stabby'!

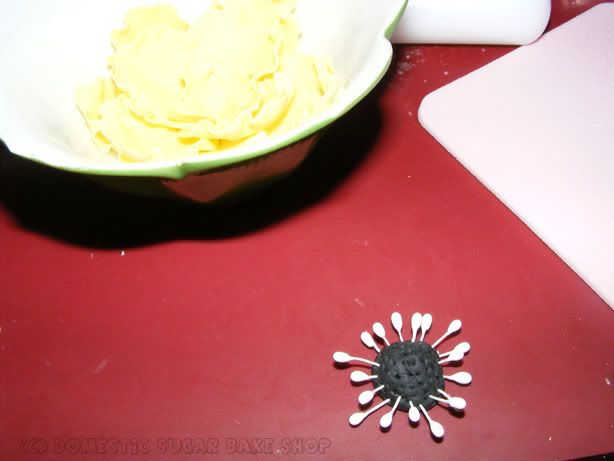
Proceed to use 'Stabby' to punch some texture into the ball. This will simulate the real look of an Anemone. Now, take the pilstils, cut them in half in various sizes, and shove them into the black center, like so:


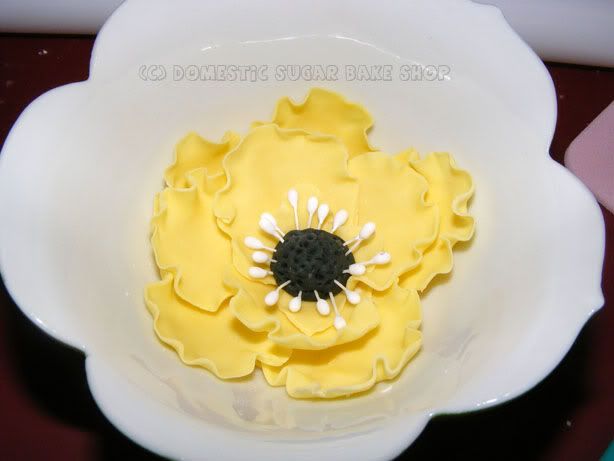
Okay, not take all that and apply it to the center of the flower.


TA-DA! DONE!


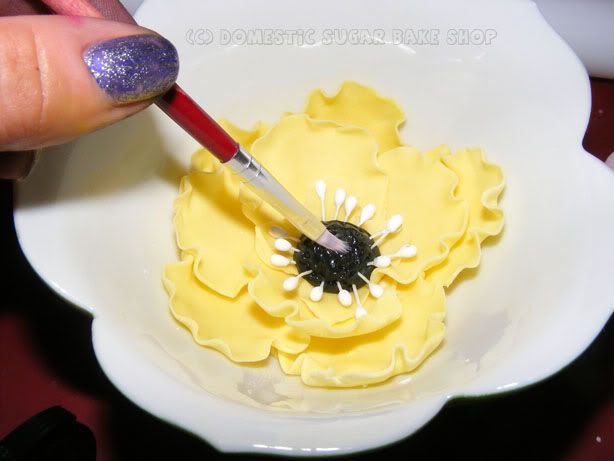
Before I add it to a cake, I like to take a little shortening and shine it up. Water will not work here... but this is a personal choice, not a necessary step.

Let your sugar flower dry overnight or until you can pick it up. Be careful when moving it, as they crack very easily. I use a small baking-grade pair of scissors to coax it out of the dish. Whatever you do, be gentil. It's hearbreaking to have broken sugar-flowers.

Link
And now you know how I make my sugar-flowers. Not magic, just patience (which most who know me are shocked to see me have)(*`ヮ´*)ノ <{ENERGY}.

If you have any other things you are interested in, feel free to ask. I'm still thinking of a sugarpaste rose tutorial... Just got to find some time to snap the shots! Hubbie helped me take these ones, but I he's going away on a business meeting, so I'm all alone ;(-__-);<{so lonely}. At least baking gives me something to do!

Hope you enjoyed the tutorial!

post signature

Thursday, August 11, 2011

Sugar Flowers!

Back from vacation #2! Now I can stay at home and not worry about anything.
You would truly think that vacations are easy and care-free, but you are WRONG! I hate being away from home for long periods of time... it drives me nuts. So, you can imagine that day 3 of being home (day one and two dedicated to laundry cleaning up the house), I would jump right into baking. Hubbie complained that he had no sweets (or food in the house at all for that matter... grocery shopping is number four on my list), and that I should get right to work creating something delicious. So, I whipped up some cake and decided to play with sugar flowers!

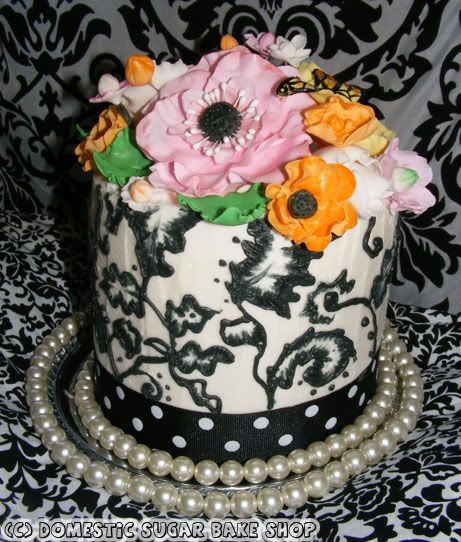
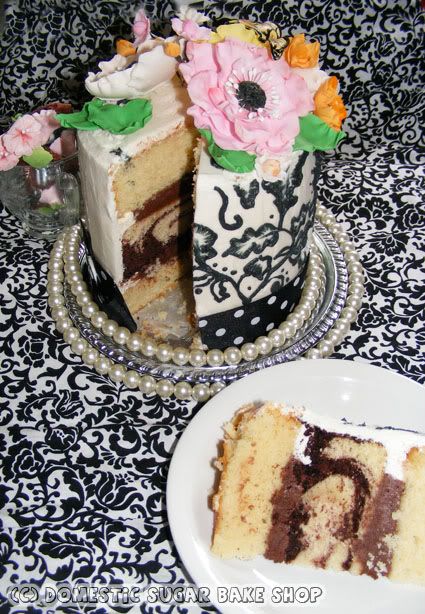
Here's the resulting Hubbie-Cake:


This was a late-night version of a brush embroidery on cake. It can be done with buttercream! HURRAY!

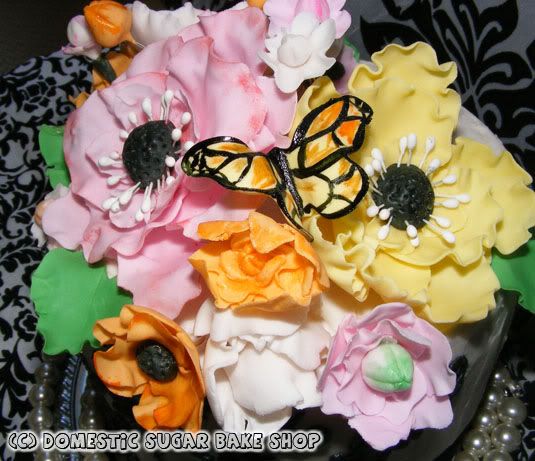
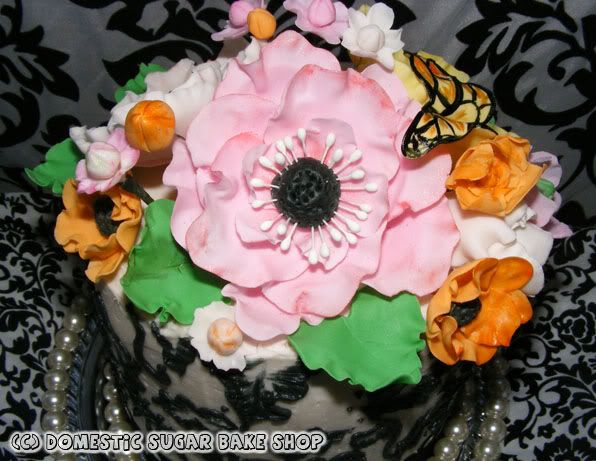
The sugar flowers themselves are ruffled Anemone flowers. I tried to pick fun and bright colors to off-set the black/white cake. Pink, orange, white and yellow with green leaves just looked so pretty.


A butterfly that was hand-painted!


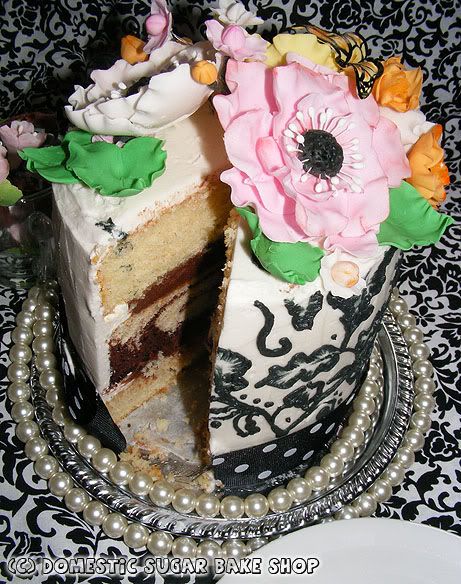
Now, the cross-section of the cake. I love showing the cut cake whenever possible. Most people forget to show the insides... I think it's the most interesting part. Like a surprise. I find myself asking of others...
WHAT TYPE OF CAKE IS IT... ९(ेД॔)७
Rainbow? Strawberry? Chocolate? Vanilla? Marble?

So, what type is my cake?


Vanilla-almond sandwiched between Marble cake with Chocolate buttercream filling. YUM!


My whole plot for this post was actually to do a tutorial on how to make the sugar anemone. I had a post a while back about a black/white cake with a beautiful anemone on top where people asked for tutorials... I forgot to take good pictures *\(°˛° )/* . Since I don't work with a lot of fancy tools (you do need gumpaste tools though), my flowers are super easy!

Anywhoo, to post it I have to shrink and crop some photos... that takes a long time.
Come back in a couple of days to see what it all looks like.

:: JUMPS INTO HER OWN BED AND CUDDLES THE PILLOW ::


post signatureLink

Monday, August 1, 2011

Brush Embroidery Tutorial

Good Morning (depending on where you are... someone must just be getting up).

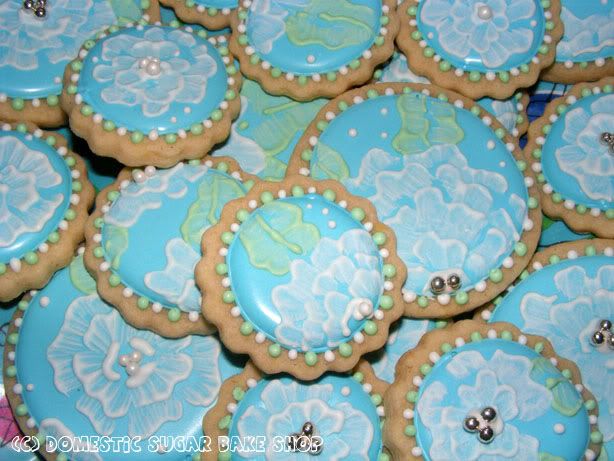
I am still a live, although some might have noticed a conspicuous absence (especially since I usually post at least twice a week on normal weeks). But, as I get deeper into the house thing, I am getting further from the kitchen. This week, I moved back into it to make these fabulous Brush Embroidery Flower cookies.

This technique it super easy, and while some may have seen it, others may not have. I figured I would post a quick tutorial on brush embroidery and let you decide how you like it. This technique has also been used on my cakes (I used it on my Cheerleading Cake a while back).

So, all you really need is pre-baked cookies, royal icing (that's the kind that hardens), and a flat-sided paintbrush.

Okay, into the tutorial we go... you get to see more of my ugly picnic-indoor-eat-off-of-it table.

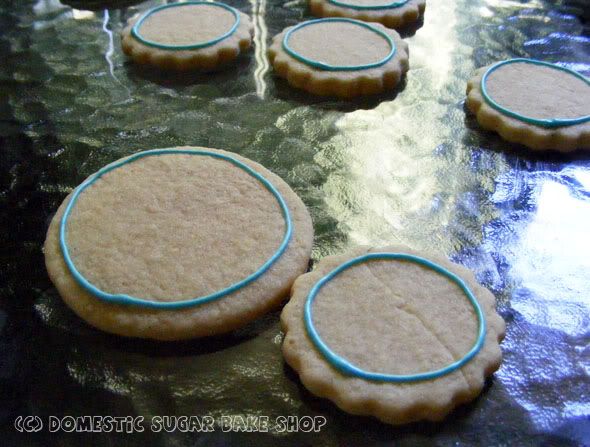
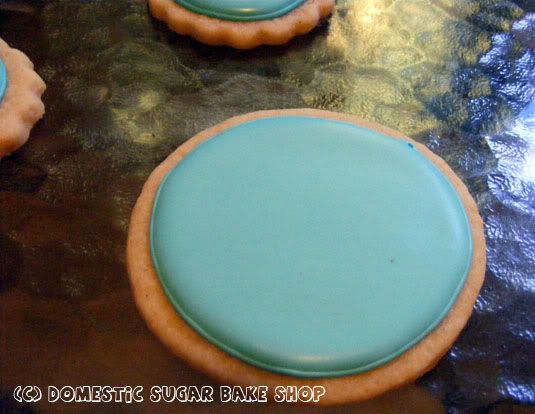
Step one. Using your royal icing in a piping bag, line the outside of the cookie... like this:


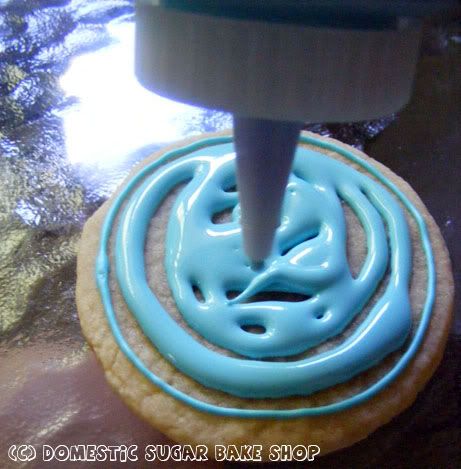
Let the outline dry for 10 minutes. Next, using a thinned royal icing called a 'flood', fill the circle so you will have a smooth cookie surface. I actually tap my cookies on the table to bring up air bubbles and pop them with a pin.


Once you have let that fill dry for at least 1 hour (depends on humidity etc), you can start painting. Mix a counter-color icing for the flower pattern... now we have fun!
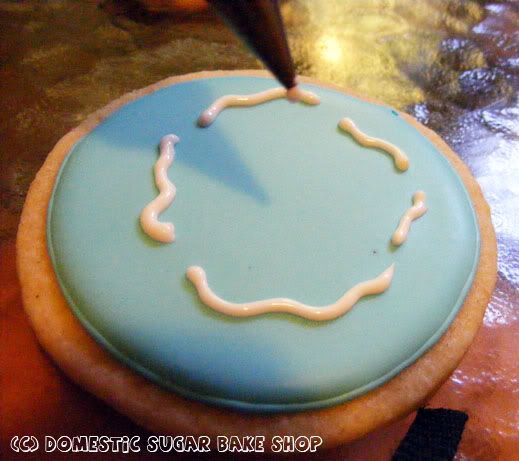
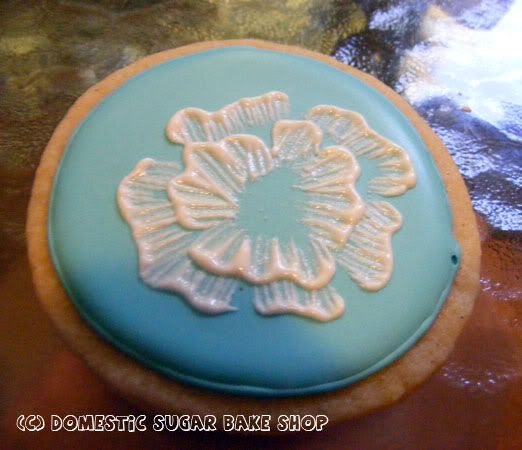
In a piping bag with a #1 or #2 tip Place begin piping the design on the flower. I used the broken petal method. Be careful not to have the icing too thin, if it is, it will be hard to get detail. I actually made my a little thin, but it came out nice all the same. It just needed more love ♥.

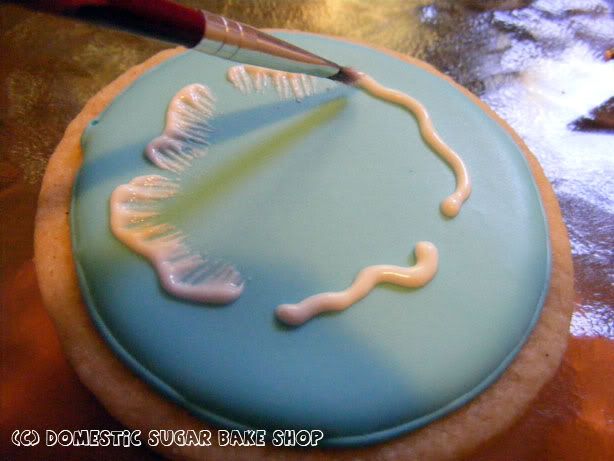
Now grab the brush and drag it downwards into the icing, moving towards the center of the cookie (or wherever you placed the flower. It does not necessarily need to be the center). I like to push up ever so slightly on the icing before brushing down, which gives it a little more ruffle int he petal, but it's your choice.

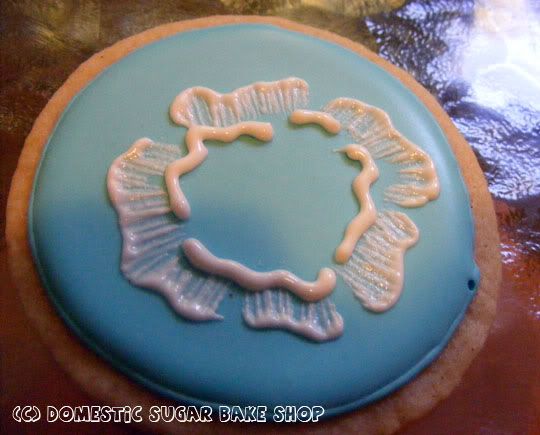
Continue to add petals moving into the center using the same technique.


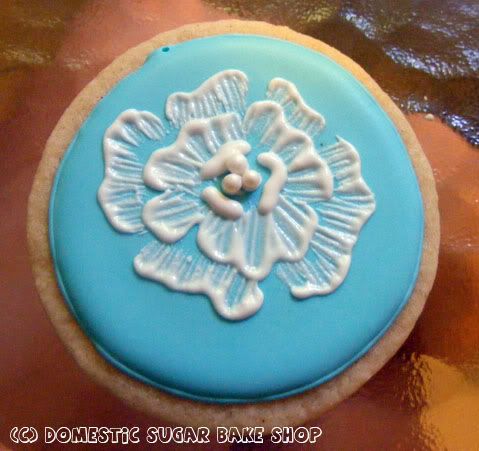
Keep going, then to finish, add lines (now you can see the thin-ness of the icing), and center it off with some kind of embellishment. I like using silver or white degrees, but there are other things you can use too.


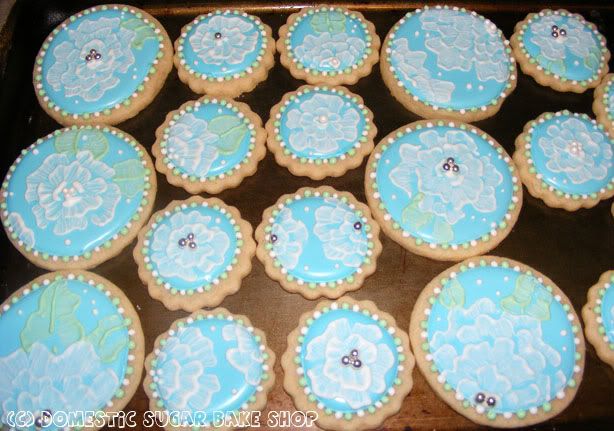
Like I said, you do not need to do a center flower each time. I like to add other flowers on the sides or off-center. I also thought it looked nice to add leaves to the sides of the flowers, a little green to contrast the blue and white.

And that's how it's done. These cookies made their way to a lovely birthday party, though I got no photos. PHOOEY! I think I need a new camera... that way I have something to post good photos with, rather than these gloomy, grainy ones. You know you need a new camera when.

If you are feeling generous, and wish to send me one, please e-mail me :)

Until I get your e-mail, O mysteriously kind person, wherever you may be, I shall continue to post cookies and cakes.

Hope you are enjoying nice weather!

post signature