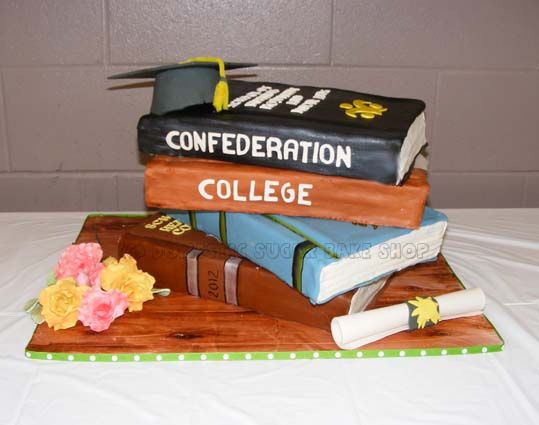
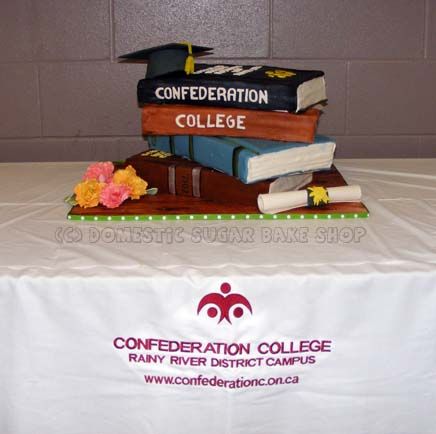
I have been meaning to do a book cake tutorial for a while, so I am very glad that I got another chance to make one. One of my friends at our local Confederation College asked me to make the grads a cake. How could I refuse? We decided that the stacked book cake would be ideal! Let's see:
So, what do you do to make the stacked book cake?
First, start by baking your favorite flavor of cake in a rectangular pan. If you only have a square, you can simply cut one side a little to make it into a rectangle. These books had to feed a lot of mouths, so I'm using a 12x9 pan.
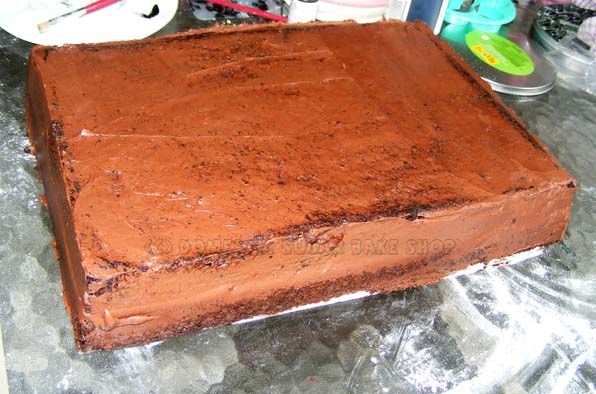
Cut the cake, fill it, then dirty-ice it. Place in the fridge, and let settle up.
Next, begin by rolling out white fondant. I like to use MMF.
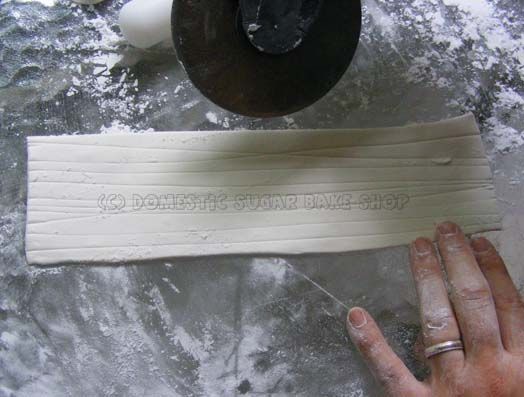
Measure the width and height, then, using a pizza cutter, cut it out to the right size.
Next, put book page lines in it using the pizza cutter and a light touch. You don't want to go through the fondant, so make sure that you press only hard enough to make lines. Don't worry if they are perfectly straight.
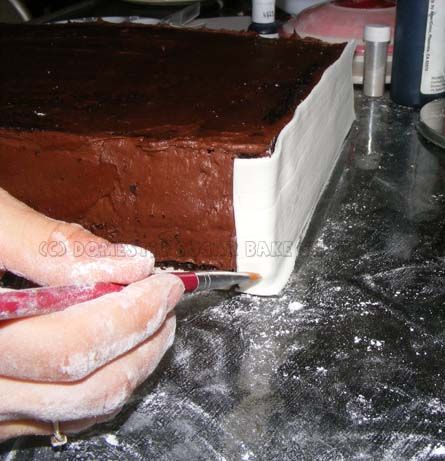
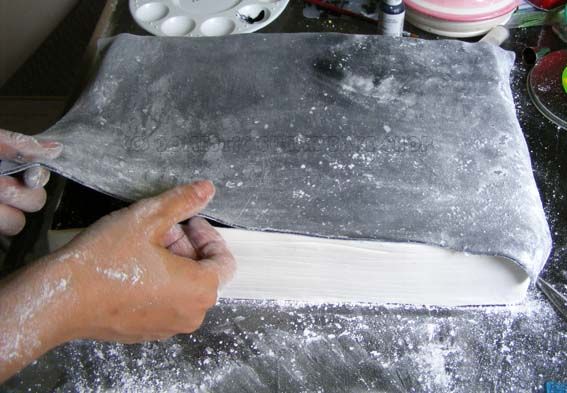
Now, remove the cake from the fridge and ice again. Put the fondant on the sides of the cake first, then the front. You only need to cover three sides white, the back will be the book's spine. I like to add a little water to help the 'pages' stick to each other. Use your fondant smoother or a smooth surface to flatten the fondant.
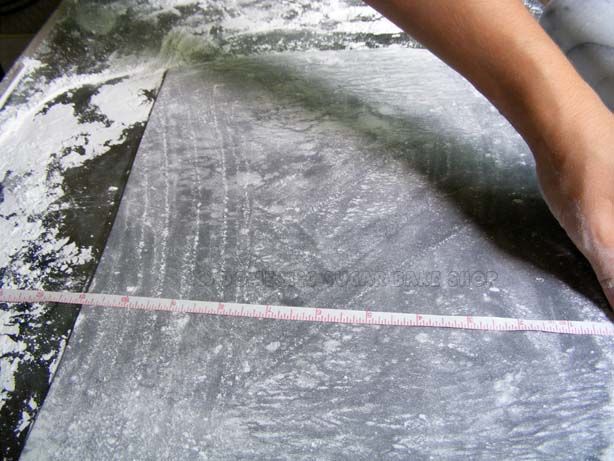
Now, measure out the book's top and roll out enough fondant to cover the top/spine of the book. I like to use a small tape measure to be sure it will cover the whole cake.
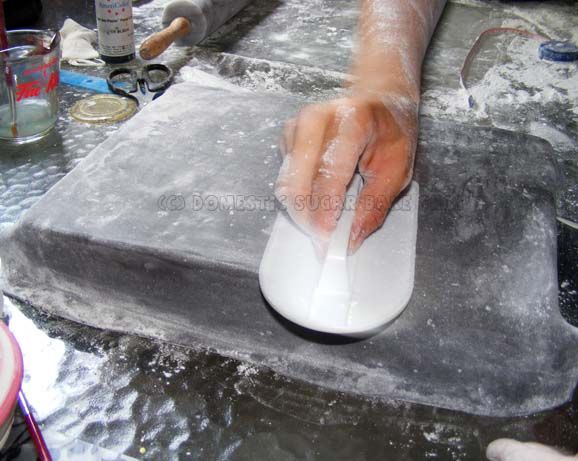
Again, use your fondant smoother to flatten the top of the cake.
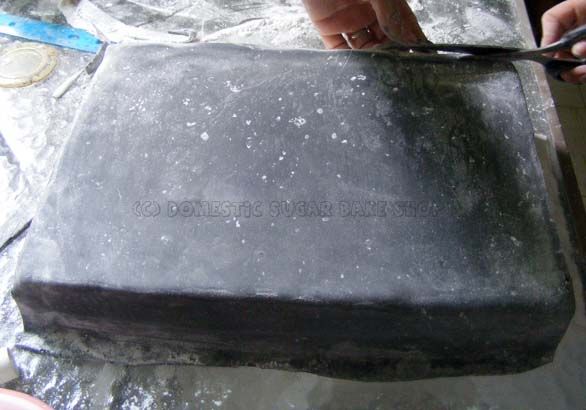
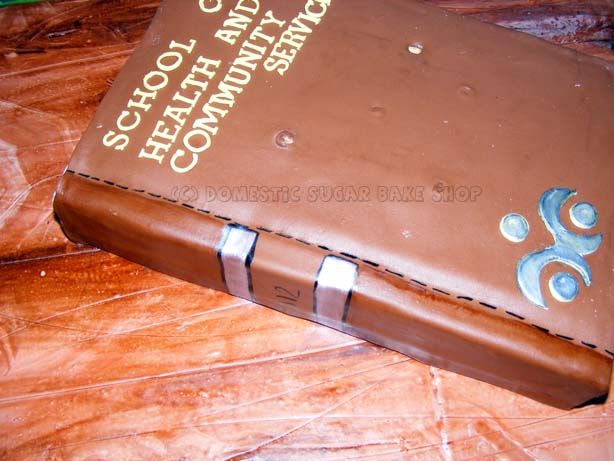
Trim any excess fondant with a pair of sharp scissors. Once it is smooth, dust off excess powdered sugar, and you can sponge the top if you want more of a textured look.
If you wanted, prior to rolling out the fondant, you can use a pattern maker to indent the fondant with some shape.... I like it to be slightly pocked.
And that's all!
Here are some examples:
Note that in the centers of the book there are round dowels. If you plan on stacking the cakes, you will need to be sure that each cake is on a cake board of its own, and that there are dowels enough to support the weight of the cake.
When stacking the cakes, be sure to distribute the weight evenly. If you plan on moving the cakes, you may wish to consider a middle, center post to hold all the cakes together. These cakes were made to be separated.
Hope this helps, and I hope you enjoyed the tutorial!




10 comments:
Wow! Great job!
Very cool!!!
Carsedra of:
http://sweets4yourtooth.blogspot.com/
Wow! What a great cake! You are one talented lady!
Thanks for the tutorial, very useful.The cake turned out really nice
Just what I was looking for a tutorial with a bit more of visual along with the explanation THANKS!!!!
You actually made this look do-able! Thank you so much for sharing your creativity at Mom On Timeout. Hope to see you back tonight!
thanks a lot for this tutorial..i just have one question- when i have to stack these books why do i have to put wooden dowels in each layer????
dont they stay one on top of the other without these wooden dowels???
Hi Hena,
I'm making my first stacked book cake soon, but have made other stacked cakes. As stated each book needs to be on its own cake board. The reason you need the dowels in the two books below is because you want the weight of the book(s) that are top of top of it to rest on the dowels, not the cakes. If you don't use the dowels the weight of the book(s) above it will most likely crush the book below it. It would be awful after all that work to have it crushed, so the dowels are the way to go. The size of the dowels is the height of the cake they are in, if too long the t he cake that is resting on them won't be stable and that's not good either. Just insert the dowel (be sure to sharpen the end going into the cake so it goes into the cake board) and make a mark (I use an food edible marker) on the dowels so you know where tio cut them. And cut the number you need. Then insert them approx 3-4 inches apart. I hope this helped and good luck with your cake.
I have found so many interesting thing in your blog and I really love that. Private tutor Bethesda Keep up the good work!
Post a Comment