Monday, June 11, 2012

Stacked Book Cake Tutorial

Okay, this one has a lot of images!

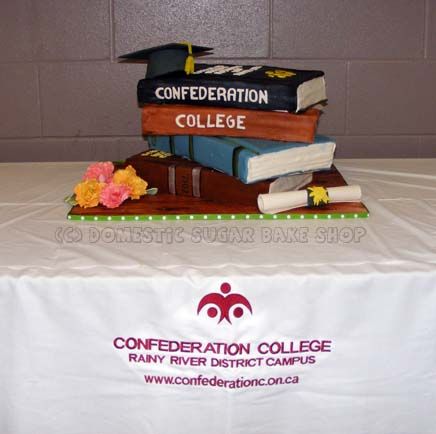
I have been meaning to do a book cake tutorial for a while, so I am very glad that I got another chance to make one. One of my friends at our local Confederation College asked me to make the grads a cake. How could I refuse? We decided that the stacked book cake would be ideal! Let's see:


So, what do you do to make the stacked book cake?
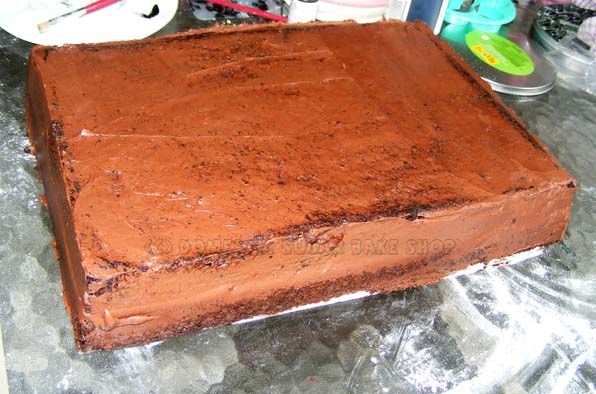
First, start by baking your favorite flavor of cake in a rectangular pan. If you only have a square, you can simply cut one side a little to make it into a rectangle. These books had to feed a lot of mouths, so I'm using a 12x9 pan.


Cut the cake, fill it, then dirty-ice it. Place in the fridge, and let settle up.


Next, begin by rolling out white fondant. I like to use MMF.
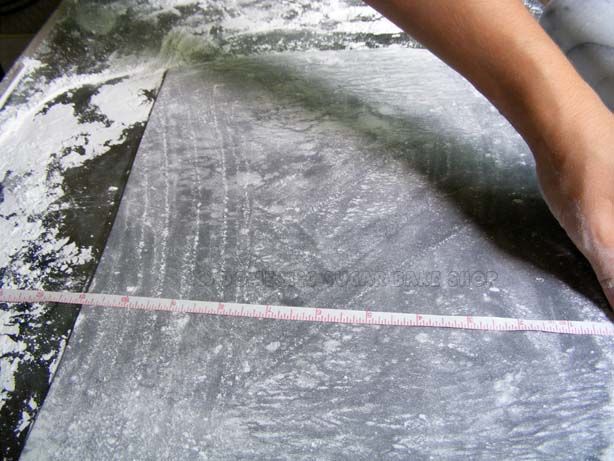
Measure the width and height, then, using a pizza cutter, cut it out to the right size.


Next, put book page lines in it using the pizza cutter and a light touch. You don't want to go through the fondant, so make sure that you press only hard enough to make lines. Don't worry if they are perfectly straight.


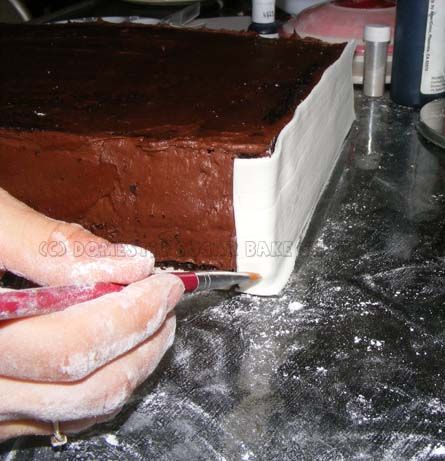
Now, remove the cake from the fridge and ice again. Put the fondant on the sides of the cake first, then the front. You only need to cover three sides white, the back will be the book's spine. I like to add a little water to help the 'pages' stick to each other. Use your fondant smoother or a smooth surface to flatten the fondant.


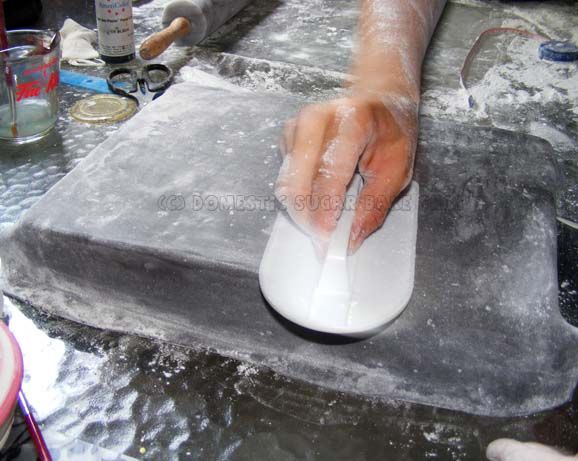
Now, measure out the book's top and roll out enough fondant to cover the top/spine of the book. I like to use a small tape measure to be sure it will cover the whole cake.


Again, use your fondant smoother to flatten the top of the cake.


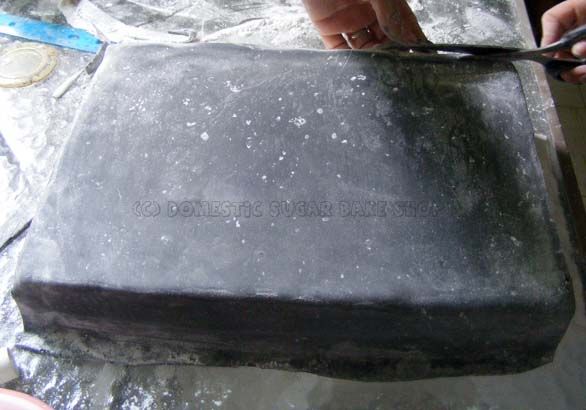
 Trim any excess fondant with a pair of sharp scissors. Once it is smooth, dust off excess powdered sugar, and you can sponge the top if you want more of a textured look.

If you wanted, prior to rolling out the fondant, you can use a pattern maker to indent the fondant with some shape.... I like it to be slightly pocked.

And that's all!
Here are some examples:


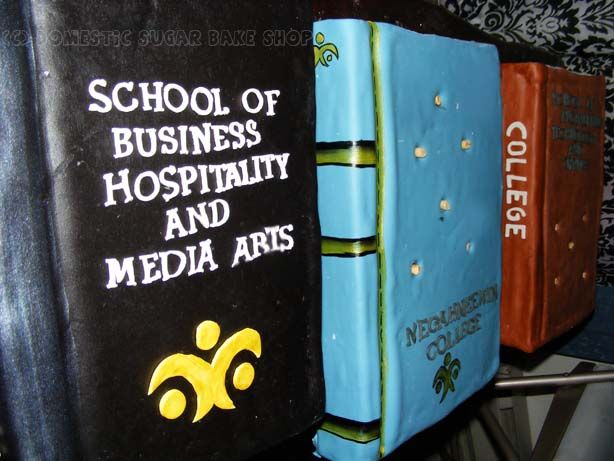
Note that in the centers of the book there are round dowels. If you plan on stacking the cakes, you will need to be sure that each cake is on a cake board of its own, and that there are dowels enough to support the weight of the cake.


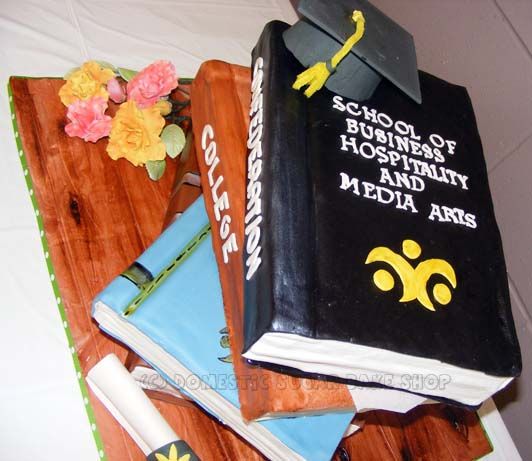
When stacking the cakes, be sure to distribute the weight evenly. If you plan on moving the cakes, you may wish to consider a middle, center post to hold all the cakes together. These cakes were made to be separated.


Hope this helps, and  I hope you enjoyed the tutorial!

post signature

Wednesday, June 6, 2012

Somber Cookies

What you say? Another blog post?
It seems that the world is trying to conspire to keep me baking. My week was pretty busy trying to get the Sauna situation in order, and then I baked to distract myself.... In a one week period I made a Pikachu Cake, Cheeky Tulip cookies, Thank you Flowers/Butterflies, and now, these Somber cookies.


Why are they called Somber Cookies? Well, they are for a friend who recently lost her father. The flowers are an attempt at chrysanthemums, a flower commonly associated with death, also known as the God Flower. The butterflies symbolize rebirth and freedom.

 
 I feel that they also symbolize light in darkness, which is why I chose the colors grey (for the loss, white for light or the divine, and yellow for hope). Hilariously, and quite honestly, I love the color scheme, even through I used them with a specific meaning above, I could easily see this as my kitchen/living room colours.


These particular cookies were a combined gift from myself and my coworkers. When they were delivered, I got a smile, which makes me hopeful that the healing process is well underway.


All our love!

post signature

Monday, June 4, 2012

A sweet "Thank You"

Things are heating up here in the Fort. Building season is in full swing, and so is work on the property. This week marked a very special milestone (other than official groundbreaking), we got a SAUNA! 
One of our friends called me up last week, saying that her old sauna was in the way of her building project, and asked if we wanted it (on condition that it be moved ASAP!).

Today, the sauna was delivered after much fuss, and I could not be happier! To thank my friend, I did what I know best: I made cookies.


It is not as though money was an issue, but rather, generosity. I worked really hard to create cookies which showed exactly how grateful I was; the butterfly cookies are my favorite cookie, and the iris cookies were hand-cut (since I don't own the cutter).

After inspecting the work and asking a few questions (the sauna is going to be a temporary shed for the builders while they get things in order), Hubbie and I went out for a celebratory supper. It was very stressful working to get the sauna to our property, and it has been a long time coming to get an official start to our new home, but I hope this marks the beginning of a very wonderful adventure.... with a warm ending.


By the way, I want to paint the sauna Pink... just in case you were wondering :)


post signature

Saturday, June 2, 2012

Pokémon: Pi - Pikachu! I choose you!

Well, here it is. I have been dieing to make a Pikachu cake for a while. Other than for my own birthday, I had no reason to make one. It is not easy when most of your friend's kids are all under 5. Luckily, one of my co-worker's children is over 7, and LOVES Pokémon! Whenever I teach them, they always ask for free time to read their Pokémon books, or to draw their favorite Pokémon, or rather, ask me and the EA to draw the complicated Pokémon for them! (づ ̄ )


This Pikachu cake was super fun and easy to make. I used one six inch round cake pan (two cakes stacked) and two nine inch cakes (cut in half and placed side-by-side) to make carve the shape. Dirty ice it, then cover in fondant. 

 
The ears are made of gumpaste, as is the tail. That was the hardest part, making sure the gumpaste was the same color as the fondant. ㅎ__ㅎ;; All the details are made from fondant and Americolor food color.


It was an interesting project, that I was super happy to do. When I first thought of a Pokémon cake, I wanted to do a Snorlax... the sleepiest character (most like me, lazy)! But since Pokémon Red and Blue are no longer as popular, and since Snorlax falls away to the super cute new characters I figured I would go with a popular one instead. I need to do a Snorlax for my birthday... MEMO TO SELF!


 So, while some small details bothered me, the mouth being one, the cake board being the other.... I rather enjoyed using the cake as a distraction, especially given our current status on building. Needs more happy Pikachus (plural) to liven up my mood! 
I have one more great cake project that I'm doing, but that's not until next week. Maybe I will go and bake some cookies! Something bright and cheerful!
 
post signature