Showing posts with label Recipe. Show all posts

Tuesday, January 17, 2012

BEST MUFFIN EVER: Snickerdoodle with Caramel-Apple filling

Hey All.

This is my new favorite Muffin recipe of all time. It had been making its way around Pintrest, and I just had to give it a try. I did not regret my decision!

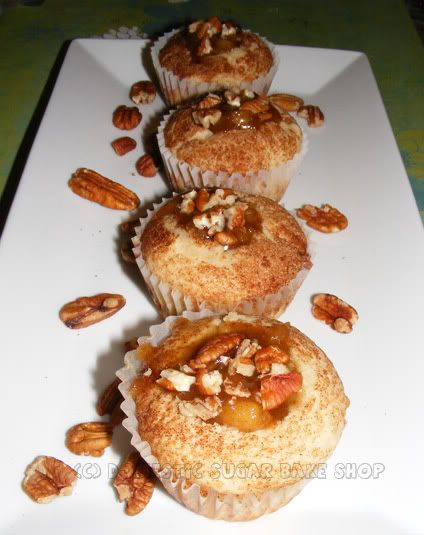
This muffin is called the Snickerdoodle, not to be confused with the cookie version of the same name. The absolute best part about this muffin is how moist it is. I have seen so many recipes where the muffins were like bricks, thick and chewy. This muffin is moist and spongy. PERFECT.


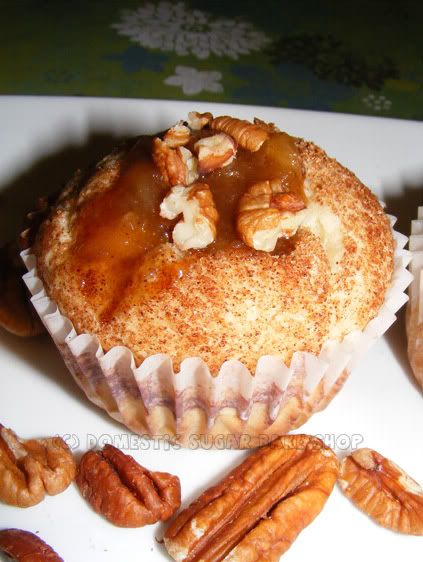
As it stands, the recipe is perfect, but can you imagine what would make cinnamon and sugar better... APPLES AND CARAMEL! No really, my Hubbie fell over backwards over these muffins. I had to give up a little on my not-so-resolute-resolution, but it was totally worth it.

♥ Snickerdoodle Muffins ♥
Adapted from eat me, delicious

2 ¼ cups all purpose flour
¾ teaspoon baking soda
¾ teaspoon baking powder
¾ teaspoon cream of tartar
¾ teaspoon nutmeg
2 sticks butter, room temperature
1 cup sugar
2 eggs
2 teaspoons vanilla extract
1 ¼ cup sour cream

Topping:
½ cup sugar
1 tablespoon cinnamon

Preheat oven to 350 degrees. Line baking pan (cuppies) with wrappers if desired, or spray.

Mix Flour, Tartar, baking powder, baking soda, and nutmeg.

Cream butter and sugar, add egg and vanilla. Slowly incorporate dry ingredients and sour cream until smooth (use spatula on the sides and bottom of the bowl to be sure).

Mix 'topping' (cinnamon and sugar) in a small bowl.
Using an ice-cream scoop, and scoop an amount and place in the 'topping' bowl. Roll batter around to coat (or simply place cinnamon/sugar in the bottom of the cuppie tin and sprinkle liberally on top).

Bake for 20-25 minutes (or until light brown on sides/top). Cool.

Yield: 24 Muffins.

Want to step it up a notch? Keep reading!


At about the point that the muffins were cooking was when Hubbie suggested a dessert with apples and caramel. That got my brain in a tizzy. I thought... CINNAMON, SUGAR, APPLES AND CARAMEL... IT'S A PIE IN A MUFFIN'S FORM!

So, I began to make up the caramel. It's super simple!

Caramel/Apple filling

1/2 c BUTTER (Must be butter)
1c brown sugar
1 large apple ( granny smith (best) or Macintosh).
1 tsp vanilla

Cut apple into small cubes. Place butter and brown sugar, vanilla and apples in a thick-bottomed saucepan. On Low-Medium heat, melt butter and sugar until the sugar begins to boil lightly. Stir often! Continue to bubble on low for 5 minutes, or until much of the water from the apples has been cooked off and the mixture is smooth. Let cool (not completely) until warm.

Core the muffins (take the centers out with a knife... eat them! EAT THEM!) Pour apple/caramel mix into the centers of your muffins. If you wish, garnish with walnuts or Pecans for a nice contrast in texture/flavor.


EAT THEM! \(휴) /


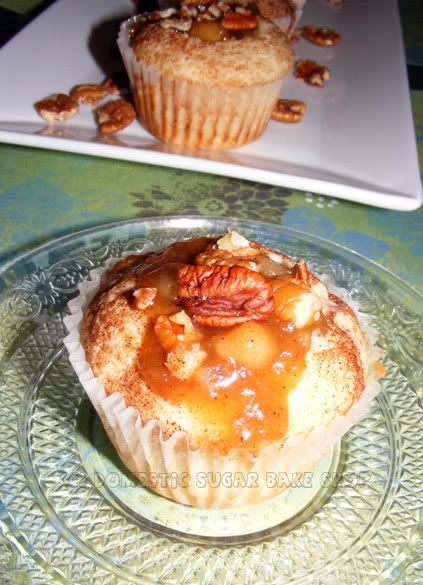
You will seriously not regret making these muffins. I have never seen a muffin so wonderful, so moist and so scrumptious. The apples and caramel are DIVINE! The thing I liked the most was the simplicity. As you can tell, things have been pretty busy, and I've not had a lot of time to bake. From start to finish, this recipe took one hour. That's all! When time is precious, you need to make something that will be amazing as well as time efficient.

Hope you all enjoy!!

post signature

Friday, January 6, 2012

Hooo Will Always Love you ?

YAY! I'm back to baking. I have to admit that this break was lacking greatly in this way... I really, REALLY wanted to do some baking, but had no way to, which was sad.

So, now to start this year off right! My first real post of the year (Minus the 10 for 2011 post I did just after the New Year). Owls are awesome, and I am cheesy enough that I like playing with their name.


Yeah, That's right! Silly sayings make everything better. I told you all on my Last Owl Cookie Post that I like to say silly things like Owl Always Love you. This time, however, I did not offer to do the dishes and instead spent the entire time creating a large sink full of piping bags, tips, spatulas, and bowls filled with rock-hard royal icing (which washes away with water... after soaking). One of the best things about cookies is the colours. I love adding different colours, but the problem will always be my reluctance to do the dishes afterwards.

Looking up above, you will see the owls I created, one looks a little angry, but I like his crest. I keep thinking he is the daddy owl, and that those two beside him are the baby owls looking cute. I wanted to do a different kind of cookie this time, a round picture cookie, but I wanted to play with the owls as well, so I took a look through Google Images to see the different looks, and I didn't find anything of what I imagined. I instead took out a sheet of paper, and sketched out a design... then piped it together:

Of course the last thing I do is sketch in the details. Not a huge thing, but I got lazy and stopped taking pictures. You can fill in the blanks as to what came next.

How, I have had so many people asking me about my royal icing recipe, and I never know how to tell them that I don't have one, not written down anyway. I have tried to fill in recipes for this in the past, but now I just eye-ball it. I do have a formula for it, but it is loose.

Royal Icing a-la-Domestic Sugar
(Yeild... lots, enough for a few piping bags at least)

5 tbsp Meringue Powder
1/3th c water

Dissolve Meringue Powder in the water, using a blender to froth it a little. Make sure that there are no 'crystals' of the powder left... some brands are granular in texture, try to use something like Wilton - though I hate to say it - as it is a better brand). Once it is dissolved...

1tbsp flavor (or equiv. I sometimes use flavor oils as they have a wonderful full, unique flavor... in those cases, use a drop or two).
3-5 c powdered sugar/Icing sugar
extra water (1/2c ?)

This is where things become different. Because icing can have different textures, you will need to eye-ball it to make it the way you want it. I use the 3 second test. If you add and mix up your icing, and you want it to be like the owls above (thick without boarders), then mix it up and run a spatula through it; count to three or five, or give it a little shake. If the icing has flattened out and you cannot see any lines sticking up, you are golden. If you can see lines, add a few drops extra water... and if it runs flat right away, add more Powdered Sugar.

What I suggest is that you find what works for you. Many people out there who try flood cookies make very thin flood, trying to extend the life of what they have, and in truth, you will get a cookie with a boarder that is higher than the middle design. That is less attractive. Try to use a thicker flood whenever possible, that way the flood actually balances on top of the boarder line. Looking below, at the old owls, you can see that I piped a line around the cookie shape, then flooded it (rather than above where I didn't use a line at all to outline). You can see that the flood is thick, and above the line; you want that! The flood is thick and rich, it is not thin at all. Thinner Floods will dry and cave in.

Well, in truth, I am not actually sure if my recipe helps in the least. I am not scientific about the flood. I just go with whatever I like. For example, below, on the cards, I used a thick flood (No lines necessary) and a thick, stiff icing (less , way less water) to pipe the words. Icing is not an exact science, and wherever you live, be it humid or cold like here, affects the icing. Just play around with the water/sugar ratio and see what happens. If you look at one of my first cookies, you can see that they are also not well filled with icing.


Okay, this post is wordy. Maybe some of you read it though and found it helpful maybe some of you didn't. I just home that you enjoyed the pictures at very least.

I wonder what I am going to do next... hmm? Any suggestions \(°˛° ) ?

post signature

Wednesday, December 14, 2011

Spicy Orange Gingerbread Cookies (Recipe)

I love the colours of Christmas! They are the best! Rich greens, reds, and silvers are a wonderful addition to any home.
Along with all those rich colours are the rich smells: Cookies freshly baked, Turkey piping hot, delicious sweet yams or fresh soups. It is a wonderful season indeed.

As promised, I am sharing yet another recipe from my yearly Christmas Box. These cookies are a staple in any home in the festive season: Gingerbread. Be it in cookie or in house form, I love the smell they give, and how sweet they are!


This recipe is one I've used forever. It is a rich, orange, spicy gingerbread that is quite unlike any other I've ever had. It also hold up to its shape. You can see above my snowflakes kept their shape, which is key for making houses etc.

Orange Spicy Gingerbread


1/2 c margerine
1/2 c sugar
1/2 c molasses (I use fancy type, but whatever works)
1 egg yolk (Save the white for the icing)
2 c flour
1/2 tsp salt
1/2 tsp baking powder
1/2 tsp baking soda
1 tsp cinnamon
1 tsp cloves
1 tsp ginger
1/2 tsp nutmeg
1 tbsp grated orange zest

Directions:

Preheat oven to 325 degrees. Put parchment on the cookie sheet.

1. Combine margerine and sugar, add in molasses, zest and egg yolk. Set aside.

2. Combine dry ingredients (Spices, flour, and salt).

3. Incorporate slowly the dry mix into the wet. Stir until all ingredients are well mixed.

4. Take mixture, and chill for at least one hour (or overnight). Remove from fridge and roll half the dough on a lightly flowered surface. Use cutters to cut shapes and bake for 8-10 minutes until firm. Remove from oven and cool. Do the same for the second half of the mix.

Yield: 30 cookies?

ENHANCE, ENHANCE, ZOOM, ENHANCE!

The above photo is super Photoshopped so that you can see the detail. The problem with my camera is that it is horrid in low light (a constant problem in my small apartment).

I hope you give the recipe a shot! If you do, tell me what you think.
Until then!

post signature

Monday, December 12, 2011

A very Sweet Christmas (With Recipes)

Happy Christmas all!

I can finally take a breather, all my Christmas baking is finally complete. Three days of solid baking made me so very sleepy, but the responses are always worth it.

What did I bake? From Left to Right:

1. (Not pictured) Caramel Butter Bars
2. Spicy Gingerbread
3. Chocolate Crinkles
4. Snickerdoodles
5. Baileys Cake Balls
6. Turtles
7. Peppermint Patties
9. Scottish Shortbread
10. (Not Pictured - see below) Gluten Free fudge Cookies


Over the next couple of days I'd like to get my recipes up so you can enjoy them. Please be patient with me for the time being. I'll try to get one up every couple of days.

Some of the articles are missing because a lazy-bum decided to take a picture before they were boxed up. If you scroll down, you'll see the Gluten Free cookies.


Making gift-baking-boxes is the most wonderful thing, and the most stressful. I love baking delicious treats, but find that three days of baking straight is totally exhausting. Yesterday, I was practically a zombie (which those who know me will think is awesome) trying to get everything packaged and ready for delivery. Today, I played Santa with my wonderful Blue Recycle bag delivering boxes of treats to all my close friends. I believe that between the 25 small boxes and the two large, I baked somewhere between 20-30 dozen cookies. I kept telling myself that I was totally running low on baked goodies, and that I needed more. That was a joke! I have tones of leftovers.

The best part of baking this year was making something new. This recipe I found on Pinterest: Gluten-Free Chocolate Fudge Cookies (also pictured in the box are the Peppermint Patties, which are also gluten-free).


This is a recipe I just had to Share! Even though they are gluten free, they are more like Brownie Cookies, very chewy and sweet.

Flourless Chocolate Cookies

Originally posted from Chocolate and Carrots


3 c Powdered Sugar (Beware of additives in this! Cornstarch is okay)
2/3c dark cocoa powder (unsweetened)
1/8 tsp salt
2 to 4 large egg whites
1 tbsp vanilla
1c chocolate chips

Directions:

Preheat oven to 325 degrees

1. Line two baking sheets with parchment, and spray parchment with non-stick coating (this is necessary)

2. In a large bowl, mix powdered sugar and cocoa. Whisk in vanilla, salt and egg-whites, starting with just two, you can add more if necessary.
IMPORTANT: The batter should be just moist, and thick like brownie batter. It should not flow like water, but should be thick but a little runny. If it is not this way, add another egg white or two if necessary.

3. Add in chocolate Chips. Stir, and use a teaspoon to place batter on the cookie sheet. Space them well, as they spread.

Bake 9-12 minutes, remove and let cool completely. (Yield 30 cookies).

THESE ARE AMAZING. Seriously, you do not need to have a gluten problem to enjoy them.

Now, here's my favorite part. I promised a while back that I would post up a picture of my tree. It is finally done. I had to pick up some new bulbs and a few extra flowers to fill it in, but I finally feel comfortable showing it off.


Here's wishing you all the very best of the season. It may seem trivial, but it gives me great joy to know that this blog has people who read it; to me, the greatest gift is your patronage. Thank you all so much for making Domestic Sugar what it is.

Cheers!

post signature

Wednesday, November 23, 2011

Lemon Shortbread Bar

I think I've made it known that I LOVE PIE!

That's why I decided to combine two of my favorite things, Cookies and PIE into one delicious bar. This elegant treat comes without the crust, and is has a wonderful texture. The end result is lemony heaven!


So, how does one make these delicious treats. Actually, it's very easy!

Lemon Shortbread Bars

For the Crust:
1/2 lb. salted butter room temp
1/2 cup sugar
3/4 cups powdered sugar
1 Tbs vanilla
2 cups AP flour

Preheat oven to 325. Cream butter, sugar and powder sugar. Add vanilla and flour until smooth.

Press crust into a lightly greased 9X13 pan. Bake for 20 minutes (or until edges are brown).
Set to cool.

Filling

**if you want to use box, I hear that works too, make to directions and pour over crust.


Home-Made filling YAY!

1 1/4 cups sugar

1 1/2 cups water
5
tablespoons cornstarch
5
large egg yolks
dash
salt
1
tablespoon finely grated lemon zest
1/2
cup fresh lemon juice
2
tablespoons unsalted butter

For filling, whisk sugar, water, and cornstarch in a pot. Whisk in egg yolks and salt and cook over low heat for about 5 minutes, whisking constantly.
Increase heat to medium and, still whisking, cook filling until it begins to bubble just a touch - when it does, remove.
Remove and strain. Stir in lemon zest, lemon juice and dissolve in butter .
Pour mix into cooled shell, let cool before sticking it into the fridge to set (or it will crack).


This elegant bar holds its own on the table, and is quite delicious. No really, it is!
And it's simple too. I say this having made it two days ago before my cold set in. I am currently typing while having two nice kleenex balls shoved up my horribly red nose! Paints a nice picture doesn't it? But really, being sick is the worst. These, are the best!


I love the contrasting ideas of my sickness with these lovely photos. As a blogger, I feel that interesting photography is super important, but living inside a building with very little light (most of which is yellow light) makes photography very difficult. I am always looking for interesting ways to take photos (using whatever props I have). I have found that the best photos are taken at night when I can control the flash on my camera (rather than the indirect sunlight of an afternoon shoot on a north-east facing building). Do I use enough parenthesis (yes)?

Okay, when the typing is bad, it is time for bed. Night everyone. ENJOY!

post signature

Saturday, October 1, 2011

Feta-Squash Ravioli Tutorial(Recipe)

Have you ever wanted to make your own Pasta? It's not hard, but it does take some work. The reward is something tailored to your taste, and something without preservatives! In my books, that's worth it!

This week, because of all my squash/pumpkin cook-downs, I decided that I should make some delicious Squash Ravioli!

Start with your pasta. I mix 3 eggs, 3 tbsp water (maybe more), 3 tbsp oil, and 3 cups of flour. I make a well in the center of the flour, lightly beat eggs in a separate bowl with the oil and water, and slowely whisk the eggs to the outside of the well. In my pasta, I also like to add some flavor. Should you choose, you could add some great spices (Sage, Rosemary, and Garlic are my pasta triad). Once the mix is balled, work it together so there is no lumps/flour pieces. Let rest 1 hour in a plastic sandwich bag.

While that is resting, mix your filling. Since we are making the Squash Ravioli, that's the recipe I'll give:

Squash Ravioli filling:
1 c of squash puree
1 pinch cinnamon
1 pinch nutmeg
1 tsp brown sugar
1 pinch salt
1/4 c feta, crumbled.

Mix contents together, set aside and wait for the pasta.


Now, take half of the ball, and roll it out either with your pasta maker, or if you are Hobo like me, grab your rolling pin and start sweating it out! Roll it flat, about 1/2 an inch thick.


Keep your pasta from drying out. Make sure to grease up your hands, and keep it moist so it does not get all icky. Mine above is starting to dry.

Now, using a small crimped circle/square cookie cutter, cut out circles for the ravioli. Place on a baking sheet. Spray them with Pam.


Once that is done, take a little water, and dab around the sides of the ravioli circles. Now you need your filling. Spoon 1/2 a tsp into the center of the circle...


Using a fork, press down around the pre-wetted edges of the ravioli to secure them down. Spray again with Pam and place on a cookie sheet. Cover with a damp cloth or plastic-wrap until you have them all completed.

BOIL SOME WATER... this part is hard!
Dump your ravioli into the water and stir to prevent sticking. After about 6-8 minutes, remove pasta from the water, place into sauce.

Beautiful! This is the inside of the ravioli! (Below)

This is a slightly sweetened supper dish. It makes about 24 ravioli, so you may want to double it for a family. It is also simple enough to get the kids involved! They can cut the pasta or even help roll it (thought it must be extreme rolled!). Nothing like a special home-cooked meal.

Other fillings I enjoy:

Rosted-Red-Pepper, feta and spinache puree

Ground-Turkey/ricotta

Ricotta/Spinach/Feta


Now, again, I just feel like sharing the beauty of NWO, because honestly, it is like someone just took their paint bucket and dumped their warm colours all over the ground! IT'S STUNNING!

Notre tour en Canot

Les arbres qui sont très jolie!

Et, sur l'eau, nous (moi et mon mari) avons vu ces arbre près du garer; c'était un très belle jour pour être sur le lac!

Now, to bake cookies!

post signature

Saturday, September 17, 2011

IT'S FALL! PUMPKIN TIME! (RECIPE)

Ah Fall! The area around here has already begun to change. The gourds are coming out. We just got back from the farmer's market here. I got some great gourds (Buttercup, Pumpkin, Acorn) and am getting ready to cook it all down for pies, soups, and more! But, I could not wait to cook it... I just had to make myself a favorite recipe: PUMPKIN COOKIES!


These cake-like cookies are the best I've ever had. I love my old pumpkin-white-chocolate cookies, but these cookies are must more subtle, less sweet, and are so scrumptious.
They are not at all dry, and not wet either. Think of a puffy cupcake or a moist muffin; that is the consistency of these cookies!

Link
So, the recipe.... it's not actually mine. I have to give credit where it is due. I found this recipe originally on Allrecipies.com; these cookies on the site are called Iced Pumpkin Cookies (By 'Gina'). I've made a few alterations for me.

So, this would make it a re-post, but I really want to share it because it always gets rave reviews.

ICED PUMPKIN COOKIES
(originally by GINA) - Edited by me :)

2 1/2 cups all-purpose flour
1 teaspoon baking powder
1 teaspoon baking soda
1 tbsp ground cinnamon
1/2 teaspoon ground nutmeg
1/2 teaspoon ground cloves
1/2 tsp ground ginger
1/2 teaspoon salt
1/2 cup butter
1 1/2 cups white sugar
1 cup canned pumpkin puree
1 egg
1 teaspoon vanilla extract

Icing:
2 cups confectioners' sugar
3 tablespoons milk
1 teaspoon vanilla extract
1/2 tsp cinnamon extract

Directions
  1. Preheat oven to 350 degrees. Combine flour, baking powder, baking soda, cinnamon, nutmeg, ginger, cloves, and salt.
  2. In a medium bowl, cream together butter and sugar. Add pumpkin, egg, and vanilla; Beat until creamy. Mix in dry ingredients. Drop on cookie sheet by tablespoonfuls; flatten slightly; I used a spoon dipped in water.
  3. Bake for 10 to 15 minutes. Cool cookies.
  4. To Make Glaze: Combine confectioners' sugar, milk, and vanilla. Add EXTRA milk as needed, to achieve drizzling consistency, or leave thick to pipe onto cookies as I like (not so sweet). Let icing set.


Seriously, this recipe is a HUGE hit at any time of the year, but something about warm pumpkin on a cool fall day makes life wonderful! I hope you are all enjoying the season and are keeping warm.

post signature

Sunday, September 11, 2011

[Recipe] Granola Bars - Homemade and Peanut-Free!

Finding good food for your kids (or husbands) to eat at school is becoming more and more expensive. Compounding the costs is the idea that many schools are 'peanut-free' due to severe allergies by staff and students. Limiting options have parents purchasing expensive lunch-treats that are not so healthy but fit the new standards. Since each day you need new treats, each day is a new bit of money thrown down the 'treat' drain.

Not anymore!

I offer to you my recipe for healthy granola bars that (if you so choose) are peanut-free and at a little healthier than other options. You customize what goes into them, and you choose what they taste like. This is a highly customizable recipe, and I LOVE IT. I make it every Sunday night for my school week; now you can too!

Recipe: Kitchen-Sink Granola Bars

1c quick oats (instant oatmeal stuff)
1/2 c corn syrup
1/2 c honey
3 tsp brown sugar
1 1/2 c rice crispy cereal
1/2 tsp vanilla
3 cups of anything (Marshmallows, seeds (sesame, pumpkin, flax), granola (strawberry/raspberry etc), cookie crumbs, chocolate chips, melted chocolate (1/2 c)...

Preheat oven to 325 degrees.

Mix all dry ingredients together, then add in the wet ingredients, stirring until everything is coated.

Place wet mix into 9X9 pan lined with parchment paper. Wet fingers with water and press down the granola bar mix into the pan; make sure all edges are pushed in and it is nicely packed. Keep fingers as wet as possible to reduce sticking and moving.

Bake at 325 for 15 minutes. Remove and cool:


Once the mix has cooled, but is still a little warm, cut it up into bars. Each mix makes 10 large bars which can be made smaller for smaller people. I find that two small bars is great for the 'balanced day' we have in our school board.


Not only is this a great recipe, but I love to personalize the bars, wrapping them in plastic wrap and putting a little note on the bar:

The last one is for myself... I always forget.


So, what do I like in MY Granola bars?
-1/2c melted chocolate
-1 c strawberry-banana granola
-1/2 c pumpkin seeds
-1/4 c sesame seeds
-1/4 c flax seeds
-1/2 c regular oats (I like em' hearty)

Give them a whirl. They are easy to make with the kids, and a staple in my house!

Happy Schoolin'

post signature

Sunday, July 24, 2011

Gluten Free Almond-Orange Cake

Lately, I've been feeling adventurous. I guess not enough to burn my house down, but enough to make things interesting. I've taken to going online, finding a random recipe, and trying it out. Now, normally, people will try a recipe first before they adapt it. Me, I tend to adapt things, then try the original. This cake is another one of those cases. And, don't worry, it turned out great!


Gluten Free Almond-Orange Cake
Adapted from The Cooking Nook

1 cup almond flour (finely ground almonds)
8 tablespoons granulated sugar (DIVIDED)
4 large eggs, separated
the zest of one orange (large)
1/2 teaspoon ground cinnamon
1 pinch salt
Powdered 'sugar for dusting
fresh berries and whipped cream for garnish (OH YEAH!)

Preheat the oven to 325°F.

1. Line the bottom of a 9-inch cake pan with parchment, grease sides, and set aside.

2. In a small bowl, mix almond flour and 2 tbsp sugar, if needed place in food processor to ensure the almond flour is fine. Set aside.

3. In a food processor, process egg yolks (4) and 2 tbsp sugar with the orange zest, salt and cinnamon. Process for 1 minute (or until egg yolks are a light yellow). Add to almond mixture (well mixed, but not over played with).

4. In another clean bowl, foam egg yolks, then add 2 tbsp sugar and whip on high until they glossy peaks form. Gently fold in egg white mix to egg yolk mix (until just incorporated. DO NOT OVERMIX). Place mix into the cake pan, and place in oven. Bake for 20-25 minutes, or until toothpick comes out clean.

5. Cool completely on a wire rack (any extra time in the pan will continue to cook it). Dust with powdered sugar and serve with whipped cream and berries.


This cake is a nice light cake, VERY LIGHT, due to it's ingredients. It is also very good for people who are diabetic (that was the reason I made the cake in the first place). I liked this cake more than the other one I tried a week back (it was too moist, almost like a wet sponge). The cake itself tends to be a little dry and has a gritty texture due to the almonds, so I would recommend the whipped cream just to soften. Another option is to spritz it after it's cooled with some coconut rum and water, then cover it overnight to let it soak in. I like that option very much.

Well, since tomorrow is my challenge run (I'm running from my place to a resort!), I need to get to bed and get some rest. I hope you are all enjoying a great summer!
CHEERS!

post signature

Wednesday, July 6, 2011

Perfect Summer Pie: Peach Blackberry (Recipe)

Happy summer tidings to you all!

I've been enjoying daily swimming, canoeing and baking. Hopefully you all get the same types of summer loving, enjoying all the best (and keeping safe).

This week, before I head off on my week-long canoe trip, I decided to blend summer flavors into a pie. When I think summer, I think stawberries, peaches, and blueberries. Since Peach is a nice fruit, and is a little different from the traditional pie flavor, I whipped up a delicious Peach-Blackberry pie. It is tangy, sweet, and deeeelicious!

Here's what you do:

Skin 6-8 peaches (medium sized, some overripe are okay). Cut into slices. Mix with blackberries (I used frozen BBerries today because we didn't have fresh). Place into a pot over medium heat.


Add in 3/4-1c sugar (depending on how sweet you like it). Add 1 tbsp ginger, 1 tsp coriander (LOVE IT!), and 1 tsp cinnamon. Stir. In a separate cup, measure 1/3 c water with 3 tbsp cornstarch... when it mixes, add to peach mix.

Once the whole thing bubbles, and the 'sauce' is clear-ish, strain some of the fluid (great on ice cream or yoghurt) place remaining fruit and sauce in an uncooked pie crust. Decorate the top as you wish...


Bake pie @ 400 degrees for 11 minutes (or until crust is light brown and flaky). Cool to room temperature. Serve with Ice Cream! (CHOCOLATE OR VANILLA! OR BOTH!)

Full recipe: Summery Peach-Blackberry Pie

6-8 medium peaches, skinned and cored, sliced in wedges.
1 c blackberries
3/4-1 c sugar (depends on your personal tastes... I like less, but it is more tart)
3 tbsp corn starch
1/3 c water
1 tbsp ginger
1 tsp coriander
1 tsp cinnamon

Uncooked Pie Crust (or use my recipe).

Directions:
Mix peach slices, blackberries, ginger, coriander, sugar and cinnamon in a pot. Heat over medium heat. As that heats, mix the corn starch and water (until dissolved), add to peach mix. Allow the mix to bubble, stirring constantly. Once the mix liquid looks clear, it should be done.

Strain some of the fluid (there will be lots). I take out about a cup of it and leave the rest as the pie fruit is exceptionally wet. Place the remaining fruit and some 'sauce' into the crust. Bake the unbaked crust and pie mix at 400 degrees for 11 minutes, or until the pie is browned on the sides/top. ENJOY!

BEFORE:

AFTER:
♥ PIE IS MESSY ♥
PIE IS VERY MESSY.. YUM!

post signature