Showing posts with label Wedding Cake. Show all posts

Sunday, February 24, 2013

Anniversary - the Couples edition

Finally, some inspiration. Things have been busy in the Fort. Over the last little while I have been working hard on several creations (some unposted as of yet, sorry!).

So, it is with great pleasure that I post this update! The Kellar Cake - a 50th wedding anniversary!
Red-Velvet and Carrot Cake with Cream-Cheese buttercream, covered in MMF.


And of course, my personal update. I don't like adding too much in the way of personal information. True, I have been known to post personal images and updates sporadically, but this one is totally worth doing. This year, my husband and I are celebrating our 5th wedding anniversary (not our 50th, I guess we are 1/10th there!). I say this year, but in truth, we were married on a leap-year (Feb 29th 2008) and only have celebrated one anniversary.... so if you count non-leap years it is five, if not, I guess we are 1.25/5 years.  I suppose my husband's face says it all as I try on my dress for the last time.


What do people do with their dresses? Wreck them, store them for their children who will never want to wear them.... Me. I decided to donate mine. There is a great group in Thunder Bay that sends dresses to people who cannot afford to buy them. I am very happy knowing my dress will have a new life with someone! So... I tried it on. One thing I always thought with my dress.... I AM BATMAN! 

Other silly things being done... a Quincy-hut outside of my house.... we've had a lot of snow! Two people can sit up or crouch in this beast! My husband says I can live in that, and he gets the house.


And of course, after-school snowshoeing on the lake. What a wonderful way to enjoy where you live. 


post signature

Saturday, December 29, 2012

Winter Wedding

This cake was near and dear to my heart, and in truth, had to be baked twice before I was happy with the results! But, with all my heart, I wanted it to be perfect.

So, with much fussing and playing, I managed to create a winter-themed cake with a rather large Poinsettia on top.


With a little bit of a twist, this is an egg-nog cake with vanilla-bean buttercream. The cake is covered in MMF, and decorated with sugar flowers/snowflakes (a combo if you will). I had no time to order a snowflake plunger set this year. Rats! Maybe next...


 Because the Poinsettia is so large, it actually dented to the top of the cake! I have never done a single flower on top, and was rather pleased with the off-set aesthetic of it.


 And of course, this was a drop-in wedding, so Cupcakes make things a little more munchable! I was rather pleased all around.


So, now I have some extra cake in the house... I wonder what I will use it to make next :)
Happy New Year!


post signature

Monday, August 13, 2012

Tutorial: Butterfly Cake Topper

 Hey! Me again!

For my cakes, I like to add small details which add height and sparkle, so my Sugar Butterflies have become a hit! Here's a tutorial on how to make your own Sugar Butterflies:


As in all my tutorials, I try to keep the materials simple. In the tutorial I use a ball tool and a foam mat to ruffle the edges of my butterfly; you can skip this step and just do a flat butterfly! As always, work with what you have! You can substitute the ball tool for a toothpick and  roll the edges of the toothpick on the butterfly's wings.....

What you need:


  1. Sugarpaste/Gumpaste
  2. Butterfly Cookie Cutter
  3. Rolling Pin
  4. Ball tool (optional)
  5. Foam Mat (optional)
  6. Dowel
  7. Food Color (gel kind like Americolor)
  8. Water
  9. Paintbrush


Step 1:


Roll out the gumpaste. You will want it to be fairly thin, maybe 2mm thick or so. Using your favorite butterfly cutter,  cut out the shape of the butterfly.

Step 2:


Using a ball tool, thin out the edges of your butterfly's wings to give the wings that whimsical look. I try to spread the butterfly's wings, and leave the body thick. This will be important when you dowel your butterfly.


As you can see, the spread butterfly is larger than the cutter. This is important! Your butterfly should be wider and longer than the original cut out for when you have to put the backing on him.

Step 3:


Now, take your thin dowel and lay it down the center of the butterfly's body on the underside. Allow the butterflies to dry in this way (Overnight, or 8hours)

Step 4:


When your butterfly is nice and hard, carefully remove him and put it upside down. Roll our another butterfly to be the backing. To secure him, simply add a little water to the backside of your butterfly, then apply. Again, allow time to dry. I try to make sure the 'head' of the butterfly is sealed well, and make sure the dowel does not poke through the top of the piece. By creating a dome on the top, the stick will have something more to keep it in place.

Antenna: At this time, you can choose to place antenna into the butterfly. Simply use a floral stamen (optional, found at a craft store) in the top between the two layers. When it dries, they will be secure.

Step 5:


Now for the sun part: DECORATING! Taking your gel paste food color, water it down, and paint the edges and body of the butterfly. Keep in mind that the as the butterfly dries, the shininess of the 'paint' will dull. No worries!

Step 6:


Depending on your pattern, you can paint the inside any way you wish. For this one, I decided to make a Monarch butterfly, so I painted the 'cell' veins through the body. Once the black is done, allow time to dry (10 min?).

Step 7:


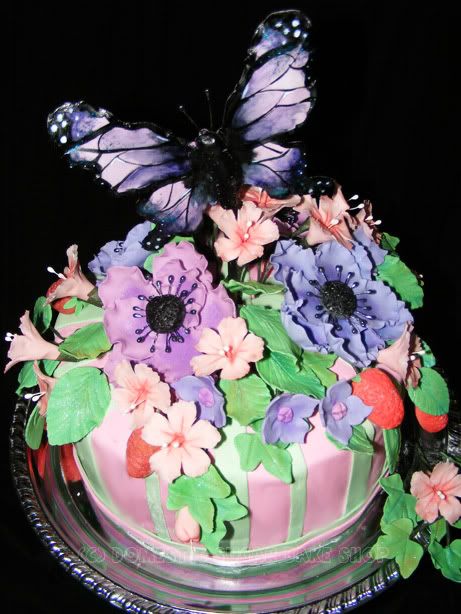
Now, when the black color is dry (this is tacky, as you can see), paint in the color. You can choose to fill all the cells, or just one or two for a stained-glass look. The Flower Garden Cake had purple gumpaste with a few cells painted.

Step 8:


Add a contrasting colour to the edges of the butterfly....


Blend the colors together with a clean, lightly dampened paintbrush. You can add in the darker black if you wish by swishing it with the paintbrush.

Step 9:


Allow time for the fully coloured butterfly to dry. If you wish, you can paint the stick the colour of the cake (for instance, I have painted them black/white before). You can even add stripes or polka-dots to the stick to give them character.


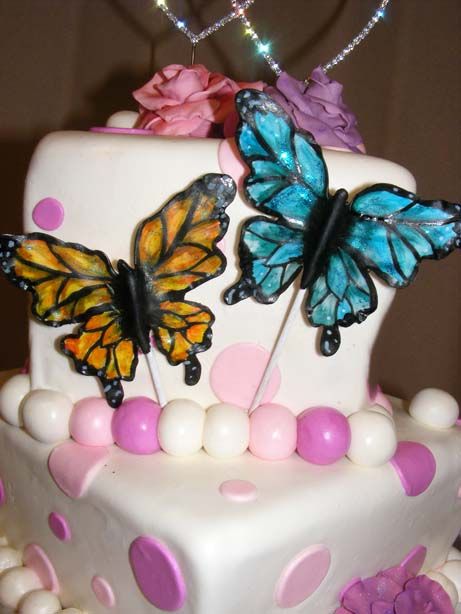
Here are the to I used on Linda's Pink Wedding Cake.


Now You too can make Butterflies! HURRAY!

post signature

Tuesday, August 7, 2012

Pink wedding!

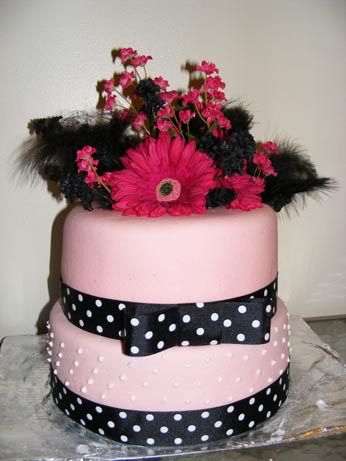
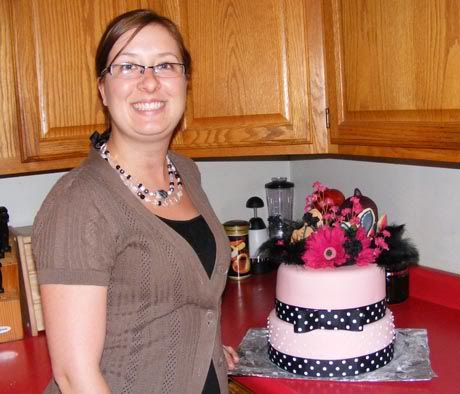
I loved the setup for this wedding. Pink and Fuchsia were the colours, and boy did they fit the bride and groom! The spread included on two tier cake (with Polka-dots), one Ice-creme cone cake, and one gluten-free orange-almond cake. I was super happy to pull myself out of my baking funk, and to get to work on a real project!


The cake included small sugar flowers and sugar butterflies! I loved the cake flavors she choose. The top tier is Chocolate, the bottom, Lemon.... In the other cake, almond and then strawberry. FUN! I love the not-so-basic flavors!


The whole room was decorated in pink bows and white tulle. I loved the bride. Her bubbly personality and cute babushka to hide her hair from her husband was just adorable!


So, I now have two tutorials to post as a result! I guess you'll have to check back later to see what they will be :)

post signature

Sunday, May 8, 2011

Anemone Cake (Recipe)

Happy Mother's Day!

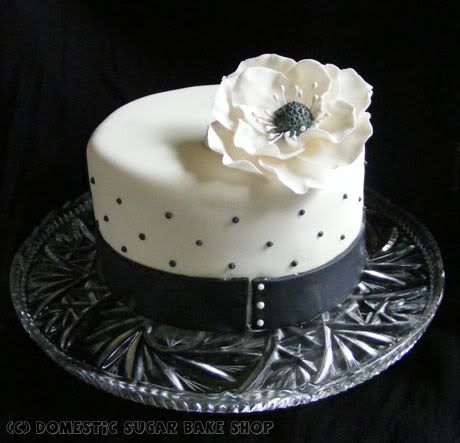
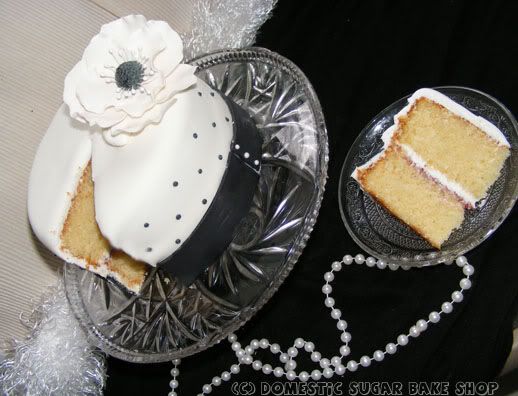
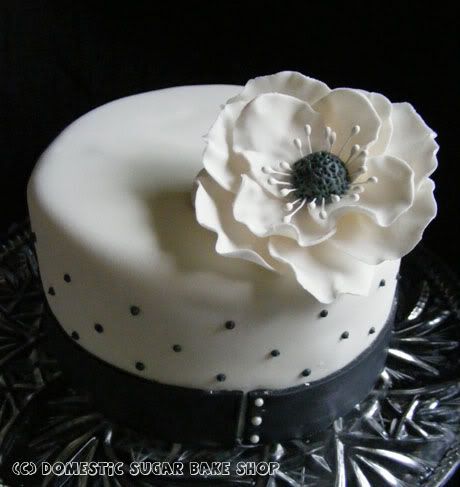
I hope you all have great weather. Here in the Fort, or in N.W.O, we generally get rain on Mother's day. I'm not sure if it is an indication that we should stay inside and enjoy our families, or whether it is something else. Either way, I had lots of time to bake my Mother's Day cake this weekend, so to you, I present the Anemone Cake:

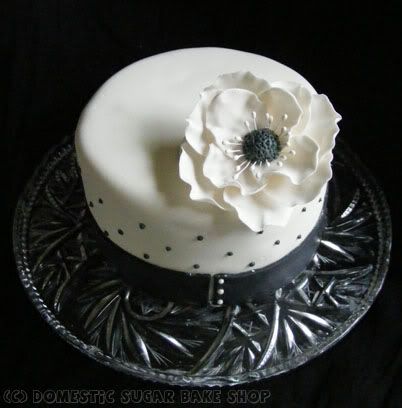
I have wanted to make this Black and White cake for a while. The trouble is that I love colour so very much (see the decorations on the blog to get the just of it). It was nice to have to bake a cake that didn't include a lot of colors and was simple to make. I was very pleased with the result.
I just think that the Anemone is such an elegant flower. It makes for a simple decoration. Now, on this cake, I did not abandon all color. The cake itself is a White Chocolate Raspberry cake with Almond buttercream. This recipe is actually one which comes from Wilton. I found it years ago and have stuck with it! I truly think it is a simple and delicious recipe, tasting better than a boxed recipe!


White-Chocolate Raspberry Cake with Almond Buttercream:

  • 2 1/4 cups all-purpose flour
  • 2 teaspoons baking powder
  • 1/2 teaspoon salt
  • 1 1/3 cups milk
  • 4 ounces (2/3 pkg baker's white chocolate) GET THE GOOD STUFF
  • 1 tbsp vanilla
  • 3/4 cup (1 1/2 sticks) butter , softened
  • 1 1/2 cups granulated sugar
  • 2 eggs
  • 1/2 cup raspberry Jam (Best stuff!)
  • 1 c unsalted butter (room temp)
  • 2 1/2 c powdered sugar (icing sugar)
  • 5 oz heavy cream (whipping cream)
  • 1 tbsp vanilla
  • t tbsp almond extract
  • pinch salt
Instructions:

Preheat oven to 350°F. prepare two 6 inch pans (lined and sprayed).

In a medium bowl, mix flour, baking powder and salt.

In small microwave-safe bowl, heat milk until hot, but not boiling. Stir in the vanilla and white chocolate until melted.

In a third large bowl, beat butter and sugar until light and fluffy. Add eggs one at a time.

Slowly incorporate flour and chocolate mix alternately, mixing until just combined. Whip for 1 minute at high speed, pour into pans.

Bake 20-30 minutes or until toothpick inserted in center comes out clean. Cool and prepare frosting.

Almond Buttercream:

Beat butter until fluffy, add in the vanilla, salt and almond extract.

On high whip in the heavy cream until mixture is fluffy.

Slowly add in the powdered sugar. Once mixed set aside.

NOW PUT IT ALL TOGETHER~!

Cut off the tops of the cakes. In the center of the cake, fill a layer of raspberry jam, then a thicker layer of the Almond Buttercream. Place two halves of the cake together. Press firmly but do not squish (gets rid of air in between).

Dirty ice the cake and let it sit for 1 hour.

Now, spread icing over top of the whole cake and decorate as you see fit. ENJOY!


I hope you all enjoy your Mother's day! Until next time.
post signature

Saturday, May 29, 2010

Pink Little Cake

This is what I've been doing all week!

On of my coworkers decided to head out of town and go to the "BIG CITY." BORING! Why would you want to do that when there are such cool people around here? Well, we tried to change her mind at a little party, but it was no go. I brought the cake.

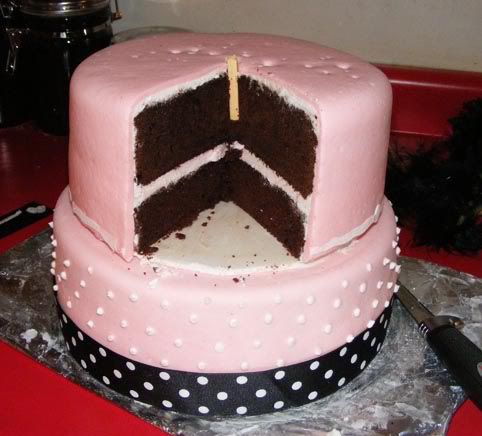
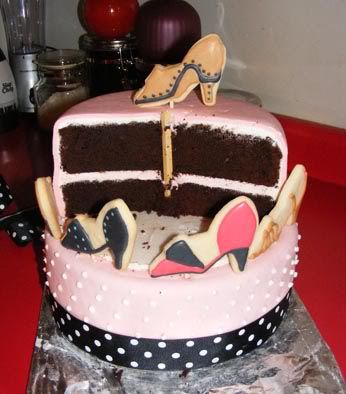
Just to explain what you see, Marshmallow fondant covers this chocolate fudge cake. Pink buttercream is covered by pink fondant. Originally my thought for the cake was to make a three tier cake to display shoe cookies (that's the type of girl.. more shoes than the queen I imagine). While I decided to change the idea half way through, but it was more for lack of time. I did have the shoes prepped, but just thought that the cake was too darn pretty as it was!

A smiling Jess next to the cake. You can see, it was a Pink Little Cake. I kept thinking about Kathia at the blog Pink Little Cake as I was making it. It was totally sweet site. You should check her out!


Of course, everyone wonders what the inside looks like, but rarely get to see. So, I took a few pictures. Look at the perfection! It was sooo moist! (notice the filleting knife we used to cut the cake? Small towns :)

Had I added the shoes, it would have been something like this... the cake just keeps getting eaten... Each shoe has a little sucker stick in them, then they are poked into the cake to stick upwards. It was a great design. I was just not too crazy about the possibility of ruining the cake. Some of the shoes did make it into the flower arrangement.

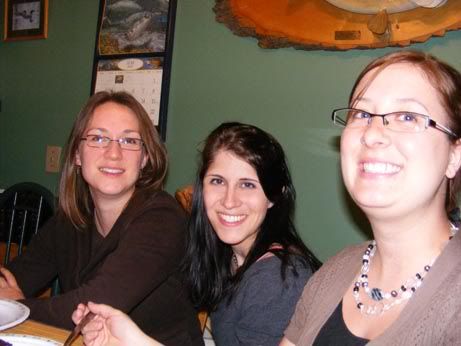
Enjoying the cake, Wendy, Me, and Jess. It was a fun night!

post signature

Sunday, May 2, 2010

And They Lived...

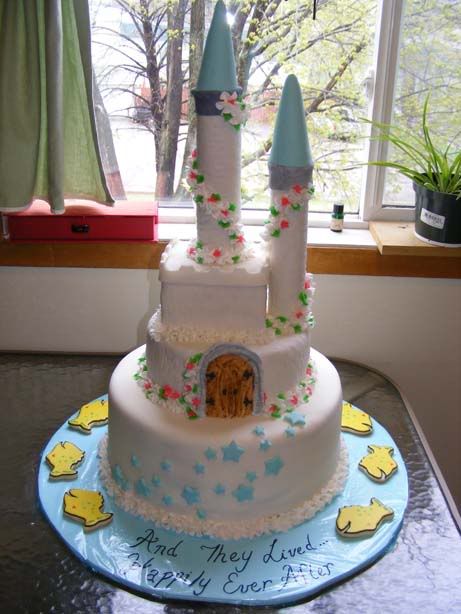
You know how a project can sound so good, and you think it will all work out given time, but when you take, play with it, you find everything goes wrong. That was this cake! What a week I've had! It was worth it for these shots, but still, the feelings of panic for three days straight, lack of food and sleep, and then utter joy and relief at the end cause a ruckus in my house!


But it was all worth it for this~

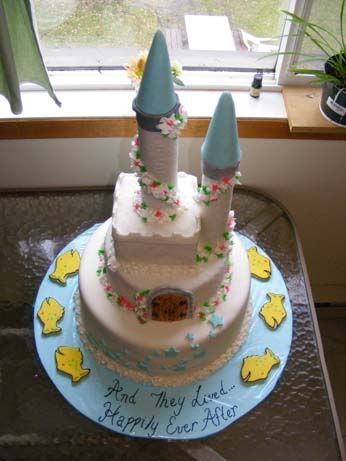
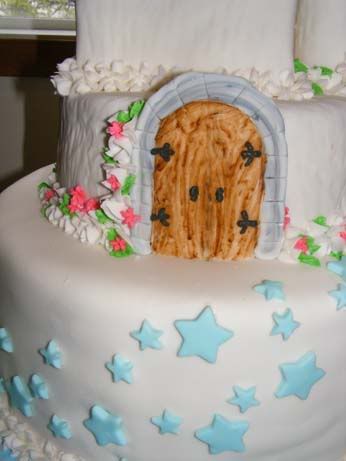
The cake itself was three layers of pain. The bottom (8 inches high) was made of chocolate, while the top two layers were made of white spongecake.
The cake itself was decorated in bight flowers (in red and blue) with larger white flowers around the base and up the towers.

As you can see, the cake was not perfect, but it was beautiful!

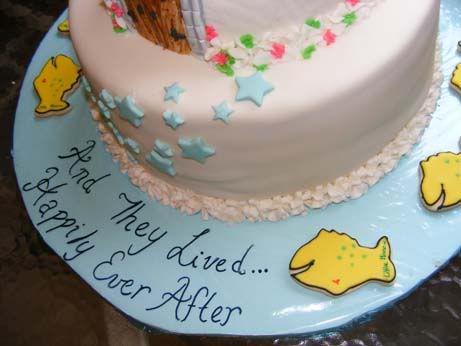
I loved the door the best. Originally, there was supposed to be a drapery going up the front which was going to be like a waterfall, but after having my fondant crack over and over, I gave up on it, and decided that stars would be simpler. They are not as classy, but the cake is whimsical, so it fit.

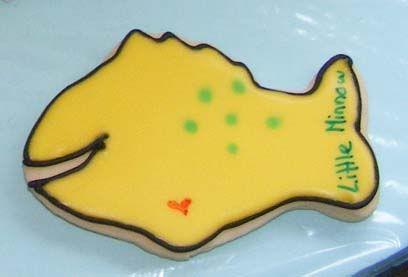
The bride requested minnow cookies to symbolize a baby on the way. Since the sex was not known, I made yellow Minnow cookies with little hearts in the belly. A friend called the baby "Little Minnow," so that caption was added to the back with Wilton Cookie writers.

So, some twenty hours after I started, the cake and cookies are finished. Congratulations to the bride and groom. I hope your the night was magical! And good luck in the future with the family!

post signature