Showing posts with label Other Goodies. Show all posts

Monday, December 10, 2012

What keeps you going? Peaking into my kitchen

 For all of my adult life, I have been dreaming of my kitchen. I pictured myself in my cute apron, whipping up batches of cookies and sweets for my husband, who comes in with the paper and sits down at the table just as I place the roast ham down next to the yams.

That will never happen.

First, my husband does not read the paper, as he is technologically inclined to download it instead, or check the online headlines.
Next, he hates ham. I love it. He hates it... a dilemma if ever there was one.
Finally, my husband loves to eat on the couch. True story.... no joke. Go figure!

So, now that I have moved into my dream mansion on the lake, and my kitchen is oodles bigger than before, I get to live only parts of my dreams. At least I can share them with hubby.


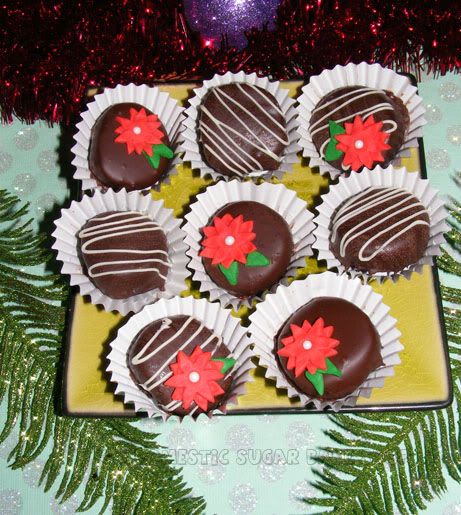
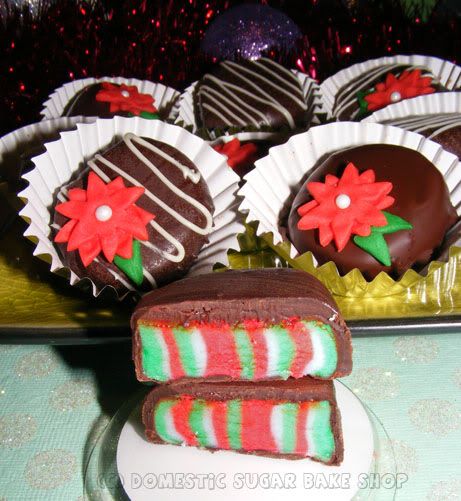
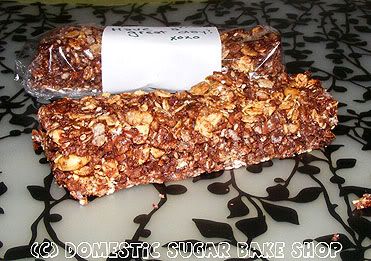
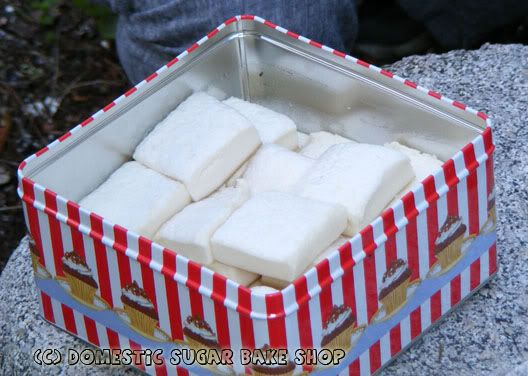
December always marks baking season for me. Every year I whip up hundreds (no literally, hundreds) of goodies to give away in tins and boxes to family and friends. The way I see it, people spend lots of money and time making dainties for people who drop in for a visit, so wouldn't it be nice to give out some of those dainties and save them time?
No
They eat them,
They eat them as soon as they are given,
And they are happy,
Which is just as good.

This year I had the pleasure of baking goodies with friends and family in my new home. If you did not know, this was the reason I had sparse posts and uninteresting pictures. I recently moved into my newly-built home on the shores of Rainy Lake. It is a gorgeous paradise. And my kitchen is about 5X bigger, without exaggeration from what I had before.


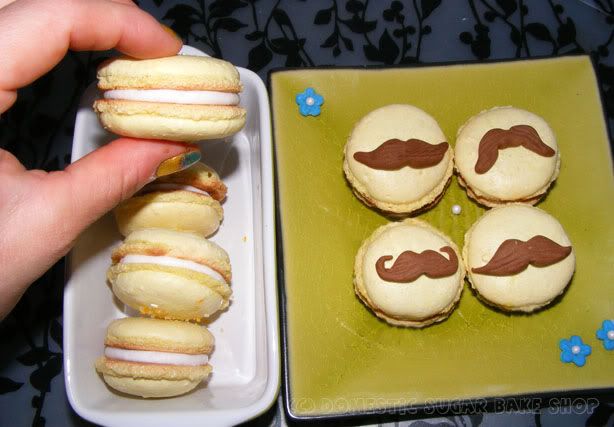
It is so big, in fact, that I was able to have company over for a cookie decorating party (as seen above) which was super fun! I was also able to bake more than one batch of cookies for the dainty boxes, which is amazing! I have never had two batches baking in my double oven while the third batch chilled... HOW MUCH DID THAT BLOW MY MIND?!

Here's my new paradise:


 It is super hard to believe that it is perfect... except for a valance curtain (teal or yellow... I have yet to decide) the place is perfect. I even had a sign made for above the island.
Je suis la propriétaire d'une patisserie!
N'êtes-vous pas exciter? Non... mais, je suis laide.


So, from my home to yours, Merry Christmas, and Happy Holidays.

post signature

Thursday, December 1, 2011

Homemade Mint Patties 2011

I love this recipe. Yes, it has been described as delicious diabetes, but there is something magical about how they melt in your mouth, and how that delicious mint flavor is beautifully coloured! Honestly, of all the things I make at Christmas, this one has to be my weakness!

GO TO TUTORIAL HERE

This year, I was asked to make these treats as a tutorial for our local newspaper. While the issue has yet to come out, I just could not stand but to post them up. Since the majority of my readers actually live outside of my small town, I figured a sneak-peak was in order. The newspaper found me through the blog some years back and did a little article on me. They saw the tutorial I made last year for this and decided to ask if I would not do one for them. Since my focus has been on photography, I am trying to make my shots a little more interesting. I also added more colour to my mints by adding a third layer (red, white and green).

Now, I had put up my tree on the weekend, but I've been dragging my heels on taking photos. I am missing some of my ornaments, and really want to wait until I have them up.

To me. the tree is the most exciting part of Chirtmas. Everyone has their traditions. For hubbie and I, the traditions for us are putting up the tree star together (me decorating because everyone knows that wives have some magical tree-decorating powers), taking a photo of me sleeping under the tree (It always happens after the tree goes up! I can't help myself, the ligthts are so twinkly), and having X-Mas Eve breakfast together (because The EVE is the best part of the season). SO far, we've hit two out of the three traditions... It did not take long before a lazy and sick wife found her way under a tree. Either way, I welcome the traditions. As I move through my life, I find myself making more and more of them. And the funny thing is that I look forward to the silly little things.

Looking back at my life, I find there are many things I wish I could change growing up. The truth is, looking at where I am now gives me perspective; I'm a lot further in my life than I thought. Seeing my tree, and looking at my house, I feel blessed to have come this far, especially knowing there were two times when I was not sure I'd make it. My treasured traditions will go on, and so will I. I guess at this time of the year, I am reflective. I apologize. I just really feel happy looking at my tree - which I will post!

post signature

Sunday, November 20, 2011

Movember Moustachioed Macarons

I have been dieing to do something for Movember. I hate when you don't have as much time as you want. But, c'est la vie! It is especially true considering I don't have kids. Most of my friends who do laugh that I get time at all to bake, so I guess I need to have more compassion and patience.

So, this week given my recent baking trend for co-workers, I decided to do something Gluten Free for the two on staff who never get to taste anything I make. The thing is, I wanted it to have a moustache. What is cuter than a Macaron with a Moustache? (maybe one on a stick!)


I have to admit, Macarons are still a struggle for me. The delectable treat tends to get all finicky in my oven. I love how they look and am still trying to perfect them. These Lemon ones, for example, slid a little in their dome. You can JUST make out the crusty bottom of the Macaron, and there are a few pock-marks on the tops. ZUT!
It is my challenge to eventually get it right!


So, I made several Macarons with Moustaches. These were my favorite: The trucker (aka. handlebars), the Undercover Brother and the Connoisseur. Hubbie can't exactly grow a mustache, but beards are his thing... go figure? My friends and I were all sitting around at a Mexican restaurant in town looking at all the moustaches. It is awesome to see, and yet part of me screams in terror at their mere presence. Our server in particular had an amazing 'stache!

Recently we've begun watching old 70s movies, and I don't know how they did it back then... how was that a trend?!


Well, combining two trends: Moustaches for Movember and Macarons for baking, I believe that I'm getting closer to my goal of making a delicious and perfect Macaron. Maybe in time! Until then, I'm going to serve these up and laugh. Maybe I need some more chocolate moustaches too!

post signature

Sunday, September 11, 2011

[Recipe] Granola Bars - Homemade and Peanut-Free!

Finding good food for your kids (or husbands) to eat at school is becoming more and more expensive. Compounding the costs is the idea that many schools are 'peanut-free' due to severe allergies by staff and students. Limiting options have parents purchasing expensive lunch-treats that are not so healthy but fit the new standards. Since each day you need new treats, each day is a new bit of money thrown down the 'treat' drain.

Not anymore!

I offer to you my recipe for healthy granola bars that (if you so choose) are peanut-free and at a little healthier than other options. You customize what goes into them, and you choose what they taste like. This is a highly customizable recipe, and I LOVE IT. I make it every Sunday night for my school week; now you can too!

Recipe: Kitchen-Sink Granola Bars

1c quick oats (instant oatmeal stuff)
1/2 c corn syrup
1/2 c honey
3 tsp brown sugar
1 1/2 c rice crispy cereal
1/2 tsp vanilla
3 cups of anything (Marshmallows, seeds (sesame, pumpkin, flax), granola (strawberry/raspberry etc), cookie crumbs, chocolate chips, melted chocolate (1/2 c)...

Preheat oven to 325 degrees.

Mix all dry ingredients together, then add in the wet ingredients, stirring until everything is coated.

Place wet mix into 9X9 pan lined with parchment paper. Wet fingers with water and press down the granola bar mix into the pan; make sure all edges are pushed in and it is nicely packed. Keep fingers as wet as possible to reduce sticking and moving.

Bake at 325 for 15 minutes. Remove and cool:


Once the mix has cooled, but is still a little warm, cut it up into bars. Each mix makes 10 large bars which can be made smaller for smaller people. I find that two small bars is great for the 'balanced day' we have in our school board.


Not only is this a great recipe, but I love to personalize the bars, wrapping them in plastic wrap and putting a little note on the bar:

The last one is for myself... I always forget.


So, what do I like in MY Granola bars?
-1/2c melted chocolate
-1 c strawberry-banana granola
-1/2 c pumpkin seeds
-1/4 c sesame seeds
-1/4 c flax seeds
-1/2 c regular oats (I like em' hearty)

Give them a whirl. They are easy to make with the kids, and a staple in my house!

Happy Schoolin'

post signature

Monday, September 5, 2011

Marshmallow Mishaps!

For the longest time I've wanted to make Homemade Marshmallows! It has been at the top of my daring baker checklist forever. So, when this past weekend I decided to make my own, and they turned out amazing, I was super excited to get out and roast them over a fire.

FINALLY, I GET TO MEET MY GOAL!

I used a recipe I found in Gourmet a while back. So, with a nice fluffy batch of marshmallows, a stick, some good company and a lot of laughs, I began to sense the anticipation of a fresh, warm marshmallow...

Hmmm.. the above marshmallow looks a little wet... hmm...

Wait... WHAT! It is melting!


Me sensing all is not as it should be....


Nope! These marshmallows are great to eat from the container, but are none too good for fires. I went through 3 Marshmallows trying to find a way to roast them that would not produce melting, but was ultimately defeated by the mighty Marshmallow Mishap.

My friends and I had a good laugh at the whole thing. It was so awesome when they saw the marshmallows, but when it started to melt away, we all laughed quite a bit. With the cool fall weather, we all enjoyed the fire and the fun, and at least each other's company.


Oh, and the swimming! Hubbie and I got into the water, which was surprisingly nice once you stayed in for a minute or so.

I hope you all had a great long-weekend, and good luck to all those who are back in school... like me. CHEERS TO MY CLASSROOM!

post signature

Monday, July 18, 2011

ლ(இ◒இლ) DONUTS!

No really, EVERYBODY LOVES DONUTS! Especially me. Maybe that's why I decided to try my hand at making them. I've honestly been wanting to try it for a while. I am certainly no daring baker, but this would have been my challenge.

Before I go on a rant, and show you how I made my donuts, here's some music to get you into the mood!


And, because my hubbie looked at my pink donuts and wanted me to post the donut, here's another image:
Okay, now we are sufficiently ready to talk about the donuts and the making!
♥ ^_______^ ♥

I've never actually been able to eat donuts. I love them, but cannot digest them well, they cause bad sadness. Still, they are adorable. I think of Donuts as on par with a Macaron in the realm of cuteness! No less, white donuts are amazingly cute with pink icing. I love pink!

Where's my recipe? Super easy!

Everybody loves Donuts!


2 1/2 tsp yeast
2 1/2 tbsp warm water
1 tbsp sugar

3 ¼ cups all-purpose flour (plus extra for dusting)
1 cup whole milk (homo milk) warmed (not hot)
1/4 cup butter/margerine
3 large egg yolks (save one egg white for icing)
2 tbsp sugar

About 8 cups vegetable oil for deep frying - you will need to fill a pan 2 inches full from the bottom.

Directions:

1. mix yeast, water and 1 tbsp sugar into a small bowl. Mix a little by swirling, then let yeast froth until doubled.

2. Mix flour, milk, butter, eggs and sugar into a bowl. Beat together and add yeast mix. Mix low until incorporated, then turn up the speed to medium and beat for 2 minutes, or until mix starts to stick to the sides of the bowl.

3. Scrape the dough into a ball, and place in a clean container. Grease the top with cooking spray and let rise in a warm, draft-free spot for about an hour to an hour and ten.


4. When the dough is ready, take it and put it on a lightly floured surface. Roll out 1 inch thick.

5. Using any size cookie cutter, (round), cut a circle of dough out.

and then using a smaller cutter, or piping tip, cut a smaller circle into the dough.

TA-DA!
Sine you can't re-roll the dough (as it gets tough and chewy), I save the donut holes to eat!

Now, let the dough rest for 15 minutes to rise a little, but mostly to soften it.

6. Warm up the oil SLOWLY on medium-low heat. The best way to test if the oil is ready is to take drop (literally a drop) of water and flick it into the oil (stand back). If the oil begins to pop the water, it's ready! DO NOT BOIL THE OIL. Put your donuts into the oil and fry until golden brown. If you look above, the two bottom donuts are ready to be taken out, and the tops need to be turned. The dough puffs up nicely and becomes really fluffy!

Once the donut is pulled, place on a paper towel to take any excess oil off.

YUMMY!
Now for icing, glaze or topping!

You could simply go for the cinnamon sugar option by rolling the donut in a cinnamon sugar mix, or you can glaze... or ice. Here's what I used:

Donut Icing:

5 tbsp icing sugar
1 tsp flavor (I used cotton candy)
2 tbsp water
1 tbsp light corn syrup
1 egg white (frothed)
color (optional)

Mix ingredients together until you can see the icing integrate into itself in 3 seconds (without tapping). It should be thin enough to run, but not run all the way off the donut. Load into a piping bag and pipe onto donuts. Add sprinkles if desired. Let dry 1 hour.

Maple Donut Glaze:

5 tbsp icing sugar
2 tbsp maple syrup (real is best)
3 tbsp water
1 tsp maple extract
maple syrup flakes (optional)

Mix ingredients until very thin and runny. Dip donuts into glaze, cover all of the donut, then place on a wire rack to drip dry. While still wet, sprinkle maple syrup flakes onto donut for decoration.

SO PRETTY!


Well, hopefully you've all been enjoying some great weather. We're still pushing 100F here, which is killing me! Thank goodness for water and swimming! Hopefully you've all been enjoying good weather and are staying safe. Boiling oil is a little hot for this weather, but that's okay... at least I can eat one donut. My rare treat!

Goes off singing the "Doughnut Song"

post signatureLink

Thursday, March 17, 2011

Last bit of Irish Green

Before we all go off to forget the awful holiday of St. Pats day (no, it's really not that bad... except when it's on a Thursday), I thought I would have one little pots on my morning snack!


I am a sucker for cinnamon buns any season of the year. Really, you could give me a whole plate of them and I would die happy! So, Here's my recipe for a quick batch! (Makes about 24 medium buns or 18 large).

Basic Sweet Dough

(adapted from the Kitchen Aid Cookbook)

3/4 cup 1% milk (we have to be healthy here!)
1/2 c sugar
1 1/4 tsp salt
1/2 c butter
2 tbsp yeast
1/3c warm water
3 eggs room temp
5 1/2-6 1/2 c flour

1. Warm milk, salt, sugar and butter in a small saucepan. Stir until sugar is melted and so is the butter. Cool to Lukewarm.

2. Dissolve yeast in warm water. Add lukewarm milk and eggs. Add flour and kneed for about 2 minutes. Add flour in 1/2 c increments until it is just a little sticky.

3. Place dough in greased bowl, turning to crease the top. Cover and let rise in a warm place (1h).

Filling


1c firmly packed brown sugar
1 cup sugar
1/2 c butter
1/4 c flour
1 1/2 tbsp cinnamon
1/2 c walnuts (if desired)

Cream sugars and butter, flour and cinnamon (and walnuts if chosen).

PUT IT ALL TOGETHER!

1. Roll out your dough and spread the mix on one side. Roll the thing up and cut into rolls (large or small). Place cut cinnamon rolls in a baking pan or dish (like below). And Let rise (40 min).

Bake at 350 degrees for 20 minutes (mine were 20 and were a little dark... my oven is on the fritz).

Green for St. Pats day! HURRAY!

I put a glaze on mine:

Caramel Glaze

1/3c evaporated milk
2 tbsp brown sugar
1 1/2 c powdered sugar
1 tsp vanilla

In a saucepan, melt brown sugar with the milk. Add warm milk mix to the powdered sugar and vanilla. Blend with a mixer until the mix is slightly cool and creamy (about 2 minutes). Pour over buns. YUMMY!

Honestly, nothing is better than a warm cinnamon bun... except someone to share it with :)

post signature