Showing posts with label Animals. Show all posts

Saturday, November 23, 2013

RAWR! Dragon Cake

Well, long time no post. Here's the latest in cakery... This cake was designed for a Physics Class... does that make it a physics Dragon?
Mixed cake flavors: Chocolate, marble and Red-Velvet
Head and horns: Constructed using rice-crispy treats.
Covered in Buttercream and Marshmallow Fondant


(Photo taken using iPod - low lighting)


 post signature

Saturday, September 22, 2012

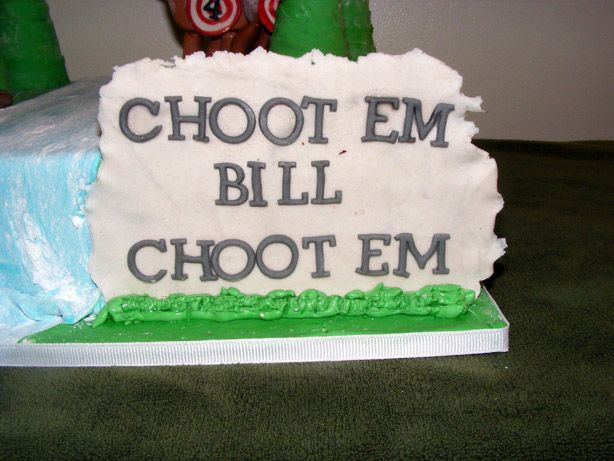
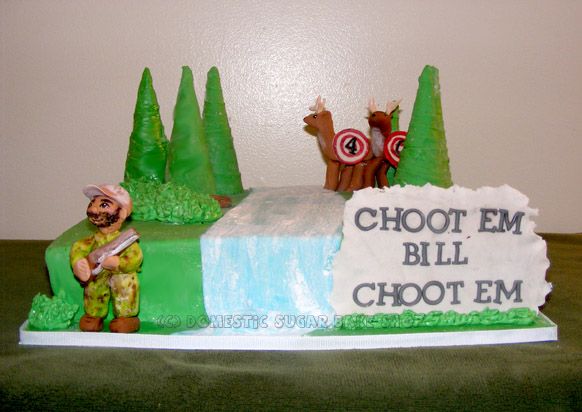
Choot 'em BILL!!

In Northwestern Ontario, people always try to pass the time away... waiting and hoping for the fall; impatiently hoping to 'choot something! It never ceases to amaze me how this town lights up around this time of year. Children, parent, and families all move from their small town rural homes, and push into the bush to find something to 'choot.

This week, I finally got a chance to make a cake for a hunter! Bill turned 40 this week! His family often encourage him with the wondrous red-necked words "'choot 'em!" Sadly, we have no gaters here up north, but the magic of "Swamp People" has certainly not missed it's mark on our population, so we turn to the deer to live out our dreams! BECAUSE THEY ARE DELICIOUS!!!


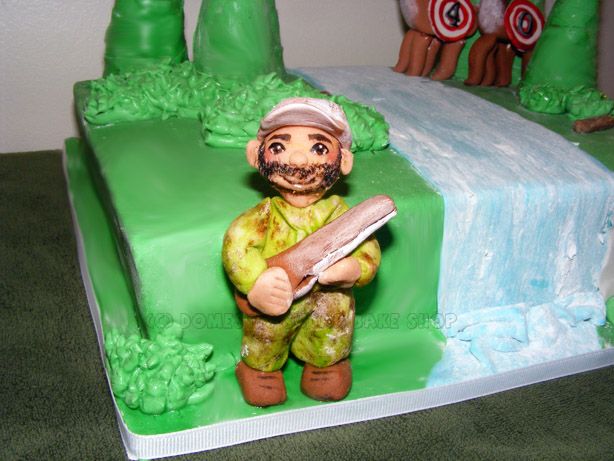
Here is Bill:


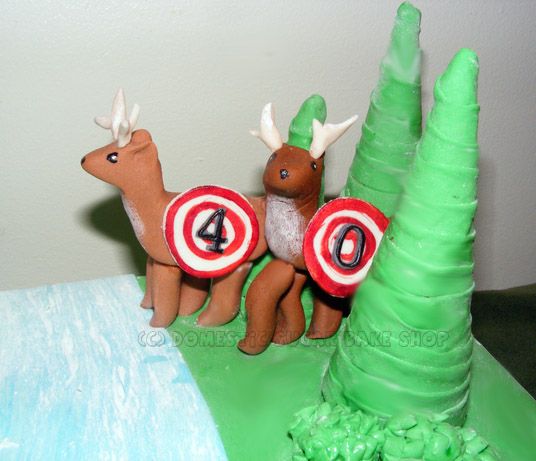
And here is his reason to want to 'choot anything:


HEY, LOOK OVER THERE!! THE BIG 4-0 IS HIDING BEHIND THOSE BUSHES!!!


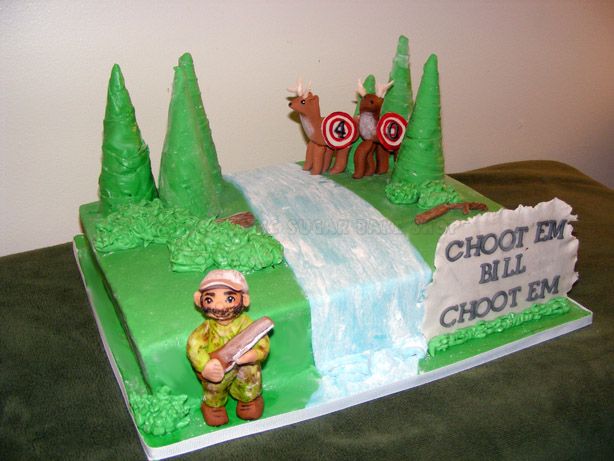
But seriously, this cake is a simple homage to aging hunters everywhere..... and while I forgot to paint the sugarpaste Bill's neck red (forgot, but wanted to), this cake represents the best of my hunting knowledge.... I had to Google Deer (I usually only eat them, not 'choot 'em), and My gun looks like a rocket launcher.


So next time you come down to Northern Ontario, look out for the bearded man with the rocket launcher, 'chooting deer in an attempt to dodge fate. Don't worry, around here, you're never too old to own a gun hunt!

post signature

Monday, August 13, 2012

Tutorial: Butterfly Cake Topper

 Hey! Me again!

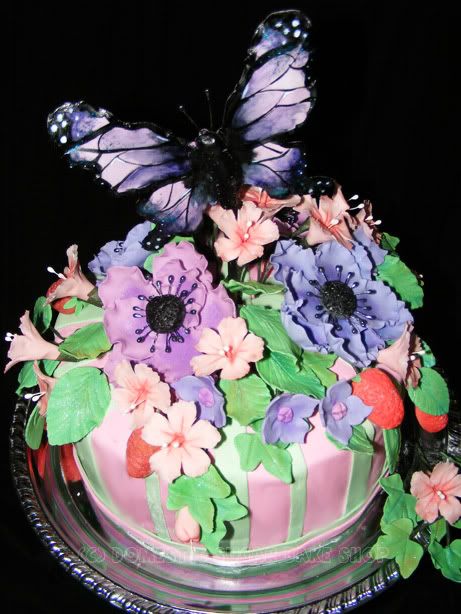
For my cakes, I like to add small details which add height and sparkle, so my Sugar Butterflies have become a hit! Here's a tutorial on how to make your own Sugar Butterflies:


As in all my tutorials, I try to keep the materials simple. In the tutorial I use a ball tool and a foam mat to ruffle the edges of my butterfly; you can skip this step and just do a flat butterfly! As always, work with what you have! You can substitute the ball tool for a toothpick and  roll the edges of the toothpick on the butterfly's wings.....

What you need:


  1. Sugarpaste/Gumpaste
  2. Butterfly Cookie Cutter
  3. Rolling Pin
  4. Ball tool (optional)
  5. Foam Mat (optional)
  6. Dowel
  7. Food Color (gel kind like Americolor)
  8. Water
  9. Paintbrush


Step 1:


Roll out the gumpaste. You will want it to be fairly thin, maybe 2mm thick or so. Using your favorite butterfly cutter,  cut out the shape of the butterfly.

Step 2:


Using a ball tool, thin out the edges of your butterfly's wings to give the wings that whimsical look. I try to spread the butterfly's wings, and leave the body thick. This will be important when you dowel your butterfly.


As you can see, the spread butterfly is larger than the cutter. This is important! Your butterfly should be wider and longer than the original cut out for when you have to put the backing on him.

Step 3:


Now, take your thin dowel and lay it down the center of the butterfly's body on the underside. Allow the butterflies to dry in this way (Overnight, or 8hours)

Step 4:


When your butterfly is nice and hard, carefully remove him and put it upside down. Roll our another butterfly to be the backing. To secure him, simply add a little water to the backside of your butterfly, then apply. Again, allow time to dry. I try to make sure the 'head' of the butterfly is sealed well, and make sure the dowel does not poke through the top of the piece. By creating a dome on the top, the stick will have something more to keep it in place.

Antenna: At this time, you can choose to place antenna into the butterfly. Simply use a floral stamen (optional, found at a craft store) in the top between the two layers. When it dries, they will be secure.

Step 5:


Now for the sun part: DECORATING! Taking your gel paste food color, water it down, and paint the edges and body of the butterfly. Keep in mind that the as the butterfly dries, the shininess of the 'paint' will dull. No worries!

Step 6:


Depending on your pattern, you can paint the inside any way you wish. For this one, I decided to make a Monarch butterfly, so I painted the 'cell' veins through the body. Once the black is done, allow time to dry (10 min?).

Step 7:


Now, when the black color is dry (this is tacky, as you can see), paint in the color. You can choose to fill all the cells, or just one or two for a stained-glass look. The Flower Garden Cake had purple gumpaste with a few cells painted.

Step 8:


Add a contrasting colour to the edges of the butterfly....


Blend the colors together with a clean, lightly dampened paintbrush. You can add in the darker black if you wish by swishing it with the paintbrush.

Step 9:


Allow time for the fully coloured butterfly to dry. If you wish, you can paint the stick the colour of the cake (for instance, I have painted them black/white before). You can even add stripes or polka-dots to the stick to give them character.


Here are the to I used on Linda's Pink Wedding Cake.


Now You too can make Butterflies! HURRAY!

post signature

Sunday, January 29, 2012

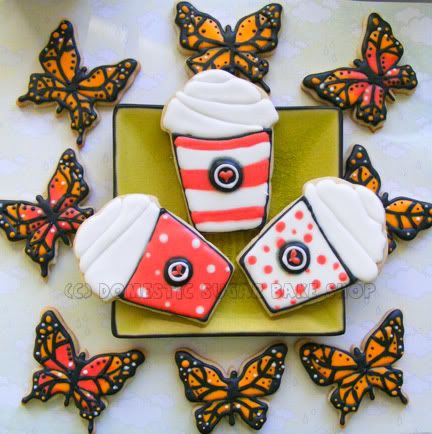
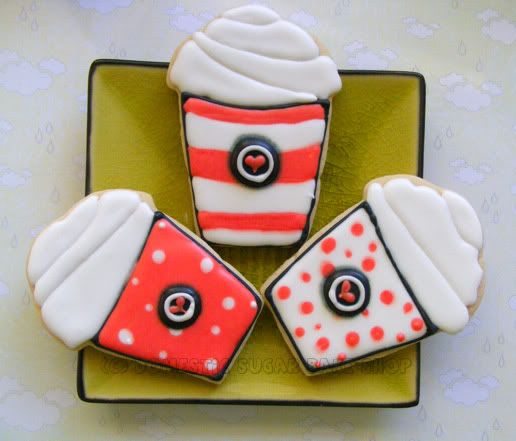
I love you a Latte

While these cookies were originally for a sick friend (one whom enjoys going for lattes with me), I couldn't help put think the theme was a little reminiscent of Valentine's day, which is quickly approaching.

The title: "I love you a Latte" is another one of those dorky things Hubbie and I say to one another. The response to the comment is always "I love you amore" which I guess drives home the fact that I am completely dorky in every aspect, and I am officially "ONE OF THOSE MARRIED PEOPLE." YUCK!


Anyway, the theme was of hope. Of course, beautiful monarchs and lattes seems a strange choice for hope, but friendships, like any type of love, are formed through a gathering. To be metaphorical, the Latte cookies symbolize a gathering, as coffee trips are wont to do, and the butterflies symbolize overcoming, rising above (in this case, sickess). Seeing as my friend is neither wanting or ready for metaphors, I figure posting here might explain my dorky choice.

Oh look... there's another ENGLISH MAJOR... with her useless degree flaunting bad spelling mistakes and internet journaling. Isn't she special. (-___-);

Back to cookies. This design is perfect in my opinion for Valentine's day as well. The Latte cup is not a cookie cutter I own, but a hybrid: CUPCAKE cutter with SQUARE cutter on the bottom = LATTE CUP cutter. HURRAY! I think finding new uses for old cutters makes my budget a little happier. Why not find another use?
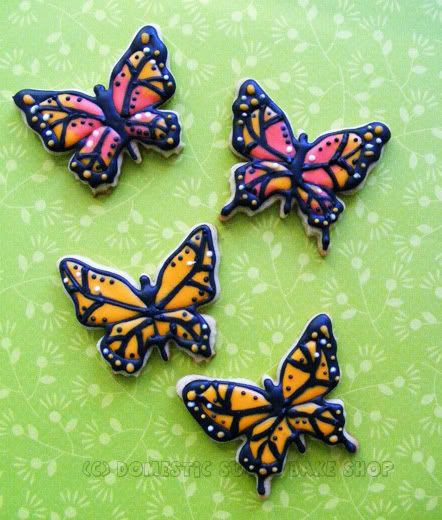
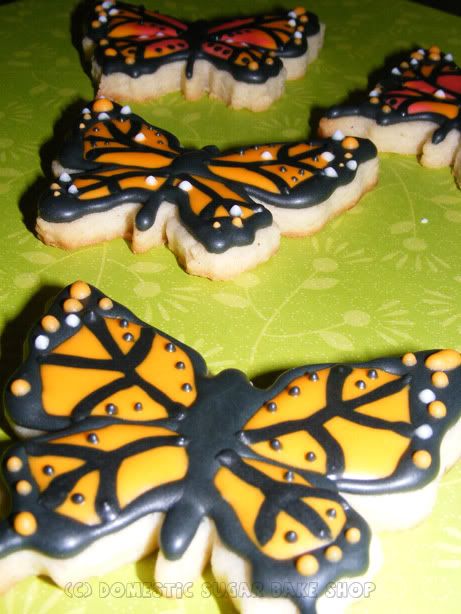
And what about these butterflies? This is my absolute favorite 'pretty' cutter. Even the normal cutter looks nice. I got it online, and have used it many times. This time, I used it for the monarch butterfly: Outline the black and fill it in!

I actually think the colours of the Monarch are absolutely stunning! I also love the Monarch's story... how it flies to South America every winter, and only it's children will return. How does it know to do that?! What sort of amazing evolutionary mechanism tells it to do that... I still can't train my husband to make coffee. "THANK YOU!"

Mine is better anyway (╤ ◡ ╤)♥


So, here's to pretty cookies, friendship and love. Hopefully I will have some more classy analysis to blither about.
Until then!

post signature

Friday, January 6, 2012

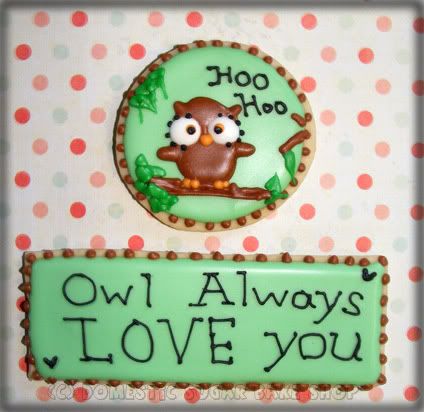
Hooo Will Always Love you ?

YAY! I'm back to baking. I have to admit that this break was lacking greatly in this way... I really, REALLY wanted to do some baking, but had no way to, which was sad.

So, now to start this year off right! My first real post of the year (Minus the 10 for 2011 post I did just after the New Year). Owls are awesome, and I am cheesy enough that I like playing with their name.


Yeah, That's right! Silly sayings make everything better. I told you all on my Last Owl Cookie Post that I like to say silly things like Owl Always Love you. This time, however, I did not offer to do the dishes and instead spent the entire time creating a large sink full of piping bags, tips, spatulas, and bowls filled with rock-hard royal icing (which washes away with water... after soaking). One of the best things about cookies is the colours. I love adding different colours, but the problem will always be my reluctance to do the dishes afterwards.

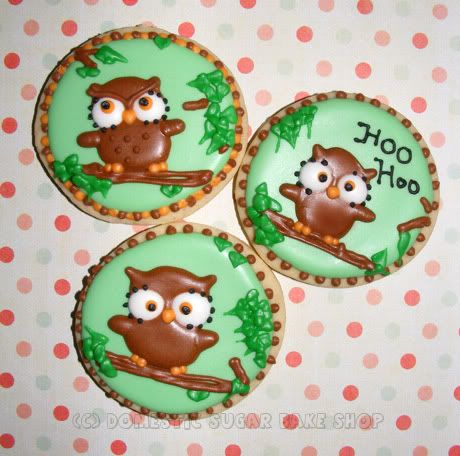
Looking up above, you will see the owls I created, one looks a little angry, but I like his crest. I keep thinking he is the daddy owl, and that those two beside him are the baby owls looking cute. I wanted to do a different kind of cookie this time, a round picture cookie, but I wanted to play with the owls as well, so I took a look through Google Images to see the different looks, and I didn't find anything of what I imagined. I instead took out a sheet of paper, and sketched out a design... then piped it together:
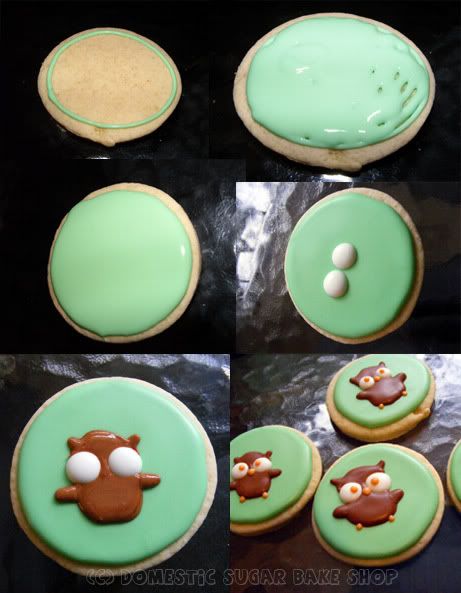
Of course the last thing I do is sketch in the details. Not a huge thing, but I got lazy and stopped taking pictures. You can fill in the blanks as to what came next.
How, I have had so many people asking me about my royal icing recipe, and I never know how to tell them that I don't have one, not written down anyway. I have tried to fill in recipes for this in the past, but now I just eye-ball it. I do have a formula for it, but it is loose.

Royal Icing a-la-Domestic Sugar
(Yeild... lots, enough for a few piping bags at least)

5 tbsp Meringue Powder
1/3th c water

Dissolve Meringue Powder in the water, using a blender to froth it a little. Make sure that there are no 'crystals' of the powder left... some brands are granular in texture, try to use something like Wilton - though I hate to say it - as it is a better brand). Once it is dissolved...

1tbsp flavor (or equiv. I sometimes use flavor oils as they have a wonderful full, unique flavor... in those cases, use a drop or two).
3-5 c powdered sugar/Icing sugar
extra water (1/2c ?)

This is where things become different. Because icing can have different textures, you will need to eye-ball it to make it the way you want it. I use the 3 second test. If you add and mix up your icing, and you want it to be like the owls above (thick without boarders), then mix it up and run a spatula through it; count to three or five, or give it a little shake. If the icing has flattened out and you cannot see any lines sticking up, you are golden. If you can see lines, add a few drops extra water... and if it runs flat right away, add more Powdered Sugar.

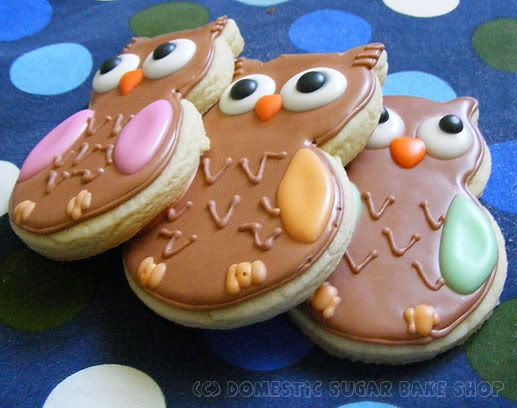
What I suggest is that you find what works for you. Many people out there who try flood cookies make very thin flood, trying to extend the life of what they have, and in truth, you will get a cookie with a boarder that is higher than the middle design. That is less attractive. Try to use a thicker flood whenever possible, that way the flood actually balances on top of the boarder line. Looking below, at the old owls, you can see that I piped a line around the cookie shape, then flooded it (rather than above where I didn't use a line at all to outline). You can see that the flood is thick, and above the line; you want that! The flood is thick and rich, it is not thin at all. Thinner Floods will dry and cave in.

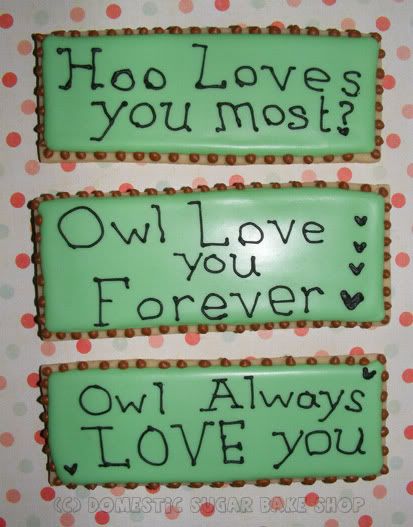
Well, in truth, I am not actually sure if my recipe helps in the least. I am not scientific about the flood. I just go with whatever I like. For example, below, on the cards, I used a thick flood (No lines necessary) and a thick, stiff icing (less , way less water) to pipe the words. Icing is not an exact science, and wherever you live, be it humid or cold like here, affects the icing. Just play around with the water/sugar ratio and see what happens. If you look at one of my first cookies, you can see that they are also not well filled with icing.

Okay, this post is wordy. Maybe some of you read it though and found it helpful maybe some of you didn't. I just home that you enjoyed the pictures at very least.

I wonder what I am going to do next... hmm? Any suggestions \(°˛° ) ?

post signature

Friday, December 23, 2011

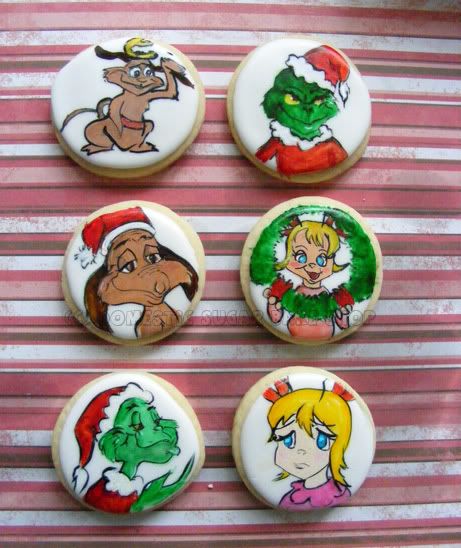
Max, the Grinch's Dog - is that his name?

No really, most people forget that the dog's name in the Grinch is Max. May be it is because I am a little silly, but I can't forget that kind of important information.

Anyway, ::
DOES A HAPPY DANCE ::
♪♪Tomorrow is Christmas Eve! ♪♪

For my Family, the eve is the most important day of the year. I am super excited! And now that our school's Christmas Concert is over, I can finally take a deep breath and enjoy it.

I was supposed to post these cookies up a few days ago, but found that I had NO time. I had a lot of those kinds of plans. So, here is the final cookie. Only two pictures of the process, but by now, you should be able to understand how I did it:
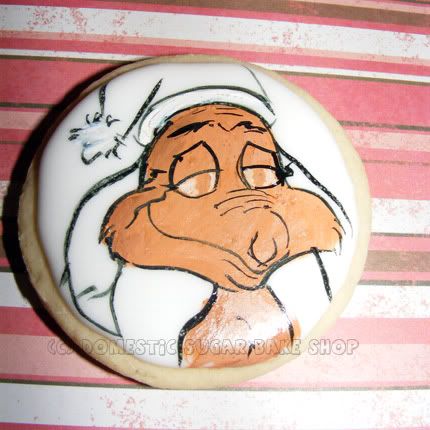
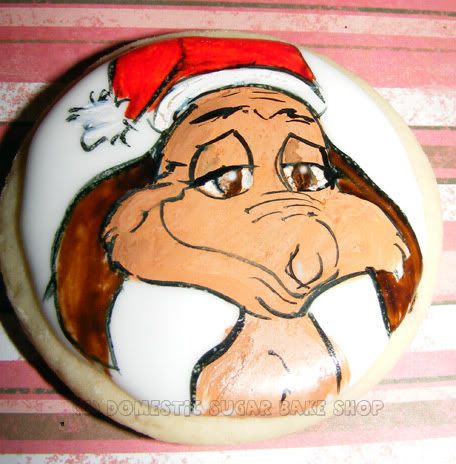


I may not have time to post over the Holiday season (But I have more cookies to post), so I am wishing you all a very Happy Christmas, Hanukkah or just the best for the season.

post signature

Friday, November 11, 2011

IT'S A DINOSAUR! (cake) RAWR!

It's been a long week! But a good one! This is probably going to be my last cake for some time. My health is kinda crappy, and I'm finding it too hard to sit for long. Too bad too. But, I must say, it's a cute way to take a break!

This Dinosaur was made for a fellow teacher. Her son is having his first birthday party, and asked for a dinosaur cake based on some plates that she had purchased. He's so cute!


This was my first cake using Rice Crispy treats to mold a shape. Although the head/feet are not that superbly detailed, I think I have a better sense on how to shape with the materials. Super excited about that! But... ITSADINOSAUR \(♥◒♥)/

I mean, really, how can you resist this face?


Dies of sugary cuteness! For this cake, I used my vanilla butter combined with a white-chocolate cake recipe. It is white through and through, except for his MMF-covered body. The cake on the side was a cute touch. It's the smoosh cake for her child. He's gonna mess that little guy up. I devised a way of adding it to the cake board as a decoration, but it pulls off easily so that when the time comes, he can eat it all up.. Smart right? (ノ◉ヮ◉)ノ<(YAY)

So, that's it for cakes for a while I think. The problem is that I love making them so much, that it is actually hard to turn down friends who want cakes. It actually makes me sad, like in my heart. At least I get to make cookies (maybe not super decorated ones though...) SIGH (= o=)/
Hope everyone has a super weekend!

post signature

Thursday, September 8, 2011

Owls... they are looking at me!!

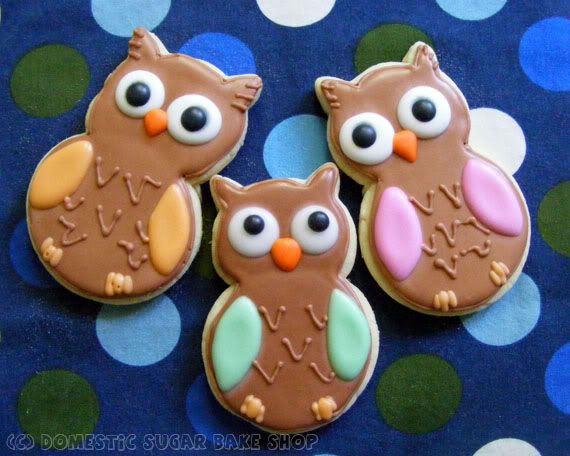
Our local teachers had a wonderful fish-fry get together this week. Each department was asked to bring some type of food (salad, buns, desserts etc). Not surprisingly, my department was asked to provide desserts. I figured, since we're a bunch of teachers, I should bake something that represents us... Like Owls... they represent wisdom.


I made three colored owls, well, owls with three different wing colours. Pink, Orange and Green. The best part of a cookie is seeing it come together. First, each cookie consists of two cookie cutters pasted together. I took an Owl head cookie cutter and fitted it to a circle body. I wanted Fat owls, and all I have is small thin Owl cutters. Fat owls are happy.... and fat :)
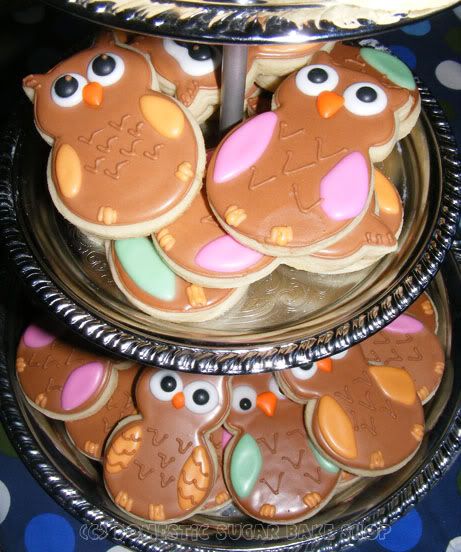
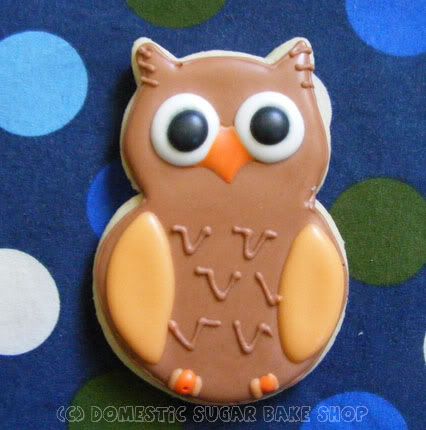
The best part was my husband's reaction. He loved how they looked and snickered at how the eyes seemed to stare at you. Then we started walking around the house saying "Owl-always love you" and "Owl do the dishes for you" etc. At this point, we devolved into sugary-cute married people. Lame as it was, the Owl Cookie seemed to really be a catalyst for silly love banter ♥.


At the fry, the cookies were a huge it. So, I was pleasantly please. I like it when people pick them off a table as the dessert that most appeals to them. It makes me feel special. Some people ask if I get sad, seeing a cookie or cake get eaten after you've worked for so many hours to make it beautiful and perfect. The answer is, I do not; when people enjoy the work of art by eating and enjoying it, I get a special feeling: Pride!


The Owl is watching you!

post signature