Showing posts with label Summer. Show all posts

Thursday, May 31, 2012

Cheeky-Tulips

I am pretty sure that aside from my family and close friends, many don't know that my home town of Thunder Bay had massive flooding. The big storm overflowed rivers and streams, overloaded the water treatment plants that then backed up into people's homes. People fought tooth-and-nail to keep water out of their homes, while others could do nothing but watch as 2 meters of water flooded their basements (that is way over my head). Some even said they had live fish down in the depths of the murky water.


While our region has been dry, this water does not help at all. I suppose we're all just wanting May showers to lead to June flowers, which is why I've made these cookies. I kept thinking of flowers, and people, rain and being stuck in the house. So, in conjunction with a cake project I'm working on, I threw together some cookies. What better to lift the spirits? (Just so we are clear, my family was fine... I'm sure my father was canoeing down the swollen rivers, and maybe even in the back lane).


 I think these cookies helped me to kick myself out of my funk! It was almost 3 weeks between my last post and the Thomas cake I made. I hate when you're creative juices dry up! Unlike the weather


Badum-CHING!


And I love to paint on cookies. I remember someone saying that using food-doodle food writers (edible markers) was cheating, but I consider painting on a cookie to be quite beautiful. I can get more detail into the cookie this way. And I make them pretty.


So, here's to spring, and summer, and nice weather, and fewer rainy days.
And good luck to all those in the Flood Zones!

I am off to finish my cake project... and maybe go to work!

post signature

Wednesday, April 25, 2012

Flower Bouquet Cake

Hurray! SPRING!
I've been watching the weather change. WE OFFICIALLY HAVE GREEN BUDS ON OUR TREES! That is super exciting. Today I was even fantasizing about swimming in Rainy Lake. I remember last year in May taking a plunge in freezing water when there was still ice moving out. This year, the ice is long gone after that wonderful March weather, but it is still far too cold to go for a dip just yet. If you've seen my polar plunge photos, you know that the cold does not bother me. Luckily, the flowers are blooming again, so here's my latest cake creation:


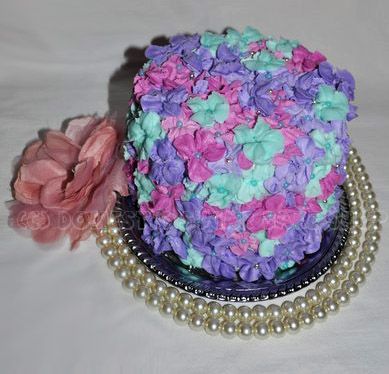
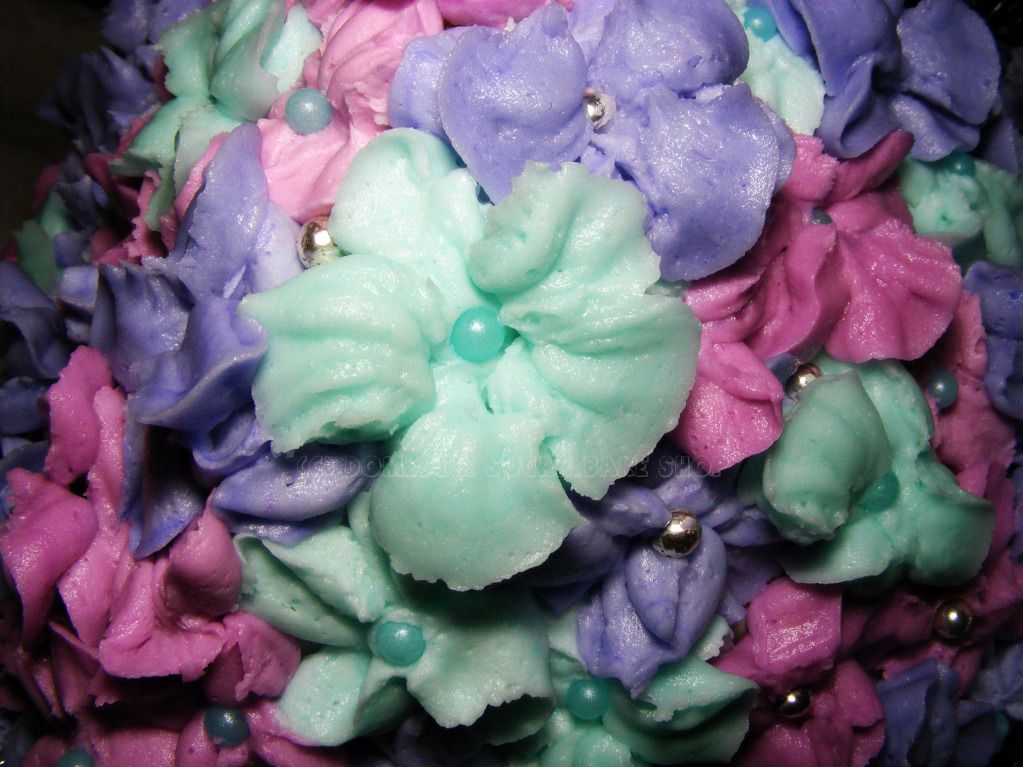
A friend of mine celebrated her birthday in April, along with a bunch of her co-workers. She asked me if I would not mind doing a communal cake to celebrate the four birthdays they shared this month. Since I was only given short notice, I make something quick with buttercream. I've been dieing to try out the flower tip I have, and since most of my work is done in Fondant, this was a welcome change.


I particularly like the little flower centers. I used some non-perils I ordered from Bake it Pretty. Super sweet. I think they finish it all off.


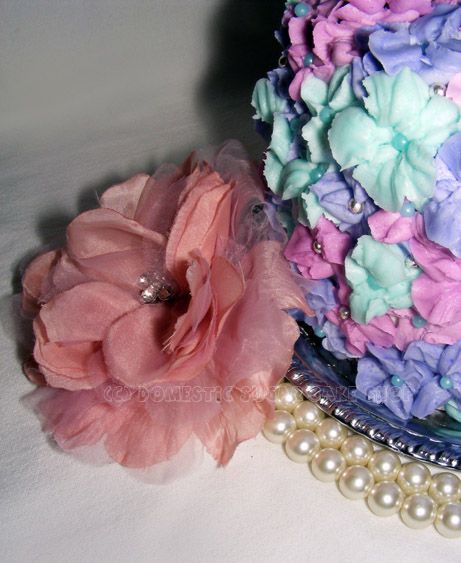
This week the photos were taken by myself, and my friend Caren, who, along wither her super awesome camera, came to play with light and colour. We sat on the floor with our little lighting set-up and played with flowers, scarves, blankets and everything else we could for the setting. Honestly, I was in love with her camera. I guess after 5 years, it is time to get a new one... I love my little Fuji Finepix, but Caren's camera was soooo awesome ლ(இ益இლ

post signature

Sunday, April 1, 2012

Butterfly Flower Birthday Cake

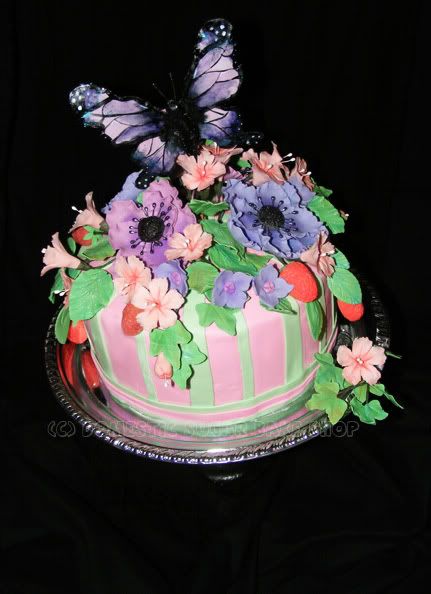
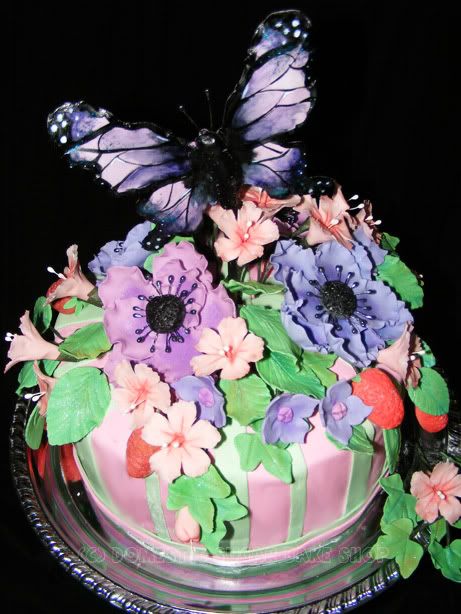
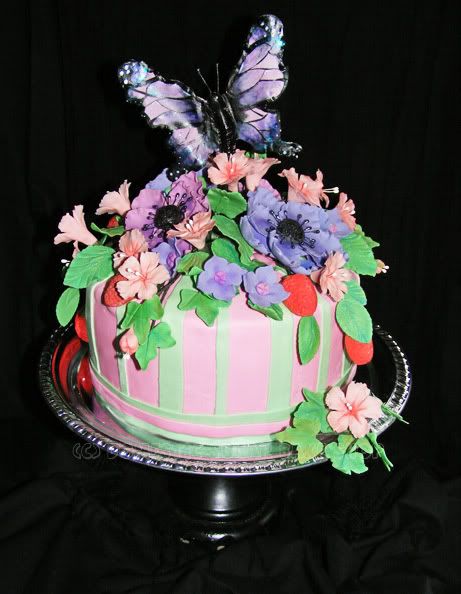
So, I had a request from a friend for another Flower Birthday Cake. The sad thing was that this request was made on a Wednesday, so I had to do a little creative changes to make the time work for me. Rather than an elaborate Flower-Box cake, I made a flower-garden cake. The cake design was simple, Strawberry cake with Strawberry Buttercream, topped with Sugar flowers and a Sugar Butterfly.


Since this is for a young girl's Flower Birthday, I wanted to make the flowers POP! The butterfly on top really accents the colors chosen (Purple and Pink). The only direction I got was that the little girl loved strawberries. Well, Sugar Strawberries make a cute accent. I love strawberries on cakes!


For the Flowers I used Cherry Blossoms, Anemones and a few 'accent' made-up flowers (Click for Tutorials). The colors do not lend themselves to 'reality' flowers, but the effect is just as cute!


Okay, First Blog post since the new upgrade to Blogger. I've got to say, I don't quite like it. The images are difficult to past, and I have to go into the HTML editor to delete useless code and get between the images. What a strange and sad change.I would love to complain, but who would listen. Any other bloggers feel the same? I hope so! Maybe I'm missing something......

Hope everyone has a great week. Easter is coming!

 post signature

Wednesday, March 14, 2012

Flowers are Blooming

The wonderful weather continues! Actually, it rained a little here on Monday, but the sun came out and the rest of the week looks clear and warm! You can even see the buds on the trees starting to come out. We've had a very mild winter. Especially for Northern Canada!

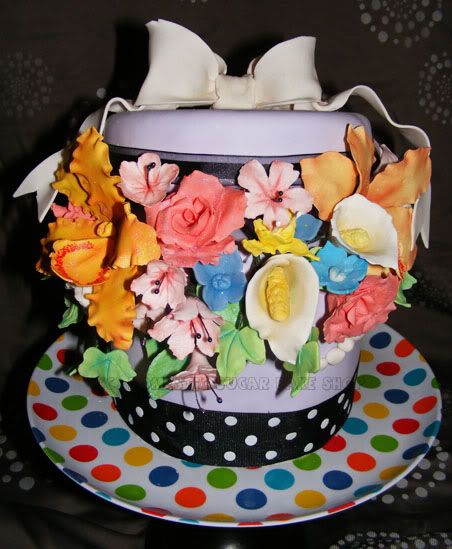
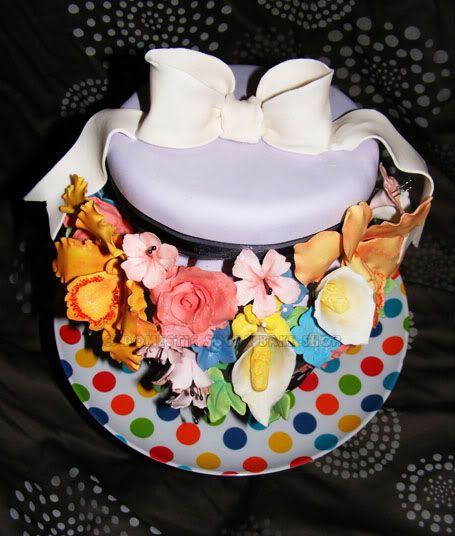
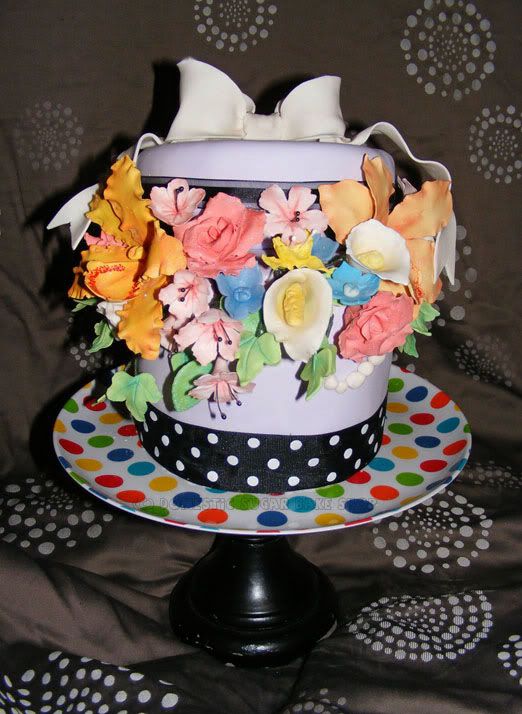
This cake is my finest! I truly believe that this cake represents my best work. My friend's daughter was celebrating her 10th birthday, which was also her "Flower Birthday". How excited was I when I was asked to make the girl's cake.

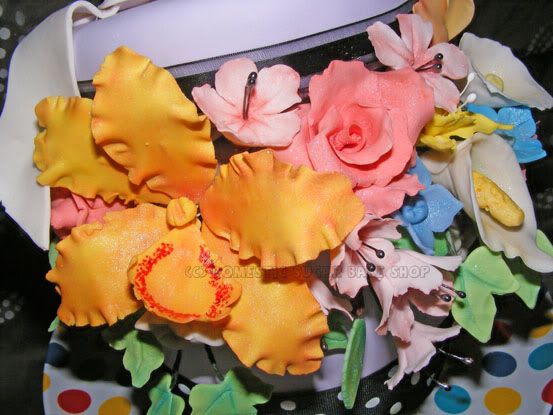
Of course, this cake in my opinion in whimsical. The only request my friend had was "Lots of Colour," and beyond that, she said go to town. This design is a very classic design. It is known as a "Flower Box" Cake. It is a "Hat Box" cake with flowers spilling over the sides and the lid slightly a-kilter. I made sugar flowers for three days! Orchids, roses, hydrangeas, cherry blossoms, calla-lilies, and ivy leaves.

The sugar orchid below is my absolute favorite flower. I have never made a combined flower (that is flower petals wrapped together to make a flower). Most of my tries result in very broken flower pieces. This time, I was able to make two, one for each side, and they looked fabulous!


I think the best part was the party. I taught the kids how to decorate cupcakes. I used piping bags and we did Cuppy bears. I was super excited. They got creative and made Cuppy-Ducks and bunnies and kitties too! The kids did a fabulous job, and hopefully I'll get the pictures of the decorating fun from my friend. My course at the college, which runs April 4th, is full. I am so excited! This was a great run-through!

Well, I have one last cake for this March Break. I have yet to make it.... So many birthday parties, so many cakes! I am having a super fantastic March Break. I hope you are too!

post signature

Sunday, March 11, 2012

MARCH BREAK MADNESS!

I hope everyone is enjoying the weather. It is gorgeous outside, and hard to believe that we are only in March. This break, I have big plans.. here's a clue as to what it is:

Can you guess?

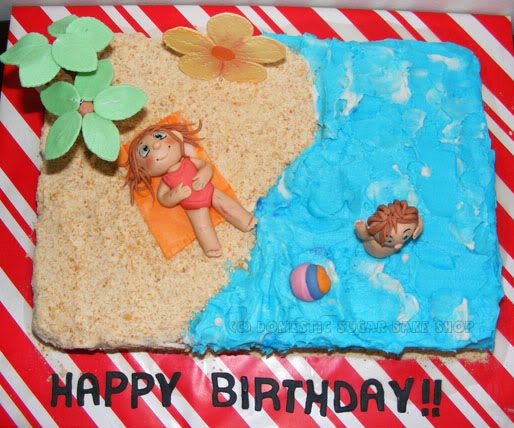
If you said lounge on the beach, you are wrong. Although I wish I could. No. This Break, instead of going somewhere warm, or visiting family in the city, I am staying at home to make cakes!
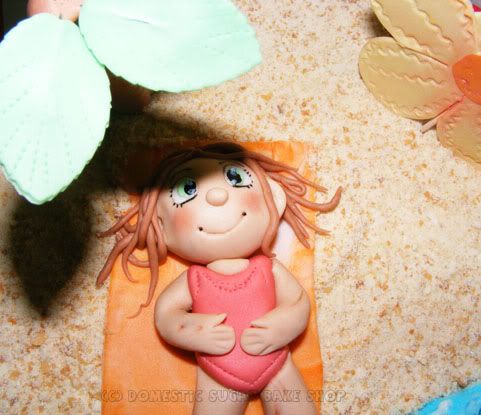
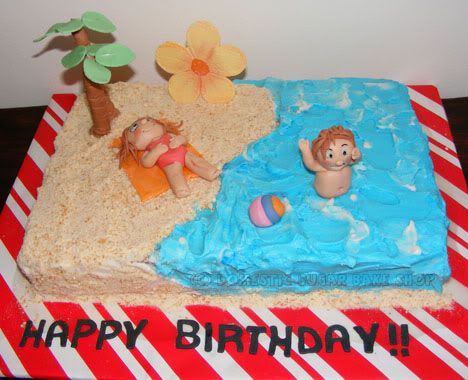
It is as though all my friends had their kids at the same time... and so, in 5 days I've made two cakes. The one above is my first. Luckily it was a simple design. BEACH BREAK!

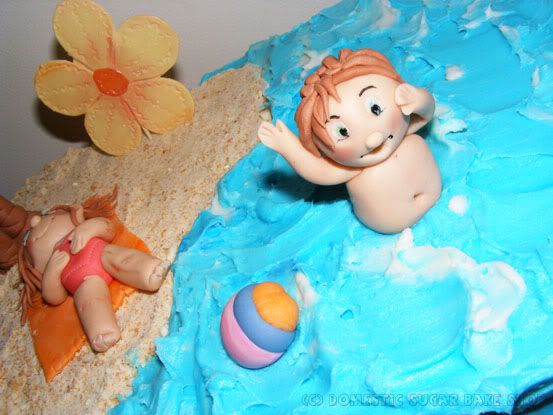
As I made the little girl figurine I couldn't help but wish I had a sunny location to go. The recent lovely weather has made for warm conditions, but having wet feet from the melting snow is hardly the beach-like conditions I was hoping for.


The two figurines on the cake, my friend's kids, are not going somewhere sunny for their birthdays, but rather, a trip to the US for a water-park like hotel. I hope you all have great trips wherever you go.


As for my second cake, one I finished today, there's a little teaser on my facebook page. I will tell you this... that this new cake took a lot more time and care to make. AND IT IS GORGEOUS! Until then :)

post signature

Sunday, August 14, 2011

Tutorial: Sugarpaste Anemone

Okay! TIME FOR TUTORIALS!

As promised, I am posting up a step-by-step for a Sugarpaste/Gumpaste Anemone. This is a very simple flower to make for cakes and goodies. I kept a couple if a vase for a while because they simply look that nice, but it's up to you what you do with them. Cakes is the more conventional sugarpaste use though.

As a little note, Sugarpaste is really Gum Paste (gumpaste). It's a mixture of glucose, sugar and gum-tex. I use the Wilton brand powder and mix generic glucose in. Your choice. Just note, this can only work with a type of dough that hardens, so Fondant will NOT WORK on these flowers.

On to the tutorial!!
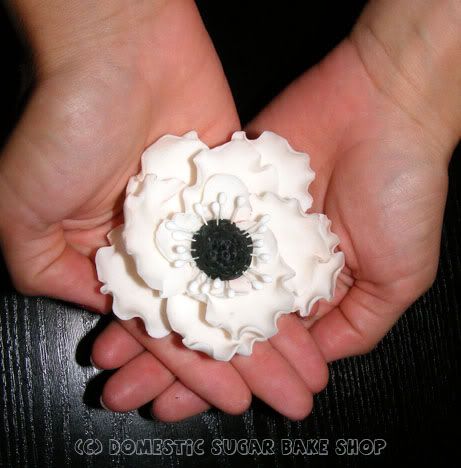

To start you will need a few things. I try to re-use tools and items whenever possible so I don't have to buy a lot of tools, but some things are quite necessary:

1. You will need pre-made sugarpaste (has to be made 8 hours in advance and let rest). You can colour it whatever colour. You will need the flower colour and a black piece for the middle.

2. You will need two sized circle/oval cutters (small and medium) for petals.

3. You should have a foam square for shaping and ruffling flowers (and gumpaste). This is again, a 5 dollar Wilton purchase.

4. You will need a bowl or a flat surface. I have made them on a plate or a bowl; the bowl rounds the flower nicely, so I prefer it. Your choice. It should be pre-dusted with powdered sugar to prevent sticking.

5. A ball-tool (seen two pictures down) to ruffle the flower.

6. (not pictured) something to roll out the sugarpaste... a cup, a rolling pin, whatever works.

7. (not pictured) a small bit of water in a bowl and a paintbrush to apply the flower petals together.

8. (not pictured, (-ι_- )<{sorry}) floral pistils (black is best, but I like the look of white).

READY?!
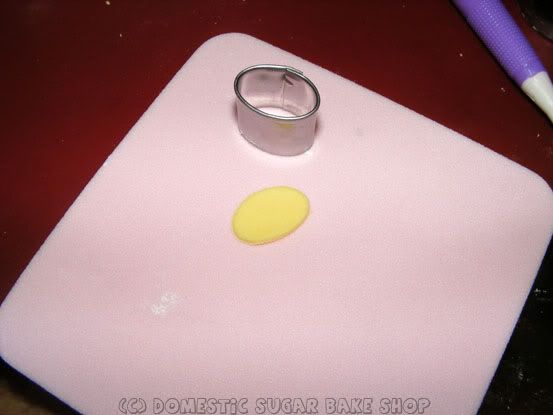
So, roll out the sugarpaste (quite thin) and cut out an oval/circle to make a 'petal'.
Place on the foam.
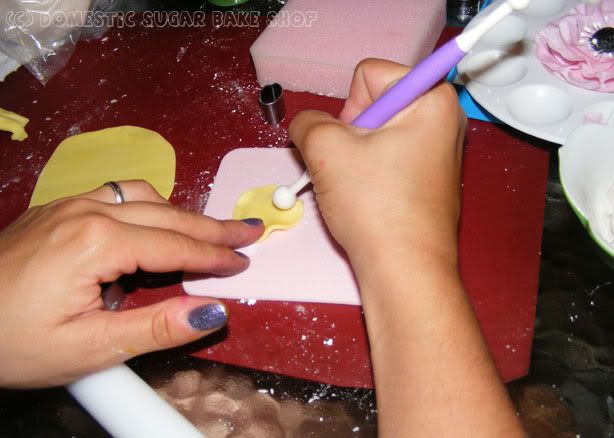

Using the ball-tool, drag the ball around the edges of the 'petal'. I like to have half the ball tool off the sugarpaste form. Apply pressure, but not too much. Dragging and applying pressure thins the paste and causes the ruffled bulges. Do this for all but one 'side' of the flower (like in a U shape).
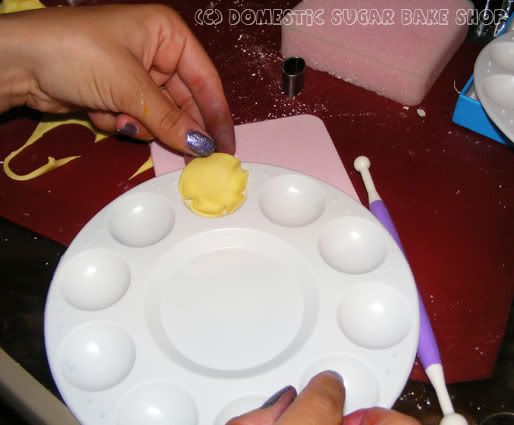

Now, if you don't have a paint pallet, that's okay, you can use large spoons, but place the petal in the spoon or pallet so that the petals are forced to curl a little more. I drape the back end of the flower petal over the edge of the pallet so that it remains flat.
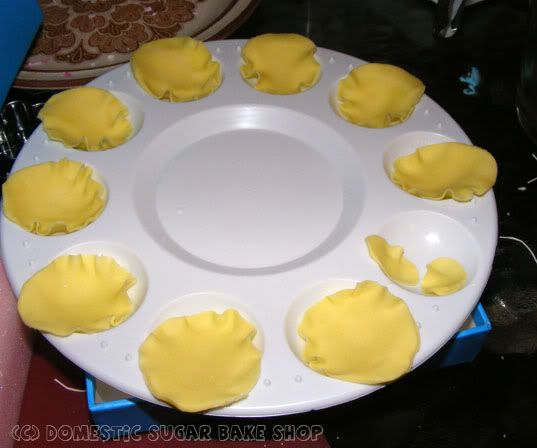
For my Anemone flowers, I use 9 large petals and 3-4 small ones, so, repeat until you get the desired petal amount. You'll see why in a second...
LET DRY FOR 20-30 MINUTES!!!
... OR until the ruffles are hard but the opposite end is still a little soft.
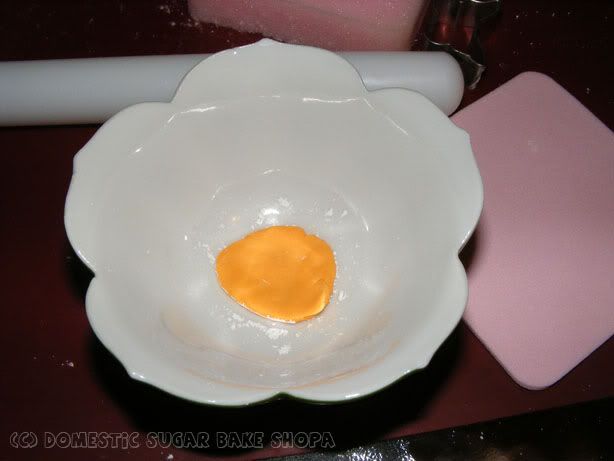
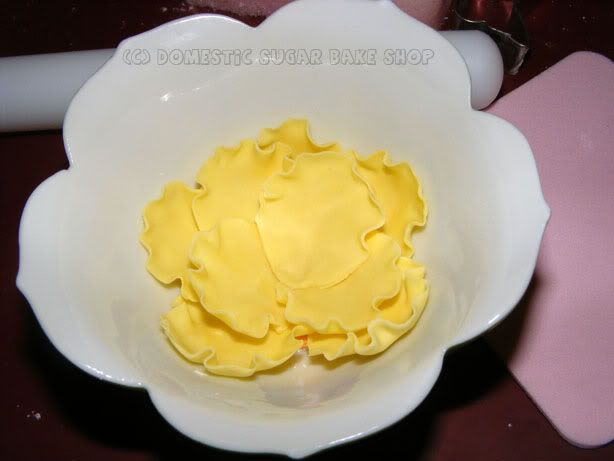
Now, going to your bowl/rounded/flat plate, place a piece of sugar paste on the bottom (flattened like the other pieces, but not ruffled). This is going to be the part that hold all the petals together. Make sure the bowl/rounded/flat plate is well dusted.
I used orange to show you, but normally I would use the same colour.
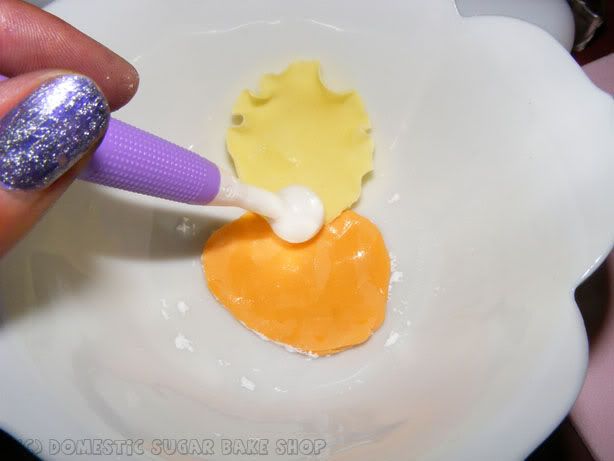
Now, with your hardened-ruffled petals, take 5 (one at a time), and apply them to the center using water to 'stick' them to the center piece. Do the same for the 4 other petals (or however many you want).
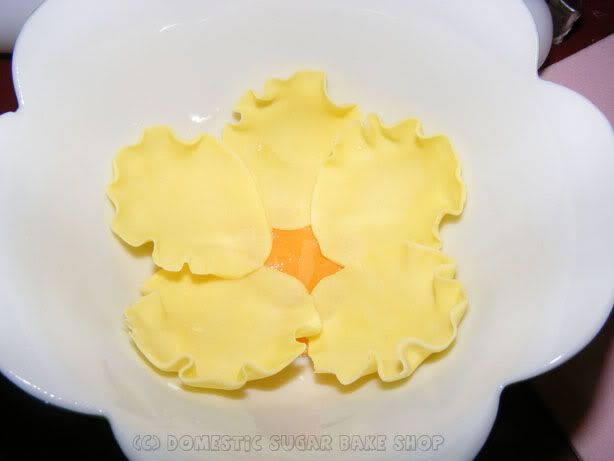
ONE LAYER DONE!!!

Now, do the same for the 2nd layer. Wet the bottom layer ever so much, (remember, more water = longer dry time) to stick the petals to the base. If you find the petals are drooping, wait 10 minutes more, then don't add more, and apply a little tissue under the already-placed petal to prevent further drooping. Once dry, you can continue to add the four center petals.
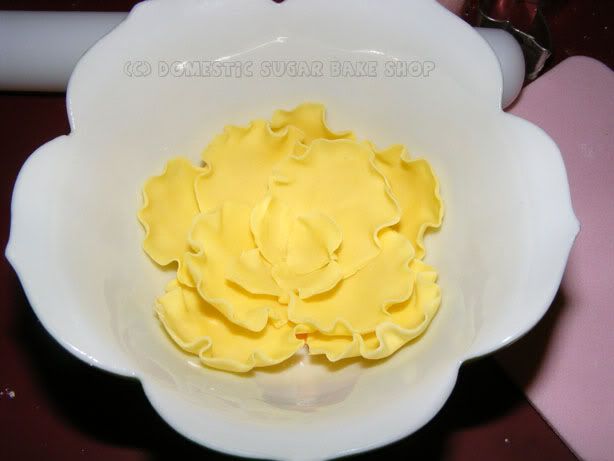

Finally, add the 3-4 smaller petals to the inner 3rd layer to complete the petal part! Almost there!
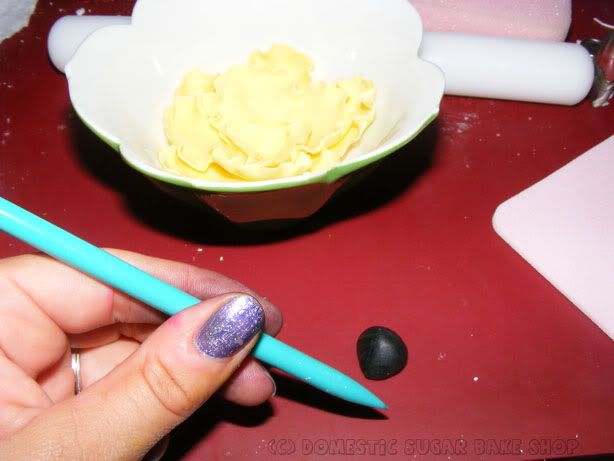

While you allow your flower to chill, grab that small piece of black sugarpaste I told you about earlier. Roll a small portion into a ball (big enough to fit into the flower) you can use a fork or a needle or anything to do this next part; here I have another sugar-tool... I call him 'Stabby'!
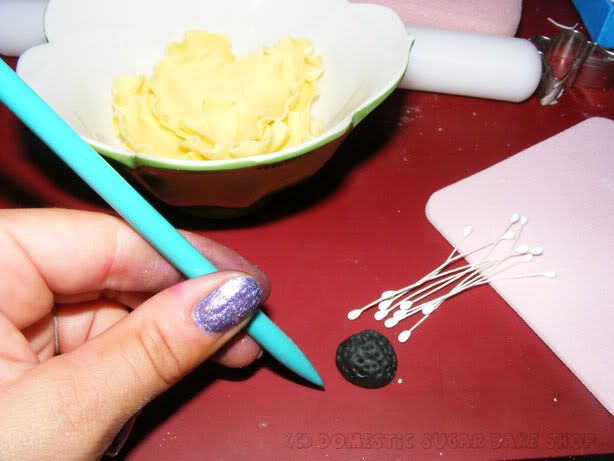
Proceed to use 'Stabby' to punch some texture into the ball. This will simulate the real look of an Anemone. Now, take the pilstils, cut them in half in various sizes, and shove them into the black center, like so:
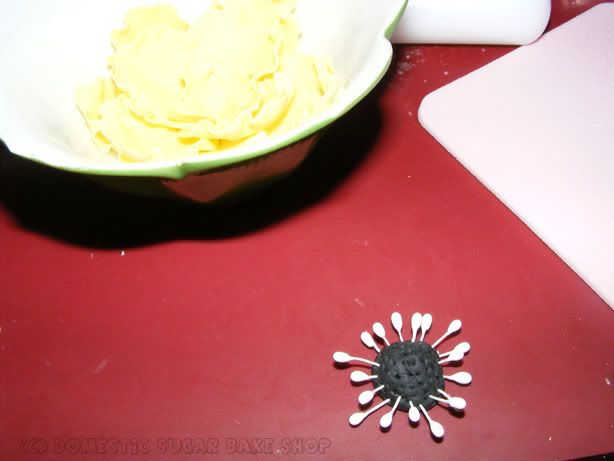


Okay, not take all that and apply it to the center of the flower.
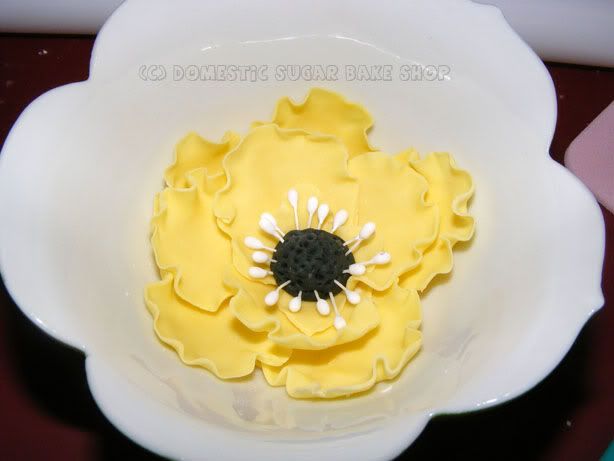

TA-DA! DONE!
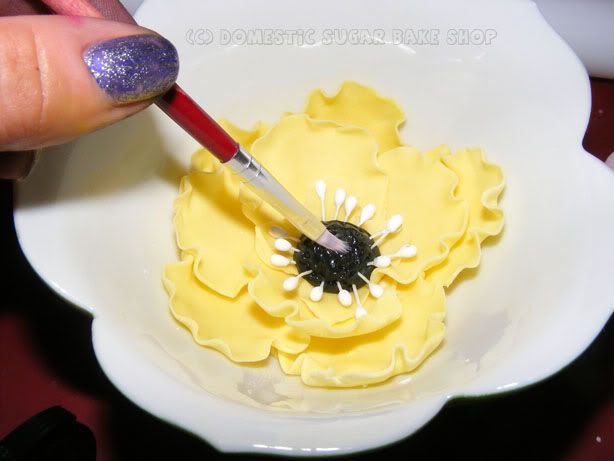

Before I add it to a cake, I like to take a little shortening and shine it up. Water will not work here... but this is a personal choice, not a necessary step.

Let your sugar flower dry overnight or until you can pick it up. Be careful when moving it, as they crack very easily. I use a small baking-grade pair of scissors to coax it out of the dish. Whatever you do, be gentil. It's hearbreaking to have broken sugar-flowers.
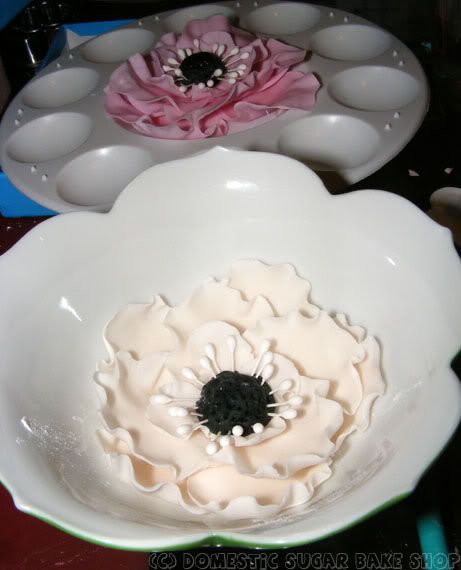
Link
And now you know how I make my sugar-flowers. Not magic, just patience (which most who know me are shocked to see me have)(*`ヮ´*)ノ <{ENERGY}.

If you have any other things you are interested in, feel free to ask. I'm still thinking of a sugarpaste rose tutorial... Just got to find some time to snap the shots! Hubbie helped me take these ones, but I he's going away on a business meeting, so I'm all alone ;(-__-);<{so lonely}. At least baking gives me something to do!

Hope you enjoyed the tutorial!

post signature

Thursday, August 11, 2011

Sugar Flowers!

Back from vacation #2! Now I can stay at home and not worry about anything.
You would truly think that vacations are easy and care-free, but you are WRONG! I hate being away from home for long periods of time... it drives me nuts. So, you can imagine that day 3 of being home (day one and two dedicated to laundry cleaning up the house), I would jump right into baking. Hubbie complained that he had no sweets (or food in the house at all for that matter... grocery shopping is number four on my list), and that I should get right to work creating something delicious. So, I whipped up some cake and decided to play with sugar flowers!

Here's the resulting Hubbie-Cake:


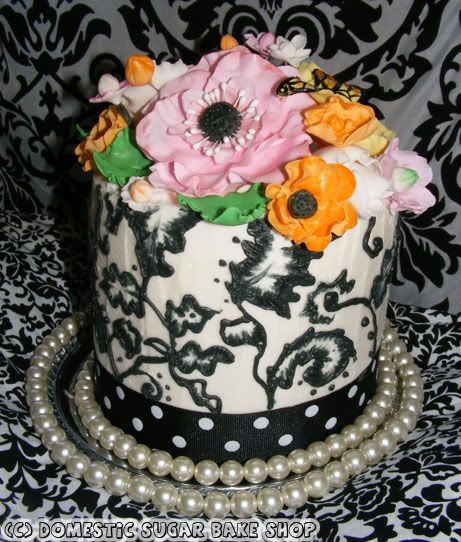
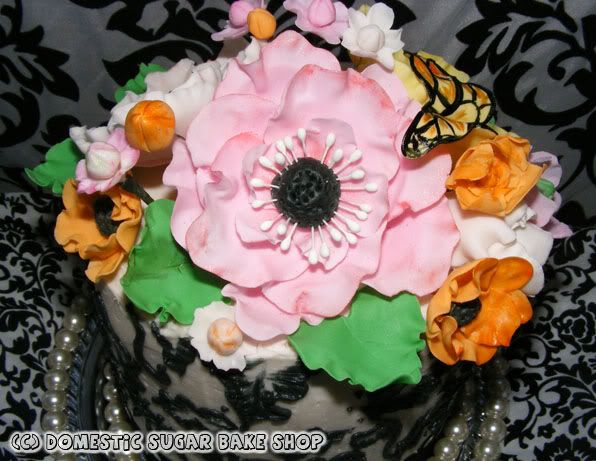
This was a late-night version of a brush embroidery on cake. It can be done with buttercream! HURRAY!

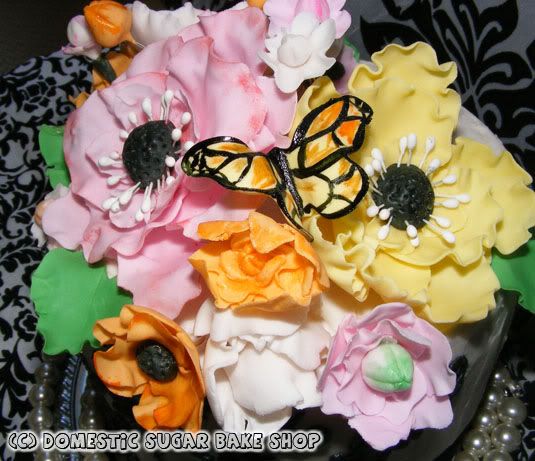
The sugar flowers themselves are ruffled Anemone flowers. I tried to pick fun and bright colors to off-set the black/white cake. Pink, orange, white and yellow with green leaves just looked so pretty.


A butterfly that was hand-painted!


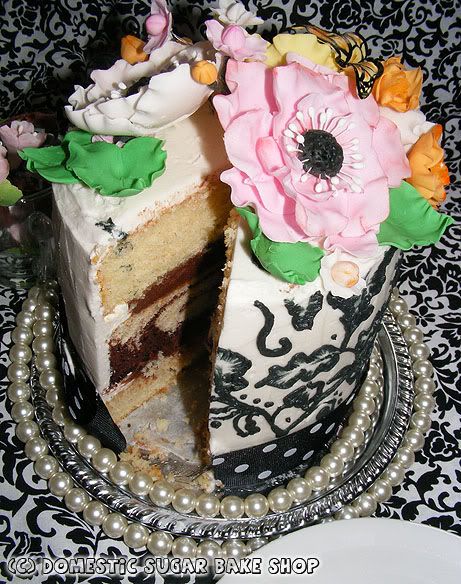
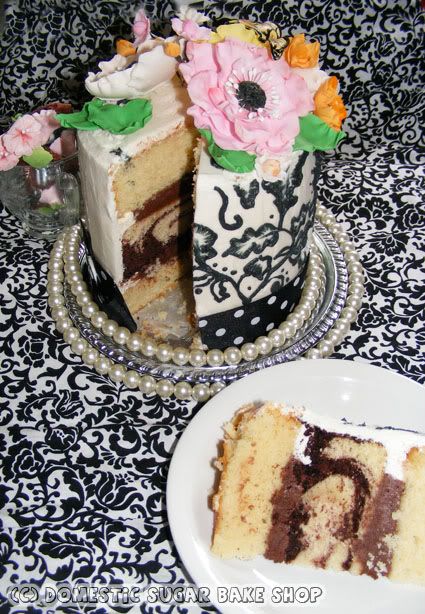
Now, the cross-section of the cake. I love showing the cut cake whenever possible. Most people forget to show the insides... I think it's the most interesting part. Like a surprise. I find myself asking of others...
WHAT TYPE OF CAKE IS IT... ९(ेД॔)७
Rainbow? Strawberry? Chocolate? Vanilla? Marble?

So, what type is my cake?


Vanilla-almond sandwiched between Marble cake with Chocolate buttercream filling. YUM!


My whole plot for this post was actually to do a tutorial on how to make the sugar anemone. I had a post a while back about a black/white cake with a beautiful anemone on top where people asked for tutorials... I forgot to take good pictures *\(°˛° )/* . Since I don't work with a lot of fancy tools (you do need gumpaste tools though), my flowers are super easy!

Anywhoo, to post it I have to shrink and crop some photos... that takes a long time.
Come back in a couple of days to see what it all looks like.

:: JUMPS INTO HER OWN BED AND CUDDLES THE PILLOW ::


post signatureLink