Showing posts with label Wedding Favor. Show all posts

Monday, August 13, 2012

Tutorial: Butterfly Cake Topper

 Hey! Me again!

For my cakes, I like to add small details which add height and sparkle, so my Sugar Butterflies have become a hit! Here's a tutorial on how to make your own Sugar Butterflies:


As in all my tutorials, I try to keep the materials simple. In the tutorial I use a ball tool and a foam mat to ruffle the edges of my butterfly; you can skip this step and just do a flat butterfly! As always, work with what you have! You can substitute the ball tool for a toothpick and  roll the edges of the toothpick on the butterfly's wings.....

What you need:


  1. Sugarpaste/Gumpaste
  2. Butterfly Cookie Cutter
  3. Rolling Pin
  4. Ball tool (optional)
  5. Foam Mat (optional)
  6. Dowel
  7. Food Color (gel kind like Americolor)
  8. Water
  9. Paintbrush


Step 1:


Roll out the gumpaste. You will want it to be fairly thin, maybe 2mm thick or so. Using your favorite butterfly cutter,  cut out the shape of the butterfly.

Step 2:


Using a ball tool, thin out the edges of your butterfly's wings to give the wings that whimsical look. I try to spread the butterfly's wings, and leave the body thick. This will be important when you dowel your butterfly.


As you can see, the spread butterfly is larger than the cutter. This is important! Your butterfly should be wider and longer than the original cut out for when you have to put the backing on him.

Step 3:


Now, take your thin dowel and lay it down the center of the butterfly's body on the underside. Allow the butterflies to dry in this way (Overnight, or 8hours)

Step 4:


When your butterfly is nice and hard, carefully remove him and put it upside down. Roll our another butterfly to be the backing. To secure him, simply add a little water to the backside of your butterfly, then apply. Again, allow time to dry. I try to make sure the 'head' of the butterfly is sealed well, and make sure the dowel does not poke through the top of the piece. By creating a dome on the top, the stick will have something more to keep it in place.

Antenna: At this time, you can choose to place antenna into the butterfly. Simply use a floral stamen (optional, found at a craft store) in the top between the two layers. When it dries, they will be secure.

Step 5:


Now for the sun part: DECORATING! Taking your gel paste food color, water it down, and paint the edges and body of the butterfly. Keep in mind that the as the butterfly dries, the shininess of the 'paint' will dull. No worries!

Step 6:


Depending on your pattern, you can paint the inside any way you wish. For this one, I decided to make a Monarch butterfly, so I painted the 'cell' veins through the body. Once the black is done, allow time to dry (10 min?).

Step 7:


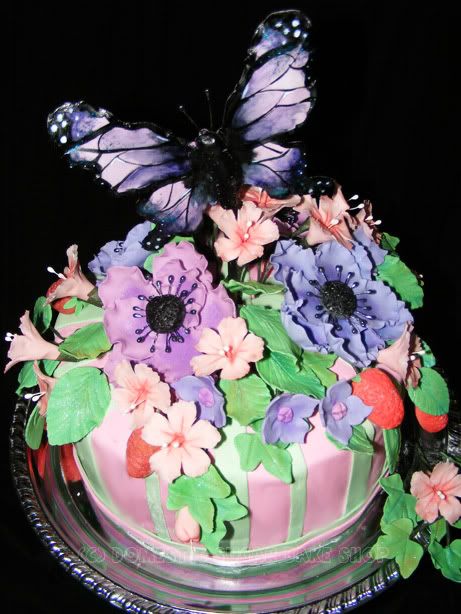
Now, when the black color is dry (this is tacky, as you can see), paint in the color. You can choose to fill all the cells, or just one or two for a stained-glass look. The Flower Garden Cake had purple gumpaste with a few cells painted.

Step 8:


Add a contrasting colour to the edges of the butterfly....


Blend the colors together with a clean, lightly dampened paintbrush. You can add in the darker black if you wish by swishing it with the paintbrush.

Step 9:


Allow time for the fully coloured butterfly to dry. If you wish, you can paint the stick the colour of the cake (for instance, I have painted them black/white before). You can even add stripes or polka-dots to the stick to give them character.


Here are the to I used on Linda's Pink Wedding Cake.


Now You too can make Butterflies! HURRAY!
post signature

Saturday, September 4, 2010

Happy Birthday Abby!

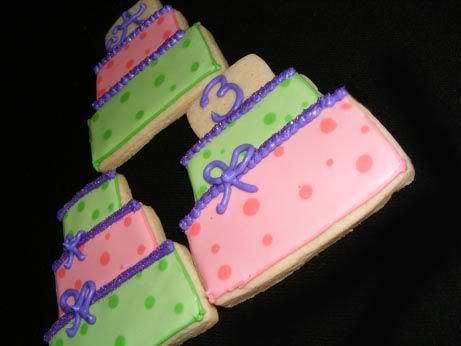
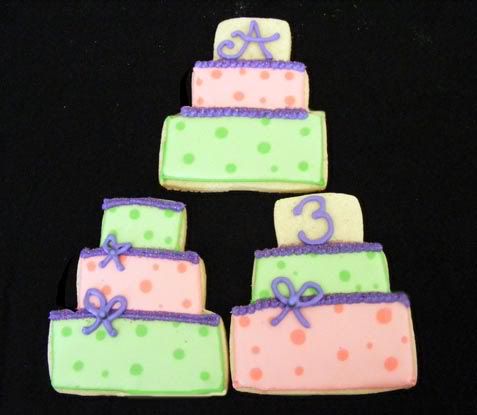
This weekend, my niece, Abby, turned 3. She's the one who likes cupcakes and cakepops... Silly little elfish smile!

Since I'm stuck in Fort Frances, and could not make it to her party, I sent a little care package her way. Inside, BIRTHDAY COOKIES!


COOKIES OF COURSE! I made little birthday cake cookie (actually, it's a 5" cutter, so they were rather large for a 3 year old). I was so excited to get these done. I've honestly not used this cutter before, and was happy with the results. Most people see the same sort of lopsidedness that I got. Hard to get them perfectly straight.


Again, another blurry image, but I send the cookies before I had a chance to take too many. I actually placed purple sanding sugar between the tiers. The effect was nice. I left the bows and numbers un-sanded. I found that the sugar would stick to the cookie.

STUPID STATIC ELECTRICITY!

In the end, I shipped them off, and they arrived just in time for the party. Here's hoping they send some pictures my way.

Now... On an unrelated note:

I added a new little button on the side (It says "Keep Calm and eat a Cookie"). It all started when I got a present from a friend. It was a bookmark that said "Keep calm and have a Cupcake." Which is Brilliant! I loved it so much I framed it! The problem, of course, is that I also love cookies and bake them more often. I thought it would be best for this blog to have some kind of image to reflect that... but when I did a search, I found nothing... nothing about eating cookies!

Google searches revealed little quotes like Keep Calm and:

- Carry On (Original Line)
- Snap On (Camera)
- Rock On
- Blog On (works for me♥)
- Pump On (shoes that is)
- Drink (with a coffee cup)
- Drink a Latte (better than the one above)

THIS ONE IS OF NOTE

PURE AWESOMENESS!

Only one site boasted the tag line I was looking for: Gumdrop Cookie Shop had a cookie with a little printed image on it that said "Keep Calm and Eat a Cookie".

So, I did a little work of my own, and created the image:


I've created a new page to link those people who wish to use this image. The image code and link information can be found here:

Keep Calm and Have a Cookie Group

Feel free to stop by and adopt the banner or a cookie!

post signature

Friday, April 30, 2010

Wedding season starts

Wedding season has started! Good luck to all couples who are going to be taking their vows!

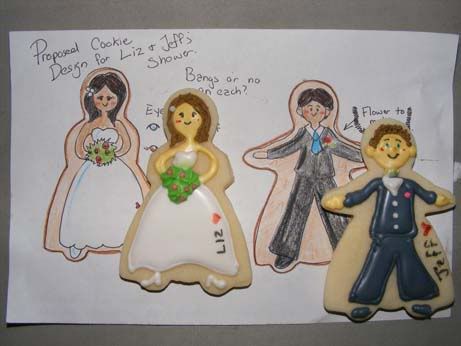
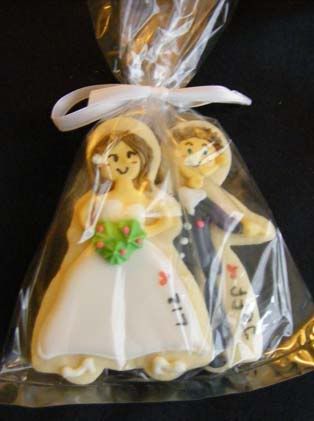
I was approached by a wonderful lady who wanted to commission cookies for a friend's wedding shower. The task was big, create a cookie to match the description of the bride and groom. I was thrilled!


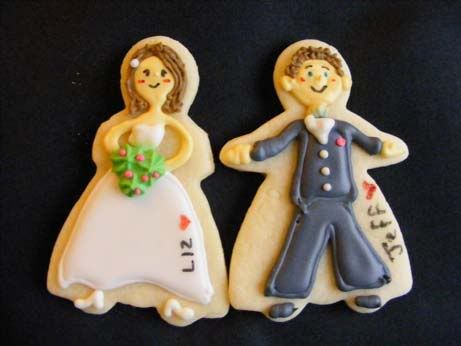
I made a little sketch based off of the cookie, and voila! Liz and Jeff cookies! I used Marian's design for the bride, giving it my own little twist.

You can see the hair design, the shoes ♥! Each cookie had the names written with Wilton Fooddoodlers to personalize the design. No one will forget who these cookies should be!


Packaged together, these cookies are in love. Good luck Liz and Jeff!

post signature

Wednesday, December 30, 2009

Kahlua Cake Truffles for Christmas!

Christmas is a time for chocolate. This year, I actually had to give it up as a result of excessive baking. The bottom line: Be careful when you bake! Testing your product can be very dangerous!!!

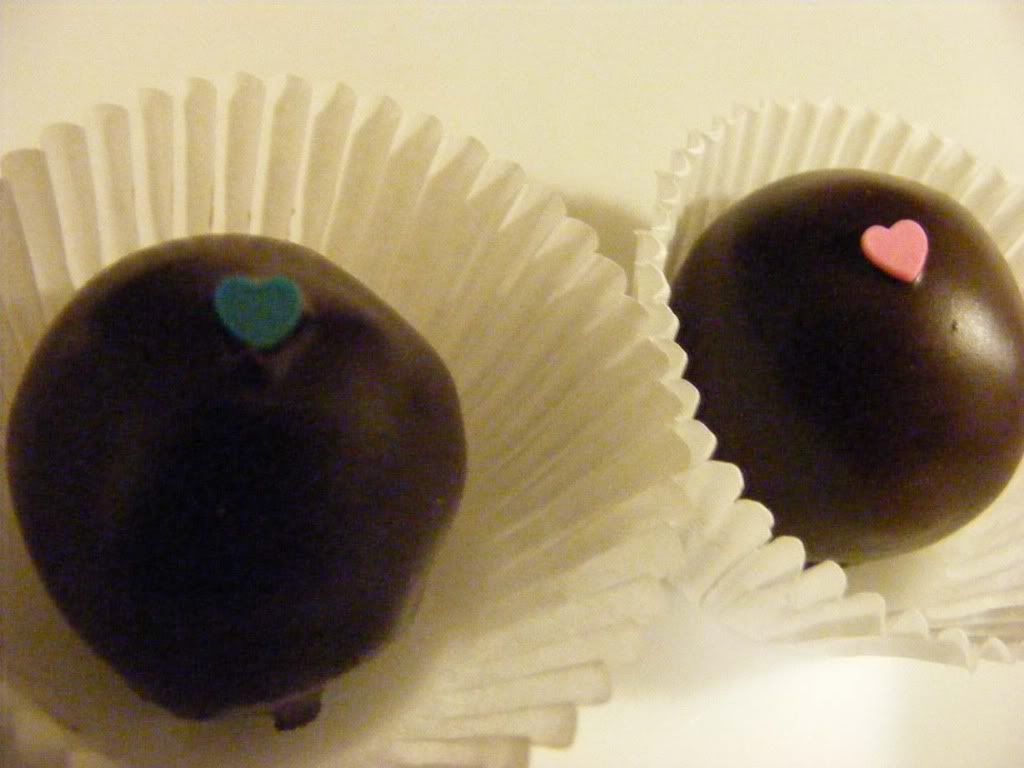
Since my chocoholic brother-in-law can't get enough of the sweet stuff, I made him these Kahlua Cake Truffles. On the inside, sweet, melty-good Kahlua-chocolate cake, on the outside, soft, delicious chocolate.


Careful little brozer, you don't want to suffer my fate at the hands of happy deliciousness!