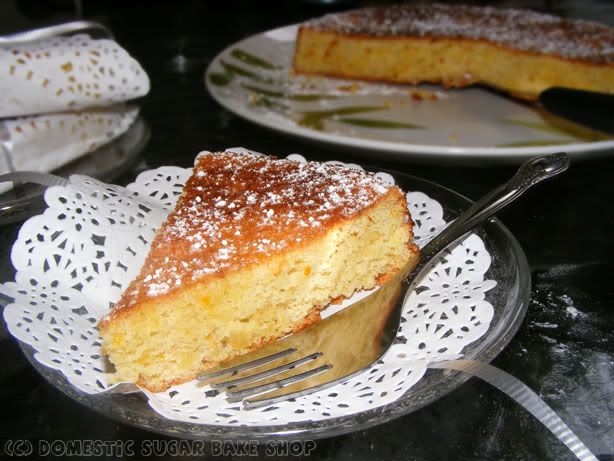
Gluten Free Almond-Orange Cake
Adapted from The Cooking Nook
1 cup almond flour (finely ground almonds)
8 tablespoons granulated sugar (DIVIDED)
4 large eggs, separated
the zest of one orange (large)
1/2 teaspoon ground cinnamon
1 pinch salt
Powdered 'sugar for dusting
fresh berries and whipped cream for garnish (OH YEAH!)
Preheat the oven to 325°F.
1. Line the bottom of a 9-inch cake pan with parchment, grease sides, and set aside.
2. In a small bowl, mix almond flour and 2 tbsp sugar, if needed place in food processor to ensure the almond flour is fine. Set aside.
3. In a food processor, process egg yolks (4) and 2 tbsp sugar with the orange zest, salt and cinnamon. Process for 1 minute (or until egg yolks are a light yellow). Add to almond mixture (well mixed, but not over played with).
4. In another clean bowl, foam egg yolks, then add 2 tbsp sugar and whip on high until they glossy peaks form. Gently fold in egg white mix to egg yolk mix (until just incorporated. DO NOT OVERMIX). Place mix into the cake pan, and place in oven. Bake for 20-25 minutes, or until toothpick comes out clean.
5. Cool completely on a wire rack (any extra time in the pan will continue to cook it). Dust with powdered sugar and serve with whipped cream and berries.
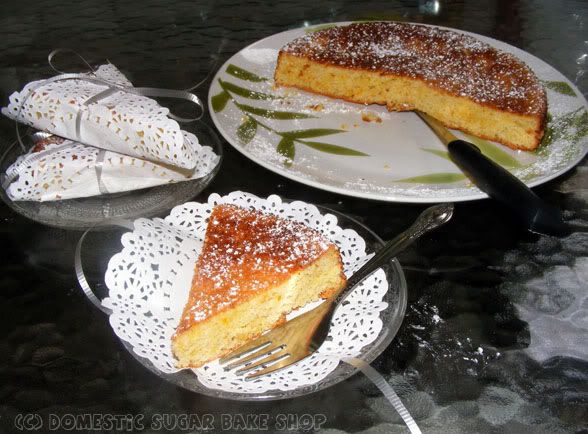 This cake is a nice light cake, VERY LIGHT, due to it's ingredients. It is also very good for people who are diabetic (that was the reason I made the cake in the first place). I liked this cake more than the other one I tried a week back (it was too moist, almost like a wet sponge). The cake itself tends to be a little dry and has a gritty texture due to the almonds, so I would recommend the whipped cream just to soften. Another option is to spritz it after it's cooled with some coconut rum and water, then cover it overnight to let it soak in. I like that option very much.
Well, since tomorrow is my challenge run (I'm running from my place to a resort!), I need to get to bed and get some rest. I hope you are all enjoying a great summer!
CHEERS!