Just getting over an awful cold. It has been hanging around for at least a week now and I am totally exhausted. Truth-be-told I had to take the day off work today for it (and a doctor's apt), so I thought a post would be perfect!
I promised last week to post up a step-by-step instruction on how to make this cookie freehand:
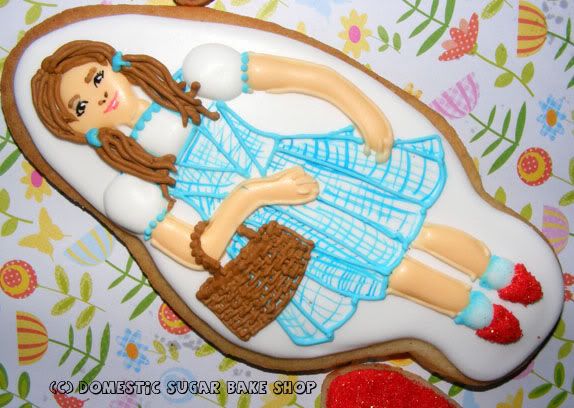
I freehand all my cookies, lacking a KopyKake projector. But it is not as hard as you think, all you need to do is plan it out in your mind.
What you will need:
CUT AND BAKED COOKIES!
Flood Colors (Thinned royal icing) :
White (background and clothing)
Peach (skin)
red (shoes)
Thick colours (For Piping):
Blue (plus blue colour for painting)
Brown (for hair)
Painting Colours (gel colours):
Blue (dress pattern)
Black (eyes, nose)
Pink (smile)
SANDING SUGAR (OPTIONAL FOR SHOES)
___________♥♥♥♥___________
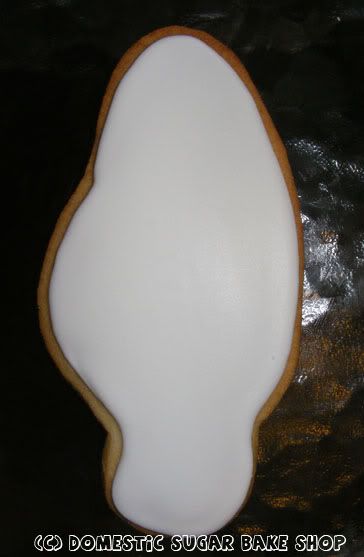
I start by cutting out the shape of the cookie I plan on making. I flood the base layer with a generic colour - white!
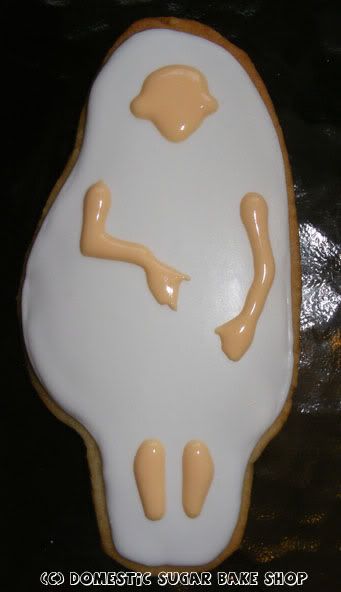
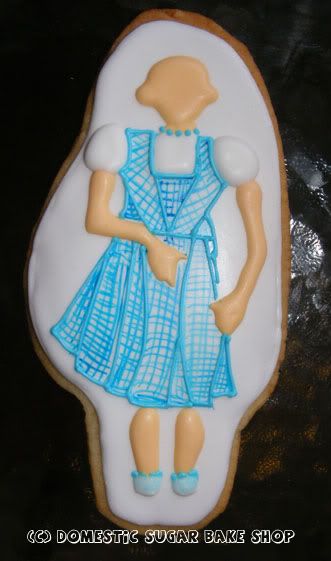
 Next, I eyeball out where the base-layer items will be. In this case, Dorothy's Skin. Using a thicker flood icing, I rough out the shape, and then use a toothpick to put in the ears and fingers. For the legs, I leave room for socks and shoes. (let dry)
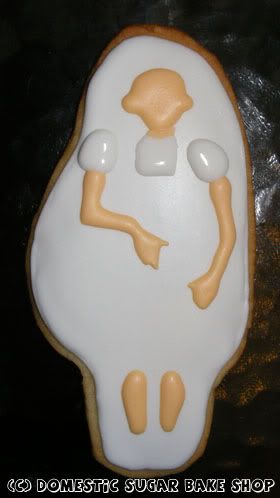
 Next, I add in the beginnings of her dress - puffy sleeves and the center Dickie part of the dress.
Let dry again - 20 minutes? it must be hard since you are painting next.
 Now, I deleted the middle scene here, but let me explain how to do it. First, I dilute some regular foodcolor (americolor gel - sky blue) with water. On a plate, I take a super fine brush, and begin to paint on the dress pattern (lines down, then across). Once the lines have been painted in, I take a small bit of royal icing (thicker than the flood) in the same blue tint as the pattern, then I outline the dress and the folds. I also pipe the socks and small detail of her neck area. This part takes some steady hand work, but painting on a cookie is actually quite simple, and fun too!
Guess what happens next... let it dry :)
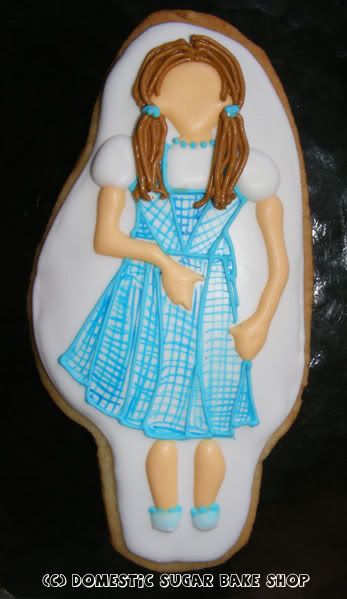
Next, I take the brown colour gel (thick again) to start the hair and basket. The hair is simple. I make a line down one side, then the other. Then go back to the first side, line, other side line, etc until the hair is full. Each line, if the icing is thick enough, should not bleed together like a flood will. Make sure to take your time though.
For the basket, I did a basket weave patter (line down, staggered lines across.... line down, opposite stagger across etc.) The basket took the most time of it all, and can be omitted.

For the basket, I did a basket weave patter (line down, staggered lines across.... line down, opposite stagger across etc.) The basket took the most time of it all, and can be omitted.
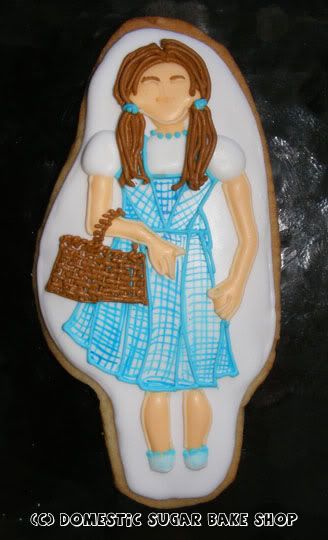
After all of that dries, I wanted to see her beautiful face. Using gel colours again (black and white americolor gel - WHITE IS ESSENTIAL FOR ALL THINGS), I used my paint brush and painted on her face. A pink smile give it the perfect touch. I used white to add shines to the eyes and lips, which I believe gives it a more 3-d look.

Finally, the red slippers. I just put some red icing on the area, and sprinkled red sanding sugar to give the sparkly look. For those that read the books
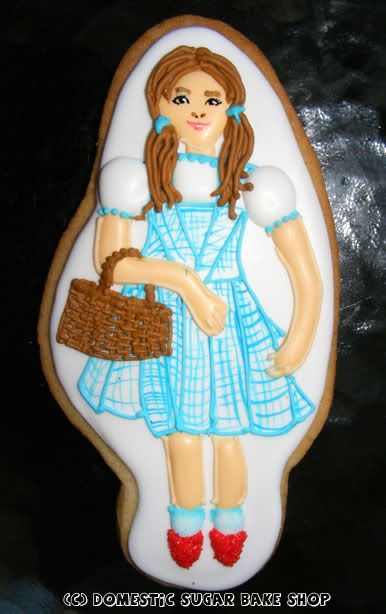
And there you have it :) I hope you enjoyed the tutorial. I want to do another sometime soon. Until then!

13 comments:
What a great looking cookie. Thanks for sharing this.
Wow! You make it look easy...NOT for me! You are very talented.
Oh no I hope you feel better soon!
Thanks very much for the tutorial, its fantastic just lie the cookies.
Fantastic post! Your cookies are gorgeous as always. x
WOW! What an incredible cookie. I would be afraid to eat it it's so beautiful! Wonderful job.
Emily
Deviantly Domesticated Team
http://stephaniehillberry.com
INCREDIBLE!!!!!!!!!!!
Tweeted and I am your newest follower!!!
Great job!! I love it!! This would be perfect for my Foodie Friday linky party - stop by this week and link up!
Stopping by from the Creative Blogger Party & Hop...that is so pretty! And time-consuming! And AWESOME!
Not only did I enjoy the tutorial, I also learned much from it :) Thank you for linking this with us.
This is really amazing! Your base artistic skills plus the mechanics of cookie decorating make for sure winner sugar art. Awesome!
Those are amazing! (I may have said that on your earlier post.) ;) You really are an artist to do that WITHOUT a projector...and to have the PATIENCE to do it! ;)
I'm doing an Oz party for my littles next months and would love these cookies, but I think you've made it seem easier than it really is. They are fabulous.
Post a Comment